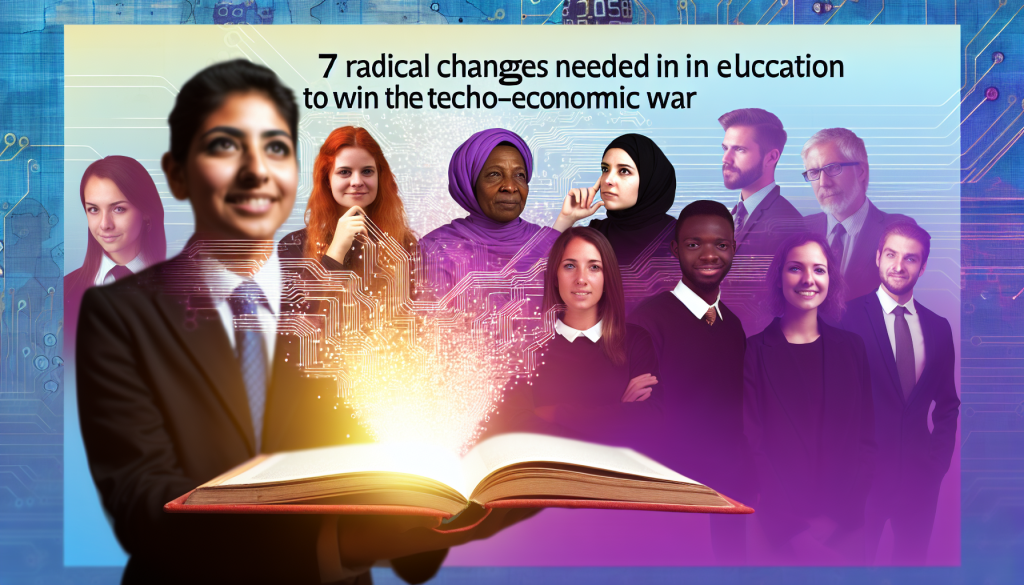
Pedagogue Blog

Activities to Teach Students to Write a Repeating Decimal As a Fraction

As a math teacher, one of the most challenging concepts to teach students is the conversion of a repeating decimal to a fraction. Repeating decimals are numbers that have digits that repeat infinitely after a decimal point. Writing a repeating decimal as a fraction is an important skill for students to learn, as it helps in understanding the relationship between fractions, decimals, and percentages. Here are some activities to help teach students how to write a repeating decimal as a fraction.

Visualizing repeating decimals with fraction circles

One of the best ways to teach students how to visualize repeating decimals is by using fraction circles. Fraction circles are a great tool that can help students understand fractions visually. Using fraction circles, ask students to shade in a fraction of the circle that represents a repeating decimal, such as 0.333. After shading the circle, students can then divide the circle into equal parts to determine the denominator of the fraction.

Write a repeating decimal as a sum of fractions

Another approach to teaching students to write a repeating decimal as a fraction involves writing it as a sum of fractions. For example, the repeating decimal 0.666 can be written as:

0.6 + 0.06 + 0.006
= 6/10 + 6/100 + 6/1000
= 600/1000 + 60/1000 + 6/1000
= 666/1000

This approach can help students see the repeating pattern in the decimal, and understand how the repeating part can be expressed as a fraction.

Using hands-on activities

Hands-on activities can also be a great way to help students learn to write repeating decimals as fractions. For example, using base ten blocks, students can represent different decimals and then group them in patterns that repeat. Teachers can then guide students in converting these decimal patterns into fractions.

Practice with real-world examples

Real-world examples of repeating decimals can help students understand the practical applications of writing them as fractions. For example, students can practice converting repeating decimals that represent monetary values, such as $0.3333, into fractions. By doing so, they can demonstrate their understanding of how to express repeating decimals as fractions in real-life situations.

Conclusion

Teaching students how to write repeating decimals as fractions can be a challenging task, but with these activities, it can be made simpler and more engaging. By using visual aids, hands-on activities, and real-life examples, teachers can help students master this important concept and gain the necessary skills to excel in math.

Activities to Teach Students to Write a Ratio Using a Fraction

Ratios are an essential mathematical concept that students need to learn. Writing ratios using a fraction is an essential step in understanding and using ratios in real-life situations. This article will suggest some activities that teachers can use to teach students to write ratios using a fraction.
1.
The first activity is called Ratio Bracelets. This fun activity requires students to work in pairs and use different colored beads to create a bracelet. The teacher provides each pair with a set of beads in different colors and ratios, such as one red bead to every three green beads. The students then take turns creating a bracelet that matches the ratio given to them. This activity teaches students how to write ratios using fractions while also improving their fine motor skills.
2.
Another activity that teachers can use to teach students to write ratios using fractions is called Math Dice. In this activity, students are split into groups of three and given two dice. The first dice displays numbers 1-6, while the second dice displays numbers 2-12. Each group rolls their dice and then writes out the ratio of the two numbers that they get. For example, if a group rolls a 4 and an 8, they could write the ratio as 4:8 or ½. This activity teaches students how to write ratios as fractions and helps them to recognize equivalent ratios.
3.
Another activity teachers can use is called Matching Game. In this activity, students work in pairs and are given a set of cards, each with a different ratio written on it. The students then match the ratio on one card to the corresponding ratio on another card. This activity teaches students how to identify equivalent ratios and how to write ratios using fractions.
4.
One more activity that teachers can use to teach students to write ratios using fractions is called Recipe Conversions. In this activity, students work in pairs and are given a recipe that serves four people. The students must then convert the recipe so that it serves a different number of people, such as eight people. The students must write out the ratio of ingredients used in the original recipe and then use that ratio to calculate the amount of ingredients needed in the new recipe. This activity teaches students how to use ratios to solve real-life problems.
In conclusion, there are many fun and interactive activities that teachers can use to teach students to write ratios using fractions. These activities help students to understand the concept of ratios and how to write them using fractions. By engaging students in these activities, teachers can make math more enjoyable and help students better understand the importance of ratios in daily life.

Activities to Teach Students to Write a Ratio

Ratios are a crucial concept in mathematics that students are likely to encounter in various fields. Ratios are used in the sciences, business, engineering, finance, and many other industries. Therefore, it is vital to equip students with the skills and knowledge needed to understand and write ratios. Here are some activities you can use to teach students how to write ratios.

Activity 1: Comparison of Two Quantities

This activity involves comparing two quantities to write a ratio. Give students a problem that requires them to compare two quantities. For instance, you can ask them to compare the number of boys to girls in a class or the number of apples to oranges in a basket. Then, have them write a ratio that compares the two quantities. For example, if there are 12 boys and eight girls in a class, the ratio of boys to girls is 12:8 or 3:2.

Activity 2: Using Visuals to Teach Ratio

Using visuals is one of the most effective ways to teach ratios to students, especially to those who struggle to visualize the concept. Provide students with a visual representation of two quantities, such as a pie chart or a bar graph. Then, ask them to write the ratio of the two quantities. For example, if a pie chart shows that there are three red slices and one blue slice, the ratio of red to blue is 3:1.

Activity 3: Ratio as a Fraction or Decimal

Help students understand that ratios can be expressed as fractions or decimals. Provide them with a problem that requires them to find a ratio using fractions and decimals. For instance, you can ask them to find the ratio of the area of a rectangle to its perimeter. If the area is 24 square units and the perimeter is 20 units, the ratio can be written as 24/20 or 1.2:1.

Activity 4: Applications in Real Life Situations

Teach students that ratios are not just a mathematical concept but are useful in real-life situations. Provide them with examples of how ratios are used in daily life, such as cooking or shopping. For instance, you can ask them to find the ratio of sugar to flour in a recipe or the ratio of the actual measurements of a room to the blueprint design. This helps students see the relevance of ratios, making it easier for them to comprehend the concept.

In conclusion, teaching students to write ratios is an essential aspect of mathematics education. Using these activities to teach ratios not only helps students understand the concept but also makes it fun and engaging for them. By mastering ratios, students will be better equipped to analyze data, solve problems, and make informed decisions in various fields.

Activities to Teach Students to Write a Quadratic Function in Vertex Form

Teaching students to write a quadratic function in vertex form is an essential skill in mathematics. This is an important concept that enables them to understand how to graph and solve quadratic equations. To help students master this skill, certain activities can be employed.

Here are a few suggestions:

1) Create a Quadratic Function Sort:

This activity is an excellent way to reinforce students’ understanding of the components of a quadratic equation. Write several quadratic functions, including standard form, vertex form, and factored form, on different index cards. Then, ask students to sort them by specific characteristics such as the vertex, x-intercepts, or y-intercept. By doing this, students can gain a better understanding of how the equations are different but also related.

2) Use Real-World Examples:

To make the concept of vertex form of quadratic equations more relatable, provide students with real-world examples. For example, use a ball being thrown in the air and ask students to write an equation that models its path. Then, have them convert the equation into vertex form. This will help them apply mathematical concepts to real-life situations.

3) Graphing Activities:

Graphing quadratic functions is a useful way for students to understand the concept of vertex form. Create a set of quadratic equations and have students graph them on the coordinate plane using vertex form. Then, ask students to identify the vertex and the axis of symmetry for each quadratic equation. This activity will help them understand how the form of the equation relates to the shape of the graph.

4) Crossword Puzzles:

Crosswords can be a fun way for students to review key concepts related to quadratic functions. Create a crossword puzzle that includes vocabulary terms such as vertex, axis of symmetry, and coefficient. This activity can be a great way to reinforce students’ understanding of key terms and concepts while also providing an enjoyable break from traditional math exercises.

In conclusion, teaching students to write a quadratic function in vertex form can be a challenging concept for some students. However, by employing creative and engaging activities such as the ones above, math teachers can help students understand the topic more clearly. The activities outlined in this article can help make quadratic functions in vertex form more accessible and enjoyable for all students.

Activities to Teach Students to Write a Quadratic Function From Its Zeros

Quadratic functions are an essential topic to be covered in high school math classes, particularly in algebra and calculus. A quadratic function is a function that contains a quadratic term with the highest degree of two, used in various fields of sciences and engineering. Understanding quadratic functions can be challenging, especially for students who are not confident in their math skills. One approach to help students in writing quadratic functions from its zeros is by engaging them in various activities. These activities are designed to enhance students’ learning experiences, help them understand the concepts, and retain the knowledge. In this article, we will discuss some of the activities that are helpful when teaching students to write a quadratic function from its zeros.

Guided Practice

In this approach, the teacher will first explain the concept of quadratic functions and zeros, and then model the process of writing a quadratic function using a few examples. After each example is modeled, the teacher will provide students with guided practice problems to solve, allowing them to apply the process of writing quadratic functions from zeros. The teacher should provide feedback and clarify any misunderstandings when necessary.

Interactive Exercises

Interactive exercises can be used as a technology-based activity or classwork to teach writing quadratic functions from zeros. This type of activity usually involves solving quadratic equations and plotting graphs, which helps students visualize how the zeros are related to the quadratic function. There are many online resources available to create interactive exercises, such as Desmos or GeoGebra.

Real-World Examples

Real-world examples can be used to inspire students and make abstract concepts more concrete. Teachers can present problems that involve quadratic functions in real-life situations such as maximizing the area of a rectangular garden or calculating the trajectory of a projectile. Students will then be required to write quadratic functions that fit the given scenarios by identifying the zeros.

Collaborative Learning

Collaborative learning activities can be used to reinforce students’ understanding of quadratic functions and zeros. This activity involves dividing the class into small groups and allowing each member to contribute towards solving the quadratic equations. During this activity, students can discuss and compare their methods of solving, which promotes deeper understanding of the concept.

In conclusion, it is essential to use a variety of activities when teaching students to write quadratic functions from zeros. A combination of activities that involve guidance, interactive exercises, real-world examples, and collaborative learning can help students to understand the concept better, retain the knowledge, and apply it to future problems. Teachers should remember to use technology tools where possible to engage students in the learning process. By applying these techniques, students can develop their mathematical skills, gain confidence, and achieve success in their studies.

Activities to Teach Students to Write a Quadratic Function From Its Vertex and Another Point

As a mathematics teacher, you may probably face a challenge in how to teach your students to write a quadratic function from its vertex and another point. However, this is an essential skill in algebra that requires a clear understanding of the quadratic function concept, graphical analysis, and mathematical reasoning. In this article, we have outlined some activities to teach your students how to write a quadratic function from its vertex and another point.

Introduction

The first activity to teach your students is an introduction to the concept of a quadratic function. Begin by defining the term, a quadratic function, and its general form, y = ax^2 + bx +c. You could also use some real-life examples of quadratic functions such as parabolic arches, water fountains, and projectile motion to illustrate the concept.

Graphical Analysis

After your students have understood the concept of a quadratic function, you can introduce another activity that involves analyzing quadratic functions graphs. Using graph paper, draw different quadratic functions with varying values of a, b, and c. Then, ask your students to identify the axis of symmetry, the vertex, and the x-intercepts. This activity allows the students to understand the relationship between the graph and the algebraic representation of a quadratic function.

Practice with Examples

Next, provide some examples of quadratic functions that include its vertex and another point. Ask your students to write the equation of the quadratic function in the standard form. For example, you can give them a vertex at (-3, 2) and a point at (-1, -2). In this case, they have to use the vertex form, y = a(x-h)^2 + k, where h and k represent the coordinates of the vertex. Substituting the given values, they can calculate the value of a to complete the equation of the quadratic function.

Group Work

Form groups of three to four students and give them different sets of vertex and point coordinates. Let them take turns to write the equations of the quadratic functions. This activity promotes teamwork and encourages students to check each other’s work to improve their understanding.

Challenge Problems

For advanced students, you can give them some challenge problems that require more complex reasoning and problem-solving skills. For example, you can ask them to write the equation of a quadratic function with a vertex at (0, -4) and passing through the points (2, 2) and (4, 10). This activity encourages critical thinking and analytical reasoning.

Conclusion

Teaching students to write a quadratic function from its vertex and another point may seem daunting and challenging, but with the right approach, it can be fun and engaging. The activities outlined in this article provide a step-by-step guide on how to teach quadratic functions to students. By using graphical analysis, real-life applications, group work, and challenge problems, students can develop the necessary skills to write quadratic functions with ease.

Activities to Teach Students to Write a Polynomial From Its Roots

Polynomials are an important topic in mathematics, and learning how to write them is crucial for any student pursuing higher education in this field. Writing a polynomial from its roots is a crucial aspect of polynomial mathematics and also a great way to teach students the concept. In this article, we will discuss some activities to help teach students how to write a polynomial from its roots.

Guess the Polynomial Game:

In this game, the teacher will ask students to choose a set of roots. Then the teacher will create a polynomial from the given roots. The student who guesses the polynomial correctly wins. This activity is a great way to create a fun environment while teaching the students.

Creating Polynomials worksheet:

In this activity, the teacher will give the students a set of roots, and the students have to create a polynomial from these roots. This worksheet can be used as an individual or group activity, helping students understand the concept of writing a polynomial from its roots while also providing them with practice.

Graphing activity:

In this activity, students graph the polynomial written from its roots. This is an excellent activity for students to understand the relationship between the polynomial and its roots. They can also identify the properties of the polynomial, such as number of roots, degree, and end behavior.

Visual representation:

Visual demonstration of the polynomial and its roots can help students understand the concept. The teacher can use manipulatives such as colored tiles or algebra blocks to represent roots and the polynomial. It enhances the understanding of the students, and they can easily relate to the polynomial symbols.

Understanding the Correlation

In this activity, the teacher explains the correlation between the roots and the coefficients of the polynomial. Students can learn to find the coefficient values of the polynomial by setting up an equation with their roots. This activity helps to understand how the roots affect the polynomial values.

Finally, the teacher can use real-world examples of polynomial roots. This can help students to see how polynomials arise in situations such as engineering applications, physics, or medical mathematics.

In conclusion, teaching students to write a polynomial from its roots is an important aspect of polynomial math. By implementing these activities, we can help students understand the concept in a fun and enjoyable way. This will ultimately enhance their mathematical understanding and give them confidence in their ability to write polynomials from its roots.

Activities to Teach Students to Write a Linear Inequality From a Graph

Linear inequalities are essential in the study of algebra and graphing. It is one of the fundamental skills that students need to master so that they can solve problems involving one or more variables. A linear inequality is a mathematical statement that describes a relationship between two variables. However, learning how to write a linear inequality from a graph can be challenging for some students

Fortunately, there are several activities that teachers can use to help their students learn this important skill. Below are some ideas for activities that can be used to teach students to write a linear inequality from a graph:

Activity 1: Graphing and Writing Inequalities

In this activity, students are given a set of graphs with various linear inequalities. The teacher then provides a worksheet with prompts that students use to write the inequalities. For example, a prompt may ask students to write an inequality that describes the shaded area of the graph. Students can use the slope-intercept form or the point-slope form to write the inequality. The teacher can then go over the worksheet with the class and provide feedback.

Activity 2: Linear Inequality Matching Game

This activity involves creating sets of cards that have a graph on one side and an inequality on the other side. Students are tasked with matching the graph with the corresponding inequality. Once students have matched all the cards, the teacher can go over each pair and discuss with the class how to write the inequality from the graph. This game is a fun and engaging way to help students learn how to write linear inequalities from graphs.

Activity 3: Real-World Linear Inequality Problems

In this activity, students are given real-world problems that involve linear inequalities. For example, a problem may ask students to write an inequality that represents the number of tickets sold for a concert. The students will then graph the inequality and determine the range of possible solutions. This activity will enable students to apply their knowledge of linear inequalities and graphing to real-world situations.

Activity 4: Interactive Whiteboard Practice

An interactive whiteboard can be a useful tool for teaching students to write linear inequalities from graphs. Teachers can project a graph of a linear inequality onto the board and then ask students to write the corresponding inequality. The teacher can then highlight or circle the key features of the graph and discuss with the class how to write the inequality. This interactive practice will help students become more familiar with the various features of graphs and inequalities.

In conclusion, teaching students to write linear inequalities from graphs can be a challenging task. Nevertheless, the activities mentioned above can be used to make the learning process more engaging and effective. By implementing these activities, teachers can help their students learn and master this essential algebraic skill.

Activities to Teach Students to Write a Linear Function From a Table

Linear functions are an integral part of the mathematics curriculum for high school students. The ability to write a linear function from a table is a crucial skill that is required in algebra courses. To ensure that students have a solid foundation in this topic, teachers must engage them in various activities that help them understand and master the concept. Therefore, in this article, we will discuss some activities that teachers can use to teach students to write a linear function from a table.

Start with a real-world problem

One way to teach students to write a linear function from a table is by starting with a real-world problem. For instance, teachers can give students a situation where they need to calculate the cost of parking a car. The aim is to calculate the total cost of parking, given the amount of time spent in the parking lot. Teachers can provide a table containing time versus cost data. Students can analyze the table to identify a pattern and then write a linear function that describes the relationship between time and cost.

Use graphing calculators

The use of graphing calculators is a fantastic way to visualize the relationship between two variables. Teachers can provide students with a table of data and ask them to input the data into their graphing calculators. Students can plot a graph of the data and identify the slope of the line of best fit. The slope represents the rate of change, which is the coefficient of x in a linear function.

Use interactive software

Teachers can use interactive software to teach students to write a linear function from a table. These software programs provide a range of activities and interactive worksheets that help students learn and practice the concept. Students can input data into the software, which plots a graph and identifies the slope of the line of best fit. The software also provides step-by-step instructions that guide students through the process of writing a linear function from a table.

Collaborative learning

Collaborative learning is an excellent way to engage students in learning. Teachers can divide students into small groups and provide them with a table of data. Each group can analyze the table to identify a pattern and write a linear function that describes the relationship between the two variables. By working collaboratively, students get to discuss their ideas, critique each other, and build on each other’s knowledge.

Provide feedback

Providing feedback is crucial in helping students to improve their learning. Teachers can grade students’ work and provide them with constructive feedback. Feedback can help students identify areas they need to improve, and encourage them to persevere in solving challenging problems.

In conclusion, these activities provide an excellent way to teach students to write a linear function from a table. Teachers can use these strategies to engage students in understanding and mastering the concept. By providing students with real-world problems, interactive software, collaborative learning, and constructive feedback, they will improve their ability to write linear functions from a table.

Activities to Teach Students to Write a Linear Equation From Two Points

Writing a linear equation from two points is an essential skill for students starting algebra and calculus. The concept of linear equations forms the foundation for advanced topics like calculus and physics. Therefore, it is crucial to teach students the basic format and structure of linear equations.

There are several activities that teachers can use to make learning fun and engaging for their students. Here are a few activities that can be used to teach students to write linear equations from two points:

The Coordinate Game:

This game involves placing a grid on the board with random points plotted on it. Students have to race to come up with an equation that passes through two points of their choice. This can be a fun way to engage students in the process of writing linear equations.

Mystery Linear Equations:

Students love mysteries, making this activity exciting and engaging. Write several linear equations on different pieces of paper, such that one equation matches the coordinates provided on the sheet. The task of the student is to match the equation with the given coordinates. This activity will make students enjoy the process of learning linear equations.

Drawing Linear Equations:

Drawing linear equations is another fun activity. Students are given points on a graph, and they have to join them to form a line. The teacher can then ask questions about the slope, y-intercept and other characteristics of the line. This activity can also be done digitally using graphing software like desmos.

Linear Equation Memorization:

This activity is a great way for students to learn the standard form of linear equations. The teacher writes several equations on the board and students must memorize them. The teacher then erases one of the equations, and students have to write it down from memory. This activity will help students to retain specific formulas and learn them thoroughly.

Linear Equation Relay:

In this game, two teams are formed, and each team is given several equations. The first person in each team has to run to the board and solve one of the equations. The next person must then build on that equation and solve the next. This continues until all the equations have been solved. This activity is a great way to reinforce everyone’s problem-solving skills.

In conclusion, these activities are designed to engage students in the process of learning linear equations creatively. Students will be more motivated and interested in solving linear equations if they are taught using fun activities. As a result, they will understand the basic format of linear equations and be able to write equations confidently from two points.

Activities to Teach Students to Write a Linear Equation From a Slope and a Point

Writing a linear equation from a slope and a point can be a challenging task for students studying algebra. However, with the right set of activities, teachers can effectively teach students this skill in a fun and engaging way.

Activity 1: The Slope Game

This activity requires students to work in teams of two to race against each other to complete a set of linear equations. The teacher will provide each team with a set of cards containing different slopes and points. The students must use these cards to create a linear equation with the correct slope and point. The first team to finish all the cards wins.

Activity 2: Create a Graph

In this activity, the teacher provides each student with a graph paper and a set of points. The students must plot the points and connect them to create a line. Once they have created the line, the teacher will provide the students with the slope of the line. The students must then create a linear equation with the given slope and one of the points on the line.

Activity 3: The Slope Challenge

For this activity, the teacher will create a set of slope challenge cards containing different slopes. The students will work in pairs or small groups to create linear equations that match the slope on the card. Once they have created the equation, they must graph it to see if it matches the slope on the card. If it does, they get a point. The group with the most points at the end wins.

Activity 4: Identify the Slope

In this activity, the teacher will provide each student with a set of cards containing linear equations. The students must use the equations to identify the slope of each line. Once they have identified the slope, they must create a linear equation with the given slope and one of the points on the line.

Activity 5: Real-World Problems

This activity requires students to apply the skill of writing a linear equation from a slope and point to real-world problems. The teacher can provide the students with a set of real-world problems that require them to use the skill of writing a linear equation. The students must identify the slope and point in the problem and use that information to create the equation.

In conclusion, teaching students to write a linear equation from a slope and point is a crucial skill that can be challenging to learn. However, with the right set of activities, teachers can make this skill fun and engaging for students. Try out some of these activities in your classroom to help your students master this skill.

Activities to Teach Students to Write a Linear Equation From a Slope and Y-Intercept

As math teachers, we know that linear equations are one of the most important topics in algebra. It is essential to teach students to understand the relationship between the slope and y-intercept of a line, which can be represented by a linear equation. However, writing a linear equation from a slope and y-intercept can be challenging for students. Hence, it is essential to use multiple activities to help them learn this concept effectively.

Graphing Activities:

The best way to start teaching linear equations is by utilizing visual aids, as with a graph. Introduce students to the slope and y-intercept of a line, and how it is represented on the graph. Use a blank graph and ask the students to plot points with different slopes and y-intercepts. Then, ask them to connect the dots and observe the line. Through graphing, students will learn how the slope and y-intercept correspond respectively to the steepness of the line and where it crosses the y-axis.

Equation Matching Game:

This activity is an excellent way to introduce students to identifying the slope and y-intercept of a line. Create several cards with different linear equations written on them, but there should be no slope or y-intercept values specified on the cards. Create more cards with just the slope and y-intercept values. Ask each student to pick a card and match the equation with the corresponding slope and y-intercept values. This activity helps students learn how to use an appropriate strategy to write a linear equation.

Build your line:

Another activity that you can use to teach slopes and y-intercepts is the “Build your line” game. Break the students into pairs and give them a set of slope and y-intercept values they can use to build their line. Each student gets a chance at writing a slope and y-intercept on the board that can be used to create a graph. Once both sets of values have been selected, the students plot their points and join them with a line. This activity gives students a chance to work together and practice writing linear equations.

Guess and Check:

This activity is an excellent way for students to independently practice writing linear equations. Randomly choose a set of slopes and y-intercepts, and write them on the board. Students then have to guess the line’s equation and write it on a piece of paper. The teacher can check the students’ guessed equations with a correct solution. This activity helps students develop critical thinking and reinforces why the slope and y-intercept are necessary in writing linear equations.

In conclusion, these activities are essential for teaching students how to write a linear equation from a slope and y-intercept. It is crucial to introduce the students to the concept through graphing, equation matching, and visually-appealing activities to help them understand and master the skills. As they sharpen their skills and grasp the algebraic concepts taught, students can then easily write linear equations from a slope and y-intercept.

Latest Posts