Pedagogue Blog

The LANTITE Test: Everything You Need to Know

The Literacy and Numeracy Test for Initial Teacher Education (LANTITE) is a crucial assessment that prospective teachers in Australia must pass to demonstrate their personal literacy and numeracy skills are at an appropriate level to teach within a classroom. Instituted by the Australian Government, the test aims to ensure that all teachers are equipped with the fundamental skills required to effectively convey information to students.

The test consists of two main components: a literacy section and a numeracy section. In the literacy section, candidates are tested on their reading and writing capabilities through tasks that assess comprehension, grammar, and spelling among other things. The numeracy section evaluates the ability to apply mathematical knowledge to solve problems that might arise in everyday life as well as in a teaching context.

Teacher education students typically take LANTITE after they have begun their teacher training course. While there is no limit on the number of times one can sit for the LANTITE, some institutions may impose restrictions on how many attempts students can make while enrolled in their initial teacher education course.

Preparation for the LANTITE includes revisiting high school level English and Math concepts. There are various resources available including practice tests, study guides, and preparation courses. These resources provide candidates with an understanding of what to expect on the test and allow them to identify any areas where they may need additional support.

Understanding the content and format of LANTITE is crucial; it consists of multiple-choice questions delivered through an online platform under exam conditions. There are no essay-based questions or subjective formats; it’s purely designed to assess functional literacy and numeracy skills.

Several testing windows throughout the year enable candidates to choose a time that suits their study schedule. Registration deadlines are typically several weeks before the testing window opens, so it’s important for candidates to plan in advance.

Passing the LANTITE is a mandatory step for all prospective teachers. The result serves as one piece of evidence among others reflecting a candidate’s suitability for becoming a teacher.

In summary, the LANTITE test is an essential component of Australia’s commitment to quality education. It ensures teachers possess strong foundational skills in literacy and numeracy which they can then impart onto their students. For those looking to pursue a teaching career, understanding and preparing for this test should be considered an important step on the journey towards entering the teaching profession.

National Recycling Week 2024 Teaching Resources

As nations around the globe intensify efforts to safeguard the environment, National Recycling Week 2024 emerges as a pivotal time for educational institutions to impart recycling knowledge and practices. Recognizing this, an array of teaching resources has been developed to facilitate educators in their quest to nurture eco-conscious students.

These resources come in various forms, accommodating different learning styles and age groups. For younger students, interactive games and colorful worksheets simplify the complexity of recycling processes, instilling foundational concepts such as sorting recyclables by material type. Older students can delve into more intricate activities like conducting waste audits or initiating school-wide recycling challenges.

Comprehensive lesson plans are also a cornerstone of these materials. They offer step-by-step guidance for teachers looking to integrate discussions on the environmental impact of waste, the significance of reducing, reusing, and recycling (the 3 Rs), and the exploration of local recycling facilities through virtual tours or guest speakers.

Digital platforms also play a crucial role, with interactive quizzes and e-books that explain the life cycle of recycled items. These engaging tools help bring the material to life, enabling students to visualize and understand the importance of their individual actions in a global context.

Furthermore, project-based learning kits invite students to address real-world problems by designing and implementing recycling programs within their schools or communities. These hands-on experiences reinforce theoretical knowledge through practical application.

National Recycling Week 2024 underscores the need for actionable education on sustainability issues. With these diverse teaching resources, educators are well-equipped to inspire a new generation of environmental stewards dedicated to making recycling an everyday practice.

How to Use The Seesaw App in the Classroom

Seesaw is an innovative application that provides an interactive learning experience for students and a comprehensive teaching and communication tool for educators. To use Seesaw in the classroom in the United States effectively, follow the steps below:

1.Sign Up:

– Start by creating a free Seesaw account on web.seesaw.me or through the Seesaw app.

– Choose the option for teachers and set up your profile.

2.Set Up Your Class:

– Click on the “+ Class” button to create a new class.

– Enter your class name, grade level, and subject area.

– Generate a class code that students will use to join.

3.Add Students:

– Share the class code with your students.

– They can sign up using their Google accounts or email addresses if they’re older than 13.

– For younger students, you can create student accounts that don’t require an email.

4.Create Activities:

– Use the “Add Activity” button to create custom assignments.

– You can add instructions, attach worksheets, or include links to resources.

– Assign it to the whole class or customize it for individual students or groups.

5.Student Interaction:

– Students can document their learning by taking photos, drawing, recording videos, or writing text.

– Encourage them to “Show What They Know” using these multimedia tools.

6.Provide Feedback:

– Once students submit their work, you can review it within the app.

– Offer constructive feedback through text comments, voice notes, or grades.

7.Family Engagement:

– Invite families to join Seesaw Family, a separate app that lets families see their child’s work and communicate with the teacher.

– Use the Announcement feature to send out class updates or reminders.

8.Use Seesaw Blogs:

– Share student work with a broader audience by setting up a class blog within Seesaw.

– Students can post to the blog and engage with comments under your supervision.

9.Collaborate:

– Encourage students to leave peer feedback on classmates’ posts in a respectful and supportive way.

– Facilitate group projects where students can collaborate on shared assignments within Seesaw.

10.Professional Development:

– Take advantage of Seesaw’s professional development resources to become proficient in various features and teaching strategies compatible with Seesaw.

Incorporating Seesaw into your classroom routine can maximize student engagement and provide you with insightful data about your students’ learning processes. Remember to regularly explore new updates and features that Seesaw rolls out so that you keep leveraging this tool’s full potential in your classroom practices.

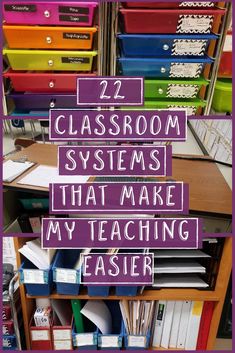
Classroom Setup Teaching Resources

In the modern educational landscape, the integration of technology in the classroom has become not just common, but expected. An “IClassroom,” or Internet-based Classroom, is a tech-forward approach to teaching that leverages online and digital resources to enhance the learning experience. Setting up an IClassroom requires careful consideration of both technological infrastructure and the educational materials used.

The key elements for an IClassroom setup include hardware, software, and digital teaching resources. Hardware encompasses interactive whiteboards, student devices like tablets or laptops, projectors, and a robust internet connection. Software includes learning management systems (LMS), such as Google Classroom or Blackboard, that allow teachers to distribute assignments, track progress, and facilitate communication with students.

However, it is the teaching resources that truly enrich an IClassroom. These can range from virtual textbooks to subscription-based educational sites offering interactive lessons. Tools such as Kahoot! enable teachers to create gamified quizzes that make learning more engaging. Similarly, websites like Quizlet offer flashcards and study tools that students can access anytime, anywhere.

Additionally, open educational resources (OER) play a pivotal role in IClassrooms by providing free educational content that can be customized by educators. OER databases like Merlot or OER Commons offer a plethora of materials across various subjects. Teachers can integrate videos from platforms like Khan Academy or TED-Ed to provide visual learning experiences on complex topics.

In conclusion, an ideal IClassroom setup doesn’t just stop at installing technology; it involves curating a suite of digital teaching resources that are accessible, versatile, and aligned with the curriculum. By doing so, educators create a dynamic learning environment where technology is not a gimmick but a powerful tool for knowledge dissemination and student engagement.

What’s the Goss on WALT and WILF (Examples Included)

In educational settings, acronyms often fly around like paper planes in a classroom on a Friday afternoon. While some may flutter away into the archives of forgotten lingo, others stick the landing and become integral to teaching and learning practices. Two such acronyms are WALT and WILF – shorthand terms that are music to the ears of educators worldwide for their simplicity and effectiveness.

WALT stands for “We Are Learning To” and is a phrase that sets clear learning intentions for students. It is an upfront declaration of the goal of a lesson, the ‘what’ that teachers expect students to understand or be able to do by the end of a session. By sharing WALT with students at the beginning of a lesson, it helps them to focus on what’s important, providing a clear objective that guides their learning journey.

Let’s look at an example:

WALT: Identify and use metaphors and similes in our writing.

Here, students know the purpose of the lesson is not just recognizing metaphors and similes but also applying them effectively in their work.

WILF, on the other hand, stands for “What I’m Looking For,” and complements WALT by setting specific criteria for success. With WILF, students can understand how they will achieve the learning intention laid out by WALT. It acts like a roadmap showing specific checkpoints or criteria that signal they’re on the right track.

Consider this example:

WILF: You can demonstrate your understanding by writing three sentences that each contain a metaphor or simile.

This helps students know exactly what needs to be done to meet the objectives of the lesson.

By combining WALT and WILF, educators provide a robust framework for student success. Students are not only clear on what they need to learn (WALT) but also on how to excel in that learning goal (WILF).

In short, understanding and effectively implementing WALT and WILF can transform teaching practices. These principles encourage active planning, promote student engagement, ensure clarity around objectives, and provide measurable outcomes for both teachers and students alike. The goss on WALT and WILF? They’re simple yet powerful tools passing note-worthy class after class.

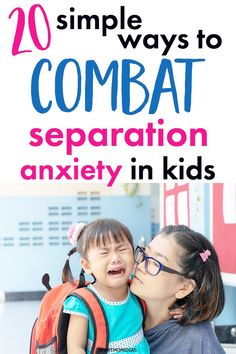
Separation Anxiety Tips for Classroom Teachers

Separation anxiety in children, particularly young ones, can be quite common and challenging within the classroom environment. It is essential for teachers to have strategies in place to support these students and mitigate the distress caused by being away from their caregivers.

Firstly, creating a welcoming and safe classroom atmosphere is paramount. Children are less likely to experience severe separation anxiety when they feel secure and comfortable in their surroundings. Teachers can foster this feeling by greeting each child warmly at the start of the day and fostering a sense of belonging within the classroom.

Another effective technique is to establish a predictable routine. Children often find reassurance in knowing what to expect throughout their school day. Having a visual schedule displayed in the classroom that outlines the day’s activities can help reduce anxiety by providing structure.

Encouraging independence is also crucial for easing separation anxiety. Teachers can facilitate this by setting up tasks that students can succeed in on their own, thus building their confidence bit by bit. Giving positive reinforcement for small achievements can go a long way in making the child feel more secure without their caregiver close by.

Communication with parents or caregivers is another aspect that should not be overlooked. By understanding a child’s background and what comforts them, teachers can better prepare to address issues as they arise. This partnership between educators and parents can provide consistent support and reinforce coping strategies both at home and at school.

Finally, introducing calming techniques like deep breathing exercises, having a quiet area in the classroom, or using sensory tools such as stress balls can help manage moments of heightened anxiety. Moreover, children should be allowed to have transitional objects from home, like a small toy or a family photo, which can act as a comfort item throughout the day.

By employing these methods, classroom teachers can significantly alleviate separation anxiety symptoms and promote a positive educational experience for all students.

Easy At-Home Science Experiments for Kids

Science is not only a key to understanding the world around us but can also be an endless source of fun and discovery, especially for children. Conducting simple experiments at home is a fantastic way to cultivate a child’s curiosity and teach them valuable scientific concepts. Parents and educators alike will find that the following easy at-home science experiments are perfect for engaging young minds.

1. Rainbow in a Glass:

Materials: Sugar, water, food coloring, and a transparent glass.

Procedure:

– Dissolve increasing amounts of sugar in four separate cups of water (e.g., 1 teaspoon in the first, 2 teaspoons in the second, and so on).

– Add a different color of food coloring to each cup.

– Carefully layer the sugar solutions into the glass, starting with the highest sugar concentration at the bottom.

The result is a liquid rainbow that teaches density and solubility.

2. Invisible Ink:

Materials: Lemon juice, cotton swabs, white paper, a light bulb or iron.

Procedure:

– Dip the cotton swab in lemon juice and write a message on the paper.

– Allow it to dry completely; your message should disappear.

– Heat the paper by holding it close to a light bulb or lightly ironing it to reveal your hidden message.

This experiment introduces kids to acidic reactions and how heat can change substances.

3. Homemade Volcano:

Materials: Baking soda, vinegar, dish soap, food coloring (optional), container or bottle.

Procedure:

– Fill the container a quarter full with baking soda.

– Mix vinegar with a few drops of dish soap and food coloring if desired.

– Pour the vinegar mixture over the baking soda.

The resulting eruption teaches kids about chemical reactions between acids and bases.

4. Magnetic Slime:

Materials: Iron oxide powder, liquid starch, white school glue, neodymium magnet (strong magnet).

Procedure:

– Mix 1/4 cup of liquid starch with 2 tablespoons of iron oxide powder.

– Integrate this mixture with 1/4 cup of glue until fully combined to form slime.

– Use the magnet to show how the slime can move or respond to magnetic fields.

This gooey experiment helps children learn about magnetism and materials science.

5. Walking Water:

Materials: Paper towels, glasses, water, food coloring.

Procedure:

– Fill every other glass with water and add different colors of food coloring to each.

– Place empty glasses between those filled with colored water.

– Connect the glasses by placing folded paper towels bridging from one glass to another.

Over time, kids can observe capillary action as water “walks” along the paper towels from one glass to another mixing colors.

These at-home science experiments are not just fun; they also impart scientific principles in memorable ways. Try these activities with your kids and nurture their scientist spirits!

Positive Affirmations for Kids — Classroom Display Cards

Positive affirmations can play a crucial role in fostering a child’s self-esteem and resilience. Affirmations are affirmative sentences that can influence the conscious and subconscious mind to help individuals believe in their potential and capabilities.

In a classroom setting, display cards of positive affirmations can act as consistent and visual reminders for kids to believe in themselves and their abilities. These are not just decorative but serve the purpose of instilling confidence and positivity that can enhance the overall learning environment.

Here are several positive affirmations designed for classroom display cards:

1. “I am brave enough to try new things.”

2. “Mistakes help me learn and grow.”

3. “I am unique and special.”

4. “I am kind to myself and others.”

5. “I am a responsible student.”

6. “Every day is a fresh start.”

7. “I believe in my dreams.”

8. “Challenges help me grow stronger.”

9. “I am thankful for today.”

10. “My ideas are worth sharing.”

Educators can introduce these affirmations during morning routines or class discussions, encouraging children to repeat them and even discuss what each affirmation means to them personally. Over time, this practice helps students internalize these positive beliefs, potentially improving their academic performance, social skills, and well-being.

More Inference Activities… What’s Going on Here!?

In the bustling world of language arts and education, one of the cornerstones is building students’ abilities to infer. Inference activities — exercises that encourage learners to read between the lines and make educated guesses based on evidence and reasoning — are crucial for developing critical thinking skills. This becomes especially important as students move up in grades and begin to encounter more complex texts.

As teachers seek fresh ways to challenge their students and sharpen their inferential reasoning, it’s essential to explore diverse activities that can bring this skill to life. The goal is not only to help students recognize implied meanings in literature but also to apply these skills in real-world situations.

Creative writing prompts are an excellent tool for inference practice. They can encourage students to project beyond what they know explicitly from their reading and to craft stories that leave room for interpretation. Consider a scenario where students are given the first half of a story and must conclude it by inferring what might logically happen next based on clues provided earlier in the text.

Picture analysis is another powerful strategy. By examining a scene without any textual support, students can discuss what might be happening and why they think so, using visual evidence as their guide. This activity can serve as a valuable pre-reading exercise before introducing a related narrative.

Role-play activities are also effective for inference skill-building. Assigning students characters from a story or historical figure without giving away all the details forces them to infer character traits, motivations, and behaviours based on dialogues or historical context.

Mystery bags or boxes filled with various objects can stimulate inference as well. Students must use these objects as clues to solve a problem or guess the contents of another student’s bag. This tangible form of inferencing can lead to lively classroom discussions and encourages deductive reasoning.

When digital literacy combines with inferential reasoning, we find ourselves at the frontier of 21st-century learning skills. Presenting students with various online resources—blogs, forums, social media snippets—requires them not only to infer meaning but also to consider source reliability and perspective.

In conclusion, weaving more inference activities into educational curricula is vital for developing sophisticated thinkers who can navigate both literature and life’s nuanced realities. As educators cultivate this critical skillset, they’ll find their students better prepared for academic success and more empowered as individuals capable of deep understanding beyond the written word.

Making Inferences Teaching Resources

Teaching students to make inferences is a crucial skill in reading comprehension. Inference is the technique of drawing conclusions based on evidence and reasoning, rather than from explicit statements. This skill helps students delve deeper into texts and understand the underlying messages, themes, and motives that aren’t directly stated.

To build inference skills, teachers need a variety of resources and strategies. These resources can include worksheets, lesson plans, interactive games, and activities that encourage critical thinking. Some resources may focus on using visual aids like pictures or comics to help students connect dots between what they see and the conclusions they can draw. Others might use short stories or passages as the basis for questions that require students to infer.

One popular teaching strategy for inferences is the “I think… because…” statement, where a student must articulate their inference and the evidence behind it. This technique encourages students to justify their thinking process and engage with the material more critically.

Another valuable resource is group activities where students discuss their inferences about a text or piece of media. This peer interaction allows them to hear different perspectives and reasoned arguments, which can in turn help refine their own inferencing abilities.

When it comes to assessing students’ abilities to make inferences, teachers can use quizzes or writing assignments that specifically require the use of inference. For example, after reading a narrative, students might be asked to write about a character’s motivations or feelings, using clues from the text to support their ideas.

In conclusion, making inferences is an essential component of reading comprehension that relies on students being active, engaged readers. Teaching resources for making inferences encompass a wide array of tools designed to challenge students and enhance their critical thinking skills. Through consistent practice with these tools, students can improve their ability to read between the lines and gain a more profound understanding of the texts they encounter.

Making Literacy Lessons Fun with Comic Strips

Educators are continuously seeking innovative methods to make learning more engaging for students, and one creative strategy that has shown promising results is the incorporation of comic strips into literacy lessons. Comics, with their combination of visuals and text, can wonderfully bridge the gap between entertainment and education, making them a valuable tool in any educator’s arsenal.

The use of comic strips in the classroom brings a multitude of advantages. Firstly, they can make reading more appealing to reluctant readers who might be intimidated by large blocks of text. The visual elements provide context clues and break down the narrative into manageable parts, thus reducing anxiety and encouraging positive reading experiences. Secondly, comics can stimulate creativity and imagination, leading to better engagement and retention of information.

Incorporating comic strips into lesson plans can start with simply using existing comics as reading materials. Students can analyze the characters, plot development, and dialogue to enhance comprehension skills. To take it one step further, educators can encourage students to create their own comic strips. This activity not only reinforces literacy skills but also encompasses other educational domains including art, storytelling, and even technology if digital tools are used for creation.

Creating comic strips requires students to summarize information succinctly due to space constraints inherent in the form. This encourages them to prioritize information and convey messages effectively – key skills in both written and verbal communication. Furthermore, when students work on creating dialogues for their characters, they practice correct punctuation, grammar, and nuances of language that are necessary for direct speech.

There’s also the collaborative aspect to consider; working on comic strips can be a great group activity. By assigning roles – such as writer, illustrator, or editor – each student contributes uniquely to the final product. Notably, this teaches teamwork while also allowing students with different strengths to shine in various aspects of the project.

To foster a love for reading and writing through comic strips, teachers could introduce a ‘Comic Book Day’ where everyone shares their favorite comics or showcases their creations. Such events encourage students to appreciate diverse literary formats and recognize that storytelling is multifaceted.

With so many genres within comic books themselves — from superheroes to slice-of-life — educators have a broad range of themes to choose from to fit any curriculum area. Tie-ins with history (historical figures or events), science (adventures that include scientific facts), or cultural studies (exploring different cultures through comic book narratives) showcase how versatile this medium is.

In conclusion, utilizing comic strips in literacy lessons represents an effective tactic to engage students in a fun and dynamic way while reinforcing essential reading and writing skills. It stimulates visual literacy, fosters creative expression, promotes critical thinking skills, encourages dialogue about complex topics in an accessible format, and most importantly makes learning an enjoyable experience. When combined with traditional teaching practices, comic strips could be the key to unlocking new levels of literacy among learners of all ages.

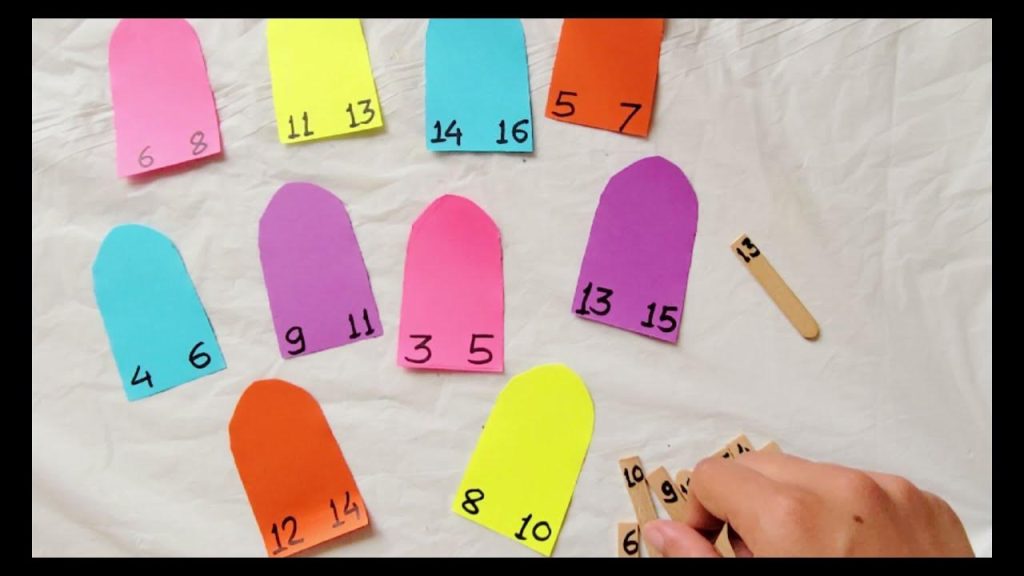
6 Paddle Pop Maths Activities (Hands-on Learning)

Engaging children in hands-on learning can significantly boost their understanding and enjoyment of mathematics. Incorporating everyday items such as paddle pop sticks into maths activities is a creative and cost-effective way to enrich your child’s learning experience. Here are six paddle pop stick maths activities to get your kids thinking, counting, and moving.

1. Counting and Sorting

Children can start by sorting paddle pop sticks by color or size, then counting them. This simple activity reinforces counting skills and the concepts of sorting and categorizing.

2. Basic Arithmetic Practice

By creating bundles of ten paddle pop sticks with rubber bands, you can teach addition and subtraction. For example, showing two bundles and five individual sticks can visually represent the equation 10 + 10 + 5 = 25.

3. Paddle Pop Place Value

Use paddle pop sticks to teach place value by creating groups of one (units), tens, hundreds, etc. This tactile experience can help clarify the abstraction of place value in base ten counting systems.

4. Geometry Fun

Children can use paddle pop sticks to construct shapes. This assists in learning the names of shapes and their properties, such as the number of sides or angles.

5. Fractions Made Simple

Demonstrate fractions by breaking whole paddle pop sticks into halves, thirds, or quarters. Kids can physically manipulate the pieces to understand fraction concepts like equivalent fractions and simple addition or subtraction of fractions.

6. Building Structures for Measurement

Encourage kids to build structures like bridges or towers using paddle pop sticks and measure their creations with a ruler. This integrates creativity with practical measurement skills.

Each of these activities turns abstract mathematical concepts into tangible learning experiences that stimulate curiosity and encourage active participation. Plus, they make learning math fun!

Latest Posts