Instructional Technology

Why Even the Best Schools and Teachers Need Instructional Coaches

Introduction:

Instructional coaching is an essential element for the growth and continuous improvement of an educational institution. It is a collaborative, supportive process in which experienced educators provide guidance, feedback, and expertise to their colleagues. The role of instructional coaches extends beyond mentoring new teachers; they also play a significant part in even the most high-performing schools and among the most accomplished educators. In this article, we discuss why even the best schools and teachers need instructional coaches to maintain an optimal learning environment for students.

1. Continuous Improvement:

Even highly effective teachers should never stop learning or seeking ways to improve their teaching methods. Instructional coaches serve as a valuable resource by helping teachers examine their current practices and find areas for growth. They facilitate the exchange of best practices, innovative ideas, and research-based strategies among faculty members, allowing both novice and veteran teachers to continue evolving professionally.

2. Encouraging Collaboration:

Instructional coaches promote a collaborative culture within schools by initiating discussions between teachers from different grade levels or departments. These conversations foster greater collaboration and enable faculty members to share experiences, challenges, and successful strategies. This cooperative approach helps create a more cohesive school community where everyone is working together towards shared goals.

3. Facilitating Reflection:

Teaching is a dynamic profession that requires constant reflection on one’s practices to achieve greater effectiveness in the classroom. Instructional coaches encourage teachers to engage in self-analysis by discussing lesson plans, assessments, curriculum development, and student-learning data that empower them to make informed decisions on instruction.

4. Supporting Differentiated Instruction:

Each student enters the classroom with unique needs and varied skill levels. Teachers need a support system that helps them cater to each individual’s learning style effectively. Instructional coaches provide guidance on how to effectively differentiate instruction by designing varied instructional materials and scaffolding techniques tailored to meet diverse learner needs.

5. Enhancing Use of Assessment Data:

High-quality schools understand the importance of utilizing assessment data to guide curricular and instructional decisions. Instructional coaches help teachers make sense of the data by analyzing student performance, identifying patterns, and offering actionable strategies to enhance lessons and classroom practices.

6. Empowering Teachers as Leaders:

By working closely with instructional coaches, teachers gain new insights, develop their professional skills, and become more confident in their abilities. This growth helps pave the way for teachers to assume leadership roles within the school community, mentoring other educators, spearheading new initiatives, or shaping school policies.

7. Nurturing a Growth Mindset:

The presence of instructional coaches in a school environment signifies a commitment to growth and improvement on all levels – from administration to teachers and students. This culture of continuous growth encourages all members of the educational ecosystem to challenge themselves and strive for constant progress.

Conclusion:

Instructional coaching plays a significant role in fostering a culture of collaboration, reflection, innovation, and improvement –in both teaching practice and educational outcomes for students. Regardless of their existing skill levels or the caliber of their institution, even the most distinguished schools and accomplished teachers can benefit from partnering with instructional coaches to reach new heights in educational excellence.

How Creative Teachers Are Using Microphones to Rock Their Instruction

Introduction:

Imagine a classroom where every student can hear their teacher’s instructions clearly, without the worry of missing key information due to poor acoustics or noisy environments. Sounds like a utopian dream, right? Well, that dream is slowly turning into a reality as creative teachers are finding innovative ways to use microphones to enhance their instruction and maximize student engagement. In this article, we will explore some of the unique methods educators are adopting in order to rock their instruction using microphones.

1. Voice Amplification:

One of the most apparent benefits of using a microphone in the classroom is voice amplification. Teachers with soft voices or who teach in larger classrooms often struggle to maintain students’ attention due to the challenges of reaching every student acoustically. By using a microphone, these teachers can ensure that all students hear their instructions and information clearly, boosting engagement and reducing misunderstandings.

2. Reducing Vocal Strain:

Frequent shouting or raising one’s voice can lead to vocal strain and potential long-term damage for educators. With a microphone, teachers can reduce the risk of vocal strain by speaking at normal volumes while still being heard clearly by their students. This benefits not only the teacher’s well-being but also promotes a calmer and more focused learning environment.

3. Hands-free Teaching:

By using wireless microphones or headset systems, educators can move freely around the classroom while still being heard by their students. This increased mobility encourages active learning, as teachers can spontaneously interact with individual students or groups without being restricted by a fixed location.

4. Audio Recording Lectures:

Instructors can take advantage of microphones to record their lectures for later review, enabling absent students or those needing additional reinforcement to benefit from verbal instructions multiple times. These recordings can also be shared online for remote learners or serve as valuable resources for flipped classrooms.

5. Enhancing Presentations and Multimedia:

With the integration of microphones, multimedia presentations have become more engaging and interactive. Educators can play videos or other audio clips while providing live commentary, ensuring the audio quality is consistent throughout the presentation. Additionally, using microphones for group presentations enables each student to be heard clearly, boosting both confidence and the effectiveness of their delivery.

6. Supporting Students with Hearing Impairments:

Microphones play a significant role in creating inclusive environments for students with hearing impairments. By utilizing available technology such as FM systems or personal amplification devices, teachers can ensure that their voices are transmitted directly to hearing aids or cochlear implants, giving every student equal access to information.

7. Enhancing Distance and Online Learning:

The transition to remote learning has highlighted the importance of clear communication in virtual classrooms. A good quality microphone is essential for instructors teaching via video conferencing platforms, ensuring that their voice is transmitted clearly and without distortion to online students during both live and recorded sessions.

Conclusion:

As we have seen, creative teachers are embracing the potential of microphones to improve their instruction and facilitate a transformative learning experience for students. Voice amplification, improved accessibility, and enhanced interactivity are just a few of the many ways that teachers can rock their instruction using microphones, proving that sometimes, innovative solutions are simply a matter of tuning into new possibilities.

15 Headphone and Earbud Storage Solutions That Really Work

Introduction:

Headphones and earbuds have become a staple accessory in our daily lives. However, keeping them organized and tangle-free can be quite a challenge. In this article, we are going to explore 15 headphone and earbud storage solutions that will help you keep your audio gear organized and ready to use.

1. Cable organizers: These small, handy devices easily attach to your headphones’ cords, preventing them from tangling up in your bag or pocket.

2. Charging docks: A charging dock not only keeps your headphones charged but also serves as a convenient place to store them when not in use.

3. Fabric pouches: Soft and lightweight, fabric pouches protect your headphones from dust, dirt, and scratches while making it easy to toss them into your bag.

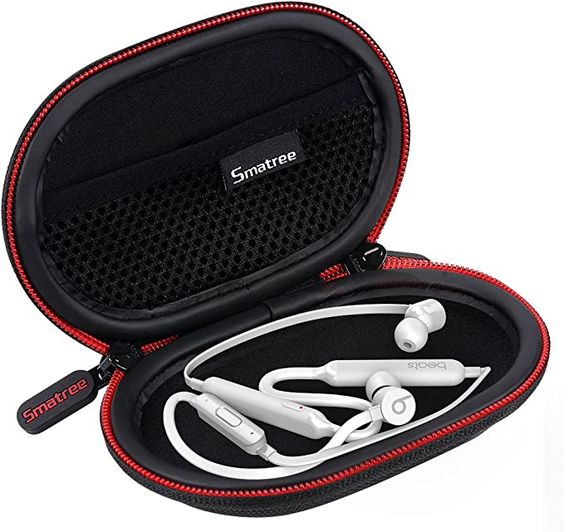
4. Hard-shell cases: Offering maximum protection against damage, hard-shell cases are an excellent storage solution for more expensive headphones or earbuds.

5. Silicon earbud cases: Lightweight and versatile, these cases provide protection against dust and impact while keeping earbuds tangle-free.

6. DIY headphone stands: A simple yet elegant solution – make your own headphone stand using materials like wood, PVC pipes, or metal rods.

7. Wall-mounted hooks: Save desk space by mounting hooks on the wall to hang your headphones when not in use.

8. Magnetic cord organizers: Attach these small magnets to your earbud cords for easy storage and quick access when you need them.

9. Binder clips: A budget-friendly solution – simply clip your headphones’ cord around a binder clip to keep it tangle-free.

10. Desktop organizers: Keep your headphones within reach while working by using a desktop organizer with dedicated storage slots or hooks.

11. Velcro cable ties: Securely wrap your headphone cords with reusable Velcro cable ties for convenient storage and easy transport.

12. Pocket-sized carrying cases: These compact cases are perfect for storing earbuds and keeping them tangle-free on the go.

13. 3D printed organizers: Customize your storage solution by 3D printing a headphone stand or earbud holder in a design that suits your style.

14. Headphone hangers: Attach these hangers to your computer monitor or under your desk, providing an easy way to store your headphones when not in use.

15. The “Spool Method”: Wind your earbud cables around a small spool, such as an empty thread spool or a similarly sized object, to keep them tangle-free and organized.

Conclusion:

With these 15 headphone and earbud storage solutions, you can say goodbye to tangled cords and misplaced audio gear. Choose the option that best suits your needs and lifestyle, and enjoy the convenience of having your headphones and earbuds readily available when you need them.

12 Tips, Tricks, & Tools for Amazing Flipped Classroom Videos

Introduction

The flipped classroom model is a teaching methodology in which the students gain their first exposure to new material outside of class, usually through pre-recorded lecture videos. This allows for more active learning in the classroom as students spend class time working on activities and problem-solving exercises. Creating high-quality videos is crucial for successful flipped classrooms. In this article, we’ll explore 12 tips, tricks, and tools that can help you create amazing flipped classroom videos.

1. Plan Your Video

Begin with a clear outline of what you want to cover in your video. Break down the content into smaller segments that are easy to understand and remember. This will make your video engaging and prevent it from becoming overwhelming.

2. Keep it Short and Focused

Keep your videos short by limiting them to one topic or concept at a time. Aim for 5-10 minutes per video as this duration has been proven to maintain student engagement and enhance knowledge retention.

3. Be Conversational and Engaging

Speak in a conversational tone throughout your videos. Be energetic, enthusiastic, and use real-world examples to ensure students find the content relatable.

4. Use Visuals Effectively

Visual aids like slides, diagrams, images, or animations help reinforce concepts and keep learners engaged. However, avoid cluttering your visuals with too much information or excessive animations that could distract from the message.

5. Include Interactions

Incorporate interactive elements within your videos by asking questions or prompting the viewer to pause and reflect on the content just presented.

6. Choose the Right Platform

Select a video hosting platform that suits your needs as well as your students’. Platforms like YouTube, Vimeo, or specialized educational platforms like Edpuzzle can be used to host and share your flipped classroom videos.

7. Edit Your Videos Efficiently

Trim any unnecessary parts of your videos using editing software like iMovie, Adobe Premiere, or Camtasia to create polished and professional-looking videos.

8. Ensure Proper Audio Quality

Use a good-quality microphone to ensure clarity and professionalism in your videos. If possible, eliminate background noise during recording.

9. Use Closed Captions or Transcripts

Adding closed captions or transcripts to your videos can benefit all students by providing an alternative way to access information, especially for those with hearing impairments or language barriers.

10. Encourage Active Note-taking

Instruct students to take notes while watching the videos and provide them with guided note-taking templates if needed.

11. Review Analytics

Periodically review video analytics provided by hosting platforms to determine which videos are more effective and identify areas of improvement in content, delivery, or technology.

12. Continuously Improve and Update Content

Finally, always aim to improve your flipped classroom videos by incorporating feedback from your students and staying updated on best practices in teaching methods and technology.

Conclusion

Creating high-quality flipped classroom videos requires careful planning and attention to key components such as engaging content, effective visuals, interactive elements, and proper audio quality. By following these 12 tips, tricks, and tools, you will not only improve the overall learning experience for your students but also enhance the effectiveness of your flipped classroom.