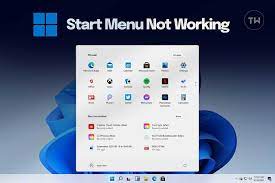

If you’ve upgraded to Windows 11, you might face a common issue with the Start menu not functioning as it should. Don’t fret! Here are several methods you can try to resolve this problem and get your Start menu working again.
1. Restart Windows Explorer
Often, this simple solution can solve the malfunctioning Start menu issue. To restart Windows Explorer:
a. Right-click on the Taskbar and select Task Manager.
b. In the Processes tab, find Windows Explorer.
c. Right-click on it and choose Restart.
2. Update to the Latest Version
Ensure your system is up-to-date by checking for new updates:
a. Press Windows key + I to open Settings.
b. Click on the Updates & Security section.
c. Click Check for updates and install if there are any available updates.
3. Troubleshoot the Start Menu
You can use the built-in troubleshooter in Windows to detect and fix any problems with your Start menu:
a. Press Windows key + I to open Settings.
b. Click on System, thenTroubleshoot.
c. Scroll down to Other troubleshooters and click on them.
d. Find the Start Menu option, click it, and then click Run.
4. Re-register your Start menu app
You can also try re-registering your Start menu application using Windows PowerShell:
a. Right-click on the Start button and select Windows Terminal (Admin) or PowerShell (Admin).
b. Type or paste the following command: Get-AppXPackage -AllUsers | Foreach {Add-AppxPackage -DisableDevelopmentMode -Register
“$($_.InstallLocation)\AppXManifest.xml”}
c. Press Enter and wait for the process to finish.
5. Create a new user account
Creating a new user account may fix issues with corrupt files in your current user account:
a. Press Windows key + I to open Settings.
b. Click on Accounts, then Family & other users.
c. Click Add someone else to this PC and follow the on-screen instructions to create
a new account.
6. Reset Your PC
If all else fails, you might need to reset your PC while keeping personal files:
a. Press Windows key + I to open Settings.
b. Click on System, then Recovery.
c. Under Reset this PC, click Get started and choose the Keep my files option.
Remember to always backup your important data before making significant changes to your system. Hopefully, one of these solutions works for you and helps you get your Start menu back on track in Windows 11.