Origami, the ancient Japanese art of paper folding, has become a popular craft for people of all ages. It is a great way to engage children in creative activities, develop their fine motor skills, and teach them about different cultures. One of the most enjoyable and kid-friendly projects in origami is making animal rings. With the rise of step-by-step videos, learning how to create these charming paper creatures has never been easier or more fun.
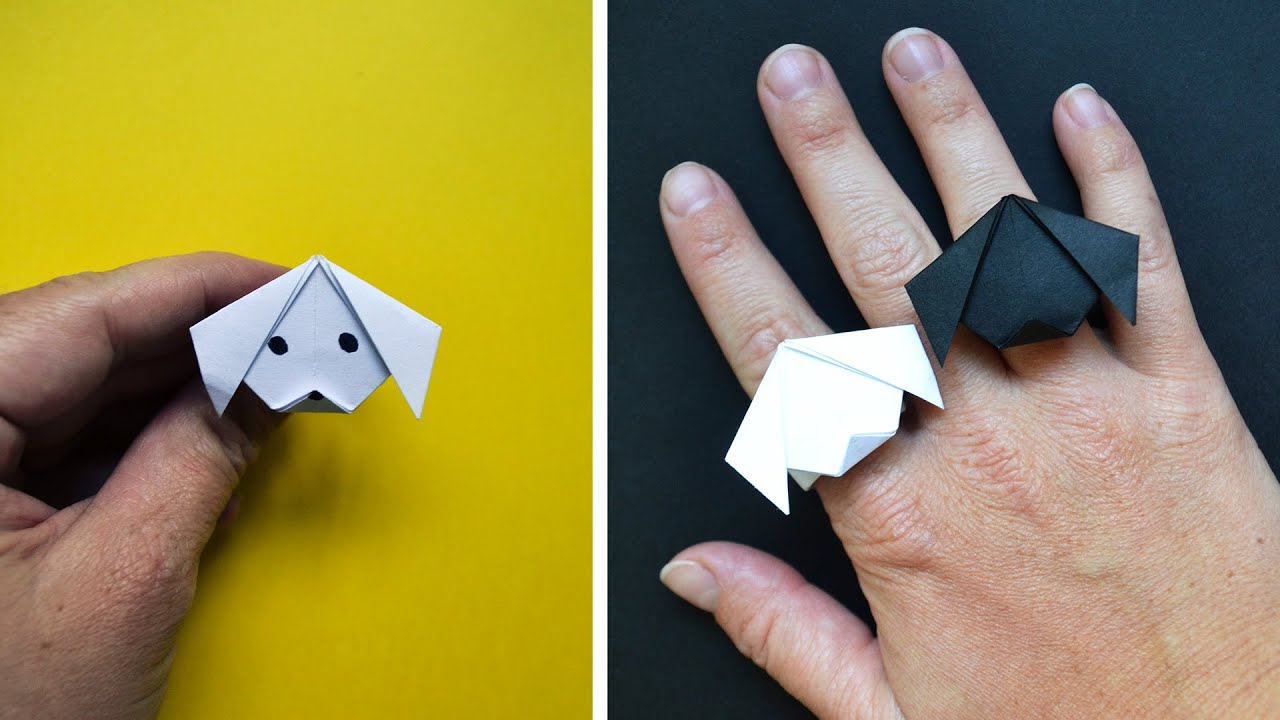
Animal origami rings bring a magical twist to traditional origami, transforming plain paper into wearable art. These creations let kids wear their handiwork with pride and even swap with friends. Whether it’s a mighty lion, a graceful swan, or a cute bunny, each fold brings the paper to life.
Creating origami requires patience and precision, but having video tutorials accessible makes the process less daunting for beginners – especially children. Video guides provide visual aids that are crucial for understanding each step in the folding process, allowing young creators to pause and replay difficult sections as needed.
Step-by-step origami videos tailored for kids will typically follow this structure:
1. Introduction:
– The video begins by introducing the specific animal ring that will be created.
– Safety tips for working with paper are provided.
– The size and type of paper required for the project are described.
2. Folding Basics:
– Before jumping into complex models, basic folds such as valley and mountain folds are demonstrated.
– Techniques like ‘squash fold,’ ‘petal fold,’ and ‘inside reverse fold’ are explained if they’re necessary for the animal ring.
3. Step by Step Instructions:
– Each step in creating the animal ring is broken down into easy-to-follow segments.
– The instructor slowly demonstrates each fold, ensuring that viewers can follow along at their own pace.
– Points of difficulty are highlighted and additional tips are given to help kids achieve better results.
4. Final Touches:
– Once the major structure of the ring is complete, additional features such as eyes or whiskers are added to give personality to the animal.
– Alternative decoration ideas may be offered to encourage personalization.
5. Wearing Your Animal Ring:
– The video concludes by showing how to properly wear the finished ring.
– Variations in ring size adjustments are discussed to accommodate different finger sizes.
6. Encouragement and Practice:
– Children are encouraged to practice frequently and reminded that making perfect folds may take several attempts.
– Viewers are motivated to try other animal designs using skills learned from the video tutorial.
Using step-by-step origami videos for crafting animal rings provides an accessible way for children to learn a new hobby while enjoying creation without a need for screens or batteries. It encourages not only craftsmanship but also imagination as kids explore various animals they can transform their papers into – all with just a series of folds guided by an expert through their screen.