Art Education

10 Simple Classroom Bulletin Board Ideas You Can Set Up in No Time

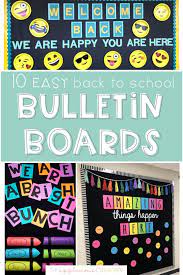
Creating an engaging and informative bulletin board in your classroom doesn’t have to be a time-consuming task. Here are ten simple ideas that you can set up quickly, adding color and life to your learning environment without taking away from valuable teaching time.
1. Welcome Board: Design a welcoming entrance for your students with a colorful “Welcome” sign. Add each student’s name to the board to create a sense of belonging from day one.
2. Birthday Chart: Celebrate every student’s special day by creating a birthday chart. Divide the board into months and allow students to decorate their own birthday slot with their name and date.
3. Word of the Week: Dedicate a space on your bulletin board for vocabulary development. Update it weekly with a new word, including its definition, synonyms, antonyms, and use it in a sentence.
4. Weather Station: Set up a section where students can help record the day’s weather. Include symbols for sunshine, rain, clouds, and snow that can be easily placed on the board.
5. Classroom Jobs Chart: Foster responsibility by assigning classroom jobs to students. Place envelopes or hooks on the board and rotate name tags weekly so each child gets a turn doing different tasks.
6. Question of the Day: Post an intriguing question every day and encourage students to write their answers on sticky notes and place them on the board.
7. Reading Corner: Highlight what’s being read in class with a reading corner area on the board that features current books, author bios, and quotes.
8. Important Dates Reminder: Help students keep track of upcoming events and deadlines by listing important dates related to school activities, tests, or project due dates.
9. Inspirational Quotes: Boost classroom morale by displaying inspirational or educational quotes that change regularly to keep things fresh and motivational.
10. Student Work Showcase: Dedicate an area of your bulletin board to highlight outstanding student work, changing pieces frequently to give all students an opportunity to shine.
These simple ideas can be modified or expanded upon, depending on your class’s needs and interests. The key is keeping it interactive, current, and relevant to maintain student interest and excitement about what’s happening in the classroom!


Fun and Easy Crafts for Kids: Pencil Shaving Goodness

Crafting with children can be a fun and educational experience that stimulates creativity and fine motor skills. One of the simplest yet surprisingly delightful activities involves something as common as pencil shavings. Here’s a fun craft project that turns these colorful byproducts into art.
Materials Needed:
– Pencil sharpeners
– Colored pencils
– Plain white paper or construction paper
– Glue
– A pair of scissors (optional)
– Clear contact paper (optional)
Instructions:
1. Start by gathering a good amount of pencil shavings. You can plan ahead and save these from when your kids do their homework, or you can have a sharpening session to procure a variety of colors.
2. Lay out a piece of paper for your craft’s backdrop.
3. Encourage your child to think about what they would like to make. Pencil shaving creations can range from simple abstract designs to more intricate images like flowers or the sun.
4. Once an idea is in place, start arranging the shavings on the paper without glue to create a rough draft of the image.
5. After your child is happy with their design, help them apply glue on top of where each shaving will lay. Then carefully place the shavings onto the glue spots.
6. Let the artwork dry completely before moving it.
For longevity:
– After drying, you might want to gently press down each shaving so it’s entirely flat against the paper.
– To preserve the craft, cover the artwork with clear contact paper, which also gives it a nice shine and prevents shavings from falling off.
Pencil shaving crafts allow kids to explore their imagination and can be made into cards, framed art pieces, or even bookmarks if you cut them into strips and laminate them. It’s also an exceptional way to teach children about reusing and recycling materials in creative ways while developing an appreciation for unconventional art materials that are readily available at home. Enjoy this eco-friendly craft with your little ones for an afternoon filled with creativity and learning!

12 Fresh and Fun Spring Activities for Kids

As spring blossoms, it’s time to get the little ones outdoors for some fresh air and sunshine. Here are 12 fresh and fun spring activities for kids that are sure to keep them entertained and engaged.
1. Flower Planting: Teach your children about the magic of growth by planting flowers together. Choose easy-to-grow varieties like marigolds or sunflowers and watch your child’s excitement bloom along with the flowers.
2. Bug Safari: Equip the kids with magnifying glasses and let them explore the backyard or a park to find and observe insects. It’s a perfect way to teach them about different types of bugs and their roles in nature.
3. Rainy Day Puddle Jumping: Spring showers bring plenty of puddles. Dress the kids in their boots and raincoats for some splashy fun, which can be both invigorating and a great way to enjoy the rainy days.
4. Fly a Kite: On a breezy day, take advantage of open fields by flying kites. It’s an enjoyable way to teach kids about wind dynamics while enjoying the feeling of a kite soaring high.
5. Nature Scavenger Hunt: Create a list of flowers, insects, rocks, and leaves to find during a walk in nature. This activity encourages observational skills and gets kids excited about the small wonders around them.
6. Sidewalk Chalk Art: Give kids a set of colorful chalks and let their creativity flow on sidewalks or driveways. From hopscotch grids to artistic masterpieces, chalk art provides hours of creative play.
7. Picnics in the Park: Pack a basket with healthy snacks, sandwiches, fruits, and cold drinks for an enjoyable meal outdoors, combined with free play or Frisbee after eating.
8. Bird-Watching: Spring is ideal for observing our feathered friends. Provide the kids with binoculars and bird guides so they can learn about species that come out during this season.
9. Bike Rides: Encourage physical activity with family bike rides through local bike paths or parks—great exercise and a lovely way to explore different environments.
10. Strawberry Picking: Visit local farms if available for strawberry picking—a tasty activity that teaches children where food comes from.
11. Start a Garden Box: If space is limited, start a small herb garden in containers. Even urban dwellers can enjoy growing basil, parsley, or mint.
12. Outdoor Story Time: Find a quiet spot under a tree and read stories or tell tales surrounded by nature—a peaceful way to stimulate young imaginations.
Each of these activities not only offers enjoyment but also provides learning opportunities that make use of the warm weather and bountiful nature that springs forth at this time of year.

Holiday Bulletin Board Ideas

Bulletin boards are a vibrant and informative part of many spaces – classrooms, offices, and community centers. During the holiday season, they can become a focal point for festivity, providing warmth and cheer to all who see them. Here are some holiday bulletin board ideas to inspire joy and creativity this season.
1. Winter Wonderland: Transform your bulletin board into a snowy scene with cotton batting or fluffy white fabric for snow. Add silhouettes of pine trees, and maybe even a snowman or two with accessories crafted from construction paper.
2. A Global Celebration: Honor different holiday traditions around the world. Feature images, brief descriptions, and festive artifacts representing Hanukkah, Christmas, Kwanzaa, Diwali, Chinese New Year, and others.
3. Holiday Greetings: Encourage students or staff to write holiday greetings to one another on post-it notes or cards. Attach these messages onto the bulletin board to create a patchwork of good tidings.
4. Countdown to Break: Create an interactive advent calendar where each day reveals a new holiday-themed image or message beneath.
5. The Gift of Reading: Decorate your bulletin board with images of book covers that have a festive theme or winter setting. This is a great way to promote seasonal literature.
6. Season of Giving: Dedicate part of the bulletin board to highlight acts of kindness or charity. Place a “giving tree” in the center where people can pin up notes sharing their good deeds or charitable contributions.
7. Crafts Galore: Feature craft ideas with step-by-step instructions and examples of finished products that students and staff can make during the holidays.
8. Historical Holidays: Provide an educational glimpse into how holidays were celebrated in different historical periods or how particular holiday traditions originated.
9. Festive Learning: For classrooms specifically, create themed areas on the bulletin board for various subjects—Math problems related to holiday shopping lists, word searches with holiday vocabulary, science facts about winter weather phenomena.
10. Thank You Heroes Board: Acknowledge and thank community heroes such as healthcare workers, first responders, teachers, and service members with photos, notes of thanks, and decorative elements reflecting appreciation for their service during the holiday season.
Creating a thematic bulletin board for the holidays can be an engaging way to brighten up any space and spread cheer. With these ideas as inspiration, you can craft an eye-catching and heartwarming display that celebrates the season’s spirit!

Fun and Easy Crafts for Kids: Pencil Shaving Goodness

Crafting with children can be a fun and educational experience that stimulates creativity and fine motor skills. One of the simplest yet surprisingly delightful activities involves something as common as pencil shavings. Here’s a fun craft project that turns these colorful byproducts into art.

Materials Needed:

– Pencil sharpeners

– Colored pencils

– Plain white paper or construction paper

– Glue

– A pair of scissors (optional)

– Clear contact paper (optional)

Instructions:

1. Start by gathering a good amount of pencil shavings. You can plan ahead and save these from when your kids do their homework, or you can have a sharpening session to procure a variety of colors.

2. Lay out a piece of paper for your craft’s backdrop.

3. Encourage your child to think about what they would like to make. Pencil shaving creations can range from simple abstract designs to more intricate images like flowers or the sun.

4. Once an idea is in place, start arranging the shavings on the paper without glue to create a rough draft of the image.

5. After your child is happy with their design, help them apply glue on top of where each shaving will lay. Then carefully place the shavings onto the glue spots.

6. Let the artwork dry completely before moving it.

For longevity:

– After drying, you might want to gently press down each shaving so it’s entirely flat against the paper.

– To preserve the craft, cover the artwork with clear contact paper, which also gives it a nice shine and prevents shavings from falling off.

Pencil shaving crafts allow kids to explore their imagination and can be made into cards, framed art pieces, or even bookmarks if you cut them into strips and laminate them. It’s also an exceptional way to teach children about reusing and recycling materials in creative ways while developing an appreciation for unconventional art materials that are readily available at home. Enjoy this eco-friendly craft with your little ones for an afternoon filled with creativity and learning!

Thanksgiving Bulletin Board Ideas

Thanksgiving is a time for giving thanks and celebrating the bounty of the autumn harvest. In schools, offices, and community centers, a Thanksgiving bulletin board can be an excellent way to foster a spirit of gratitude and togetherness. Here are some ideas for creating an engaging Thanksgiving bulletin board:
1. Tree of Thankfulness: Designate a section of the board for a large tree made from brown craft paper, with branches reaching out across the space. Provide pre-cut leaves in autumn hues like orange, yellow, and red, and invite students or staff to write things they are thankful for on the leaves before pinning them to the branches.
2. Pilgrim’s Progress Timeline: Create an educational timeline detailing the key events in the history of Thanksgiving. Use images of the Mayflower, Pilgrims, and Native Americans to depict historical moments leading up to the first Thanksgiving feast.
3. Cornucopia of Cultures: Build a large cornucopia out of craft materials and fill it with representations of different foods from cultures around the world. This display can highlight diversity and inclusiveness during a holiday primarily associated with American history.
4. Autumn Haiku Display: Encourage creativity by having students or colleagues write haikus about what Thanksgiving means to them. Each haiku can be written on a leaf-shaped paper and added around the border of the bulletin board.
5. Thanksgiving Recipe Swap: Dedicate part of your board for participants to share their favorite Thanksgiving recipes. Provide index cards or recipe card templates where participants can write down their recipes for others to take home.
6. Gratitude Photo Collage: Turn your bulletin board into a photo wall where students or staff can bring in pictures that represent things they are grateful for. This could create a powerful visual display of the many blessings people feel especially thankful for during this season.
7. Historical Harvest: Explore agricultural history by showing different methods of farming and food collection used by early settlers versus modern times—use side-by-side imagery to illustrate how technology has advanced agriculture.
8. Interactive Turkey Feathers: Design a large turkey with detachable feathers on your bulletin board; leave markers or sticky notes beside it encouraging people to write what they are thankful for on a feather and attach it to the turkey.
9. Seasonal Poetry Corner: Dedicate an area for students or colleagues to post original poems that reflect on themes of thanksgiving, family gatherings, autumn scenery, etc.
10. Harvest Helpers Volunteer Board: Encourage community service by posting volunteer opportunities related to Thanksgiving — such as local food drives or soup kitchen staffing needs — where people can sign up directly on your bulletin board.
When crafting your Thanksgiving bulletin board, remember that its purpose is not only decorative but also inspirational and educational. By choosing one (or combining several) of these ideas, you’ll be able to create a thoughtful space that reflects the essence of gratitude and community inherent in the holiday season.

10 Visual Brainteasers Kids Will Love

Visual brainteasers are a fantastic way for kids to engage with problem-solving in a fun and interactive way. Not only do these activities stimulate their brains, but they also offer a unique platform for parents and educators to connect with children through play. Here are ten visual brainteasers that kids will absolutely love:
1. Find the Panda
Among a group of sketched or cartoon-like images of snowmen, there’s a single panda waiting to be found. This challenge is delightful and tests the ability to spot anomalies within patterns.
2. The Counting Challenge
A picture full of various objects where kids have to count how many of a specific item they can find—for instance, “Count all the red apples in the tree.” It exercises their attention to detail and counting skills.
3. Spot the Difference
Two seemingly identical pictures are placed side-by-side, but several subtle differences exist between them. Children must identify what’s changed, sharpening their observation and concentration abilities.
4. The Color Quiz
A sequence of colored words spells out different colors than the word itself (e.g., “RED” written in blue ink). The task is to say the color of the word and not what the word reads as, challenging young minds on cognitive flexibility.
5. Hidden Object Scenes
Intricate images that contain hidden items blend into the scene’s background for keen eyes to discover—perfect for promoting focus and patience.
6. Mystery Shadow Game
Various objects are presented alongside multiple shadows they could cast, but only one is correct for each object. Children will enjoy figuring out which shadow matches, using their spatial awareness and reasoning skills.
7. The Impossible Object
Illustrations like the Penrose triangle or Escher’s never-ending staircase intrigue kids as they try to wrap their heads around these impossible structures.
8. What’s Missing?
Show an image with several items, then show almost identical image after some time wherein one item is missing. Kids will need to remember what was there before and identify what has disappeared.
9. The Maze Challenge
Simple or complex maze designs can captivate children for hours as they navigate paths from start to finish; it’s great for developing planning and foresight.
10. Memory Grid Test
A grid with different symbols or pictures is shown for a short period, after which kids must recall and replicate as much of the grid as they can remember; this test strengthens memory retention.
These brainteasers not only entertain but equip children with essential cognitive skills that contribute to their overall developmental process while keeping learning enjoyable and challenging.

Make Your Anchor Charts POP!

Anchor charts are essential tools in the classroom, helping to visualize learning and make concepts memorable. These large, handwritten posters can be powerful references for students, but with a little creativity, they can transform from mere classroom decorations into engaging, interactive learning aids. To make your anchor charts truly pop, here’s what you can do:
1. Use Color Wisely: Color draws attention and can help organize information. Utilize different colors to highlight key terms, show contrasts, or categorize ideas. But remember, too many colors can be overwhelming—choose a palette and stick to it for consistency.
2. Embrace Visuals: Incorporate drawings, icons, or even real objects to create a visual connection with the content. Visual aids can make abstract ideas more concrete and easier to grasp.
3. Make It Interactive: Transform your anchor chart into a living document by using sticky notes for comments or questions. This allows the chart to evolve with the learning process and encourages student participation.
4. Keep It Legible: Despite your artistic touches, ensure that your handwriting is clear and large enough to be read from anywhere in the room. The effectiveness of an anchor chart hinges on its readability.
5. Organize Thoughtfully: How you arrange information can impact comprehension. Use flowcharts, bullets, or numbered lists to structure ideas logically.
6. Invoke Themes: Integrate themes related to your curriculum or current lessons to create a cohesive learning experience.
7. Encourage Personal Connection: Let students add their insights or examples to the chart. This promotes ownership of their learning experience.
8. Refresh Regularly: Keep your charts dynamic by updating them often with new information so they remain relevant and engaging.
By implementing these strategies, anchor charts will not only pop visually but also become pivotal assets in fostering an interactive and immersive learning environment.

Fun and Easy Crafts for Kids | Pencil Shaving Goodness

Pencil shavings often go unnoticed or are swept away, but these colorful remnants from sharpening our favorite pencils can be transformed into shimmery scales on a majestic fish or layered for a dynamic 3D art piece. Engaging children in fun and easy crafts is not just a pastime; it’s a way to enhance their creativity, motor skills, and appreciation for simple materials around them.

One of the most delightful and accessible projects is creating pencil shaving art. It’s an excellent way for children to upcycle something they might otherwise discard. All you need to get started is a collection of pencil shavings, some paper, and glue.

Pencil Shaving Fish

Create an underwater scene by choosing brightly colored pencil shavings to mimic the scales on fish. Have your child sketch out the shape of a fish on paper — it can be as realistic or fantastical as they wish. Then, using school glue, attach the shavings starting from the tail and overlapping them towards the head to create a scale effect. Once dry, add details like eyes and fins with markers or cut paper.

3D Rainbow

Bring a touch of color to any room with a 3D rainbow craft. On a large piece of paper or cardboard, draw an arc for each color band of the rainbow. Start gluing red shavings on the outermost arc and continue with orange, yellow, green, blue, indigo, and violet until you have filled in each one. The result is a textured rainbow that pops off the page.

Abstract Pencil Shaving Trees

For nature-inspired art, pencil shavings make perfect leaves for trees. Draw or trace a tree trunk onto paper, then let your kids unleash their inner artist by gluing different shades of green shavings for leaves. They can even create seasonal trees using autumnal colors.

What makes this craft idea even more exciting is its endless possibilities; children are only limited by their imagination! Besides being budget-friendly and quick to set up, these activities also help in developing fine motor control as kids handle delicate materials like pencil shavings.

Remember always to supervise younger children when handling sharp pencils and small objects like pencil shavings. And don’t forget to have fun with this simple yet imaginative crafts project that turns ordinary pencil shavings into extraordinary pieces of art!

Funky Pumpkin Halloween Craft Template

As October rolls in and the leaves start to change color, the excitement for Halloween grows. It’s the perfect season for crafts, and what could be more quintessential than creating your own funky pumpkin? This guide provides you with a unique craft template that will stand out from the classic jack-o’-lanterns and add an extra flair to your spooky decor.

Materials:

– Thick paper or cardstock

– Scissors

– Pencil

– Colored markers or paint

– Decorative materials (glitter, stickers, sequins etc.)

– Glue or double-sided tape

Instructions:

1. Print or Draw the Pumpkin Shape: Start by printing the pumpkin template on thick paper or cardstock. If you are drawing your own pumpkin shape, keep it simple with a round base and a little stem at the top.

2. Cut out the Shape: Use scissors to carefully cut along the outlines of the pumpkin shape.

3. Decorative Face Cut-Outs: For an interesting twist, cut out shapes for the eyes, nose, and mouth in styles that deviate from traditional triangles and scary features. Think heart-shaped eyes or a crescent moon smile!

4. Color Your Pumpkin: This is where you can let your creativity flow. Use colored markers, crayons, or paint to give your pumpkin character. Funky patterns like polka dots, stripes, or even leopard prints can give your pumpkin a modern vibe.

5. Add Decorative Elements: Once the paint or markers have dried, amplify your pumpkin’s funkiness with glitter, stickers, sequins, and any other craft supplies. You can outline the eyes, nose, and mouth cut-outs with glitter glue for extra pizzazz.

6. Final Touches: For a three-dimensional effect, fold some small strips of paper into accordion shapes and glue them on as arms or legs.

Your funky pumpkin craft is complete! You can use it as a standalone decoration piece or attach a string at the back to hang it up. With each unique creation adding personality to your Halloween festivities, these funky pumpkins will be sure to draw attention and compliments from trick-or-treaters and guests alike.

Remember that this is just a template—you are encouraged to twist it however you see fit to express your personal style. Whether it’s as part of a crafting party with kids or just a fun DIY project on a cozy fall afternoon, creating these funky pumpkins promises tons of fun and an output as unique as you are!