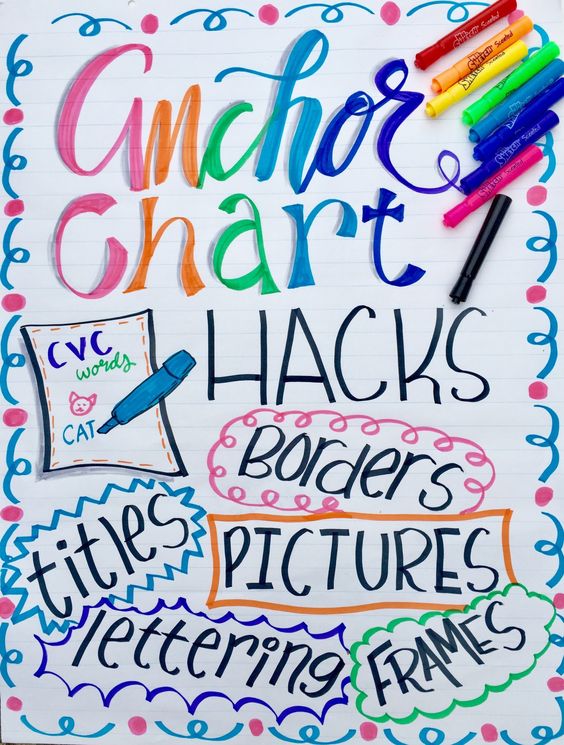
Learning Strategies, Tactics, and Methods

18 Nonfiction Anchor Charts for the Classroom

Introduction

Nonfiction anchor charts are essential tools for effectively teaching students how to comprehend, analyze, and engage with nonfiction texts. These visual aids help break down complex ideas into simple, easy-to-understand concepts that students can use as a reference when discussing or writing about nonfiction. In this article, we explore 18 nonfiction anchor charts that can be used throughout your classroom to promote deeper understanding and engagement with nonfiction texts.

1. Text Features Chart

This chart showcases the various features that students should be looking for in nonfiction texts like headings, subheadings, captions, and sidebars. This visual guide helps students understand how to navigate through the pages and find important information quickly.

2. Nonfiction vs. Fiction

This chart is designed to help students differentiate between nonfiction and fiction texts by listing their unique characteristics side by side.

3. Main Idea and Supporting Details

A chart that demonstrates the relationship between a text’s main idea and its supporting details to help students practicing identifying these key components in the text.

4. Fact or Opinion

This anchor chart offers clear examples to help students distinguish between fact and opinion in nonfiction texts.

5. KWL Chart (Know-Want-Learn)

An important tool for activating background knowledge before reading, the KWL chart prompts students to consider what they already know about the topic, what they hope to learn, and encourages them to reflect on what they learned once finishing the text.

6. Author’s Purpose

A guide for identifying an author’s purpose in a text – whether it is to inform, entertain, persuade, or express an opinion.

7. Cause and Effect Relationships

A demonstration of how certain events lead to specific outcomes will teach your students how to track how information flows within a nonfiction text.

8. Compare and Contrast

This chart provides a framework for comparing and contrasting two different topics and guides students in identifying similarities and differences.

9. 5 W’s & H (Who, What, When, Where, Why, How)

A reference guide for finding answers to crucial questions within a nonfiction text.

10. Making Inferences

This anchor chart assists students in interpreting information from the text that isn’t explicitly stated to make educated guesses about the topic.

11. Sequence of Events

A chart teaching students to identify the order of events or steps in nonfiction texts.

12. Reading Response Chart

A prompt for students to reflect on their reading experiences and develop connections between the text and themselves.

13. Text Structure

This visual aid teaches the various structures of nonfiction texts and helps prepare students to understand and analyze them more effectively.

14. Vocabulary Strategy Guide

A helpful chart listing different strategies to find the meaning of unknown words in a nonfiction text.

15. Summarizing

This anchor chart helps students practice condensing large amounts of information into concise summaries.

16. Note-taking Strategies

An essential tool for teaching the importance of taking effective notes while reading nonfiction texts and reviewing them later for deeper understanding.

17. Primary vs. Secondary Sources

A visual guide distinguishing between primary sources (original documents or firsthand accounts) and secondary sources (interpretations or analyses of primary material).

18. Making Connections

An anchor chart designed to help students establish connections between text and their personal experiences, other texts, or the world around them.

Conclusion

Nonfiction anchor charts serve as valuable tools when teaching students to successfully navigate, analyze, and engage with informational texts. Incorporate these 18 ideas into your lesson plans to promote increased nonfiction comprehension and critical thinking skills among your students.

What are Learning Styles, and How Should Teachers Use Them?

Introduction

Learning styles are an essential aspect of education that impact both student performance and teacher effectiveness. Teachers must recognize and understand these learning styles to create a conducive learning environment for their students. This article explores what learning styles are, their importance, and how teachers can use them to enhance student experiences.

What are Learning Styles?

Learning styles refer to the various ways individuals process and retain information. They describe a person’s preferred method of gathering, interpreting, organizing, and thinking about new information. Various models categorize learning styles differently, but some of the most common include:

1. Visual Learning: Visual learners process information effectively when presented in charts, diagrams, or other visual aids.

2. Auditory Learning: Auditory learners absorb information best when it is spoken or heard.

3. Kinesthetic Learning: Kinesthetic learners prefer hands-on experiences or physical activities to understand new concepts.

4. Reading/Writing Learning: Reading/writing learners effectively gather information through reading text or writing about the material they learn.

Why are Learning Styles Important?

Understanding different learning styles has several benefits for both students and teachers:

1. Enhances Students’ Understanding: A tailored approach to teaching can help clarify complex topics and improve comprehension by addressing each student’s preferred learning style.

2. Encourages Active Participation: Students feel more engaged when lessons match their preferred learning style, promoting participation in classroom discussions and activities.

3. Boosts Confidence: When students experience success through tailored teaching methods, their confidence and motivation increase.

4. Personalized Education Experience: Customizing instruction according to learning styles ensures that no student is left behind due to a one-size-fits-all approach.

How Should Teachers Use Learning Styles?

Teachers can implement various strategies based on understanding their students’ learning styles:

1. Offer Diverse Instructional Methods: Teachers should incorporate visual aids, auditory explanations, hands-on activities, and reading/writing assignments in their lessons to appeal to a range of preferences.

2. Cater to Multiple Learning Styles Simultaneously: Presenting material in diverse formats at once can engage multiple learning styles and foster a deeper understanding.

3. Foster Collaborative Learning: Teachers can encourage students with different learning styles to work together on projects or assignments, promoting active engagement and shared understanding.

4. Adapt Assessments: Varying assessment formats, such as oral presentations, written essays, or practical tasks, enables students to perform at their best based on their preferences.

5. Maintain Flexibility: Educators must be willing to adjust teaching methods based on student feedback and ongoing assessments of class progress.

Conclusion

Teachers play a vital role in facilitating the growth of every student by recognizing and adapting their teaching style to meet each student’s unique needs. Understanding learning styles and employing strategies that cater to them can have a profound impact on student success, resulting in a more inclusive, engaging, and effective classroom experience for all involved.

Online Activity: Women’s History Scavenger Hunt

Introduction:

In celebration of Women’s History Month, join us for a fun and educational online activity – Women’s History Scavenger Hunt! This event will not only be an engaging way to learn about the incredible achievements of women throughout history but also a chance to connect with like-minded individuals who share the same passion for gender equality and empowerment.

About the Scavenger Hunt:

The Women’s History Scavenger Hunt is designed to bring together people from around the globe to explore and uncover the inspiring stories of women who have made a significant impact on society. Participants will embark on a virtual quest, navigating through various websites and resources, searching for clues and facts about trailblazing women from various walks of life.

How It Works:

1. Registration: To participate in the Women’s History Scavenger Hunt, sign up through our website or social media platforms. Once registered, participants will receive an email containing the guidelines, starting point, and necessary resources for the hunt.

2. Teams or Solo Play: Participants can choose whether they want to embark on this virtual adventure alone or form a team with friends or family members.

3. Clues & Challenges: Each challenge in the scavenger hunt will come with hints and clues that lead participants to different websites or resources where they can discover fascinating stories of extraordinary women.

4. Time Limit: The scavenger hunt will have a time limit for each challenge. Participants must submit their answers within the specified period to earn points.

5. Leaderboard & Prizes: Throughout the event, participants will be able to track their progress and compare their ranks with other players on a live leaderboard. The top three scorers at the end of the scavenger hunt will receive exciting prizes.

Benefits of Participating:

– Learn about inspiring women from history who have demonstrated courage, determination, and resilience.

– Improve research skills by navigating through various online resources.

– Enhance teamwork and communication skills (if participating as a team).

– Connect with like-minded individuals who are passionate about women’s empowerment and history.

– Compete for exciting rewards and recognition.

Conclusion:

Don’t miss out on this fantastic opportunity to explore the remarkable achievements of trailblazing women in a fun and interactive way. The Women’s History Scavenger Hunt promises an unforgettable experience filled with learning, camaraderie, and friendly competition. Register today and get ready to embark on an exhilarating virtual adventure that will leave you with a deeper appreciation for the countless contributions of women across time and space.

How Music Primes the Brain for Learning

Music has been an integral part of human culture for centuries, and research has shown that it can profoundly affect the brain. In addition, studies have found that music can prime the brain for learning, making it an effective tool for students, teachers, and lifelong learners.

Based on a study, music has been shown to directly impact mood and motivation. For example, listening to upbeat music can boost energy levels and increase learning motivation, while slower and more calming music can help reduce stress and anxiety. Additionally, certain types of music, such as classical music, can help improve attention and focus, making it easier for the brain to process new information. This can be especially useful for students struggling to pay attention in class or when studying.

Aside from these, research has shown that music can help improve memory retention by strengthening neural connections in the brain. Listening to music before studying or taking a test can help prime the brain for learning and make it easier to recall information later. It also shows a positive impact on creativity and problem-solving. Listening to music can help spark new ideas and encourage more abstract thinking, making it a great tool for students and professionals in creative fields.

Moreover, music has a direct impact on emotional intelligence and empathy. Listening to music can help develop emotional intelligence by exposing the brain to a range of emotions, helping to build emotional literacy.

In conclusion, music can prime the brain for learning in several ways. Whether a student, teacher, or lifelong learner, incorporating music into your daily routine can positively impact mood, attention, memory, creativity, and emotional intelligence. So, next time you want to boost your brain power, try putting on some tunes and see what happens!

16 Ways to Teach Students to Raise Their Hand to Ask a Question

Are you looking for ways to teach students to raise their hand to ask a question? If so, keep reading.

1. Provide mobility to be regularly near the learner when they display appropriate attention-seeking behaviors (e.g., hand-raising).

2. Make sure the learner knows when it is acceptable to interrupt others (e.g., in an emergency).

3. Prior to beginning a learning experience, make sure the learner knows the rules (e.g., wait quietly until the teacher can help, work quietly at your desk, etc.).

4. Get the learner to raise their hand to question any directions, explanations, and instructions they do not understand.

5. Select a peer to model raising their hand when appropriate for the learner.

6. Connect with parents to disseminate information about the learner’s progress. The parents may reinforce the learner at home for raising their hand when appropriate at school.

7. Draft an agreement with the learner stipulating what behavior is required (e.g., raising their hand for teacher assistance) and which reinforcement will be implemented when the agreement has been met.

8. Create classroom rules: • Complete every assignment. • Complete assignments quietly. • Request assistance when needed. • Remain in your seat. • Finish tasks. • Meet task expectations. Examine rules often. Praise students for following the rules.

9. Praise the learner for raising their hand when appropriate based on the number of times the learner can be successful. As the learner shows success, slowly increase the number of times required for reinforcement.

10. Converse with the learner to explain (a) what the learner is doing wrong (e.g., talking out, engaging in a behavior without raising their hand to get permission, etc.) and (b) what the learner should be doing (e.g., raising their hand for permission to speak, or move about the room, etc.).

11. Make sure that reinforcement is not provided for unacceptable behavior(e.g., paying attention to the learner only when they blurt out answers without being called on).

12. Praise the learner for raising their hand when appropriate: (a) give the learner a concrete reward (e.g., privileges such as leading the line, handing out learning materials, 10 minutes of free time, etc.) or (b) give the learner an informal reward (e.g., praise, handshake, smile, etc.).

13. Consider using a classroom management app. Click here to view a list of apps that we recommend.

14. Consider using an adaptive behavior management app. Click here to view a list of apps that we recommend.

15. Consider using Alexa to help the student learn to behave appropriately. Click here to read an article that we wrote on the subject.

16. Click here to learn about six bonus strategies for challenging problem behaviors and mastering classroom management.

What are Edges?

What are edges?

An edge is where two faces on a shape come together. In 2D shapes, edges are the lines between each vertex. 3D shapes, they’re the lines that separate each face. You can see the edges of things in real life all the time. Take buildings, for example; you can walk around the edge of a building to count how many it’s got

Edges on 2D shapes

On 2D polygons, edges are the line segment on the boundary, joining one vertex (corner point) to another.

The fantastic thing about the edges of a 2D shape is that we can work out the perimeter of the figure. It is easy and can be done quickly. All you have to do is measure the shape’s sides and add them together. It gives you the perimeter of the figure. Told you it was easy!

Edges on 3D shapes

In 3D shapes, the edges separate the different faces of the figure.

Working out a 3D shape’s perimeter is a different process. First, you have to measure all the edges individually. For example, a cube would have 12 edges. Then you multiply the length of each edge by how many edges. Let’s say each cube’s edge is 12 cm in this case. That means we’d have to do 12 x 12, which equals 144 cm.

How many edges do shapes have?

Here is a list of shapes and how many edges they have. Before you read the answers, try guessing how many edges each figure has.

  • Semi-circle: 2 (one straight and one curved)
  • Circle: 0
  • Triangle: 3
  • Quadrilaterals: 4
  • Pentagon: 5
  • Hexagon: 6
  • Heptagon: 7
  • Octagon: 8
  • Nonagon: 9
  • Decagon: 10

What about 3D shapes? How many edges do they have? Here’s another list of how many edges 3D shapes have.

  • Hemisphere: 1
  • Cone: 1
  • Tetrahedron: 6
  • Square-based pyramid: 8
  • Cylinder: 2
  • Triangular prism: 9
  • Cube: 12
  • Cuboid: 12
  • Pentagonal prism: 15
  • Hexagonal prism: 18

Where can I find edges in real life?

Edges can be found everywhere in real life. Here’s a quick list of some examples. First, let’s look at some everyday objects and what 3D shape they look like. Then you can count the edges to find out how many they have.

  • Microwave: A microwave is cuboid shaped. It might have sharp or curved edges depending on what the microwave could be in your house. Even if the edges are curved, you can still count them. If you count the edges of a microwave, it should have 12, like a cuboid.
  • Light switch: Light switches are usually square. See if you can spot some light switches in your house. Are all the edges the same length? Make sure not to mess with the light switch; instead, count the edges. It should have four edges, like a square.
  • Cups: Take a look at some cups in your house. It doesn’t matter if they’re mugs or glasses as long as they’re cylinder-shaped. They should have two edges, just like a cylinder. The only difference is that they have a hold through them to hold liquids.
  • Dice: They’re perfect for this activity if you’ve got some at home. Count all the edges on them. They should have 12, just like a cube. It is because dice are meant to be as close to an exact cube as possible. So it ensures an equal chance of any number coming up when you roll it.


What is a Verb?


A verb is a “doing” or “action” word. These are particularly important for your kids’ grammar lessons since you cannot have a complete sentence without a verb. After all, verbs can describe an action that’s doing something. When learning grammar rules, children are often taught that verbs are “doing” words, meaning they signify the part of the sentence which explains the action taking place.

There are many verb meanings and uses, for example, the word jumping in the sentence “the rabbit was jumping in the field.”


Verb facts for kids

Did you know? Every language in the world has verbs, but they are not used similarly.

In English, verbs are the only type of word that changes to show past or present tense.

There are three types of verbs: action, linking, and auxiliary.

What is a verb? Give five examples.

You can check out this set of five example sentences to see verbs in action. We have highlighted the verbs in bold to make them super simple to spot!

Ian likes to play the guitar.

Samantha made a mess of her bedroom.

James likes to dance every Wednesday.

Dad went to buy some milk.

Mark devours his dinner.

What are the main types of verbs?

Finite verbs:

A finite verb can be identified if:

  • It is the only verb in a sentence.
  • It is the central element of the main clause.

Finite verbs can appear in the present or past tense. Examples of finite verbs include:

  • James does the washing every day (present tense).
  • Even Dave did the washing yesterday (past tense).
  • Do the washing, Josie! (imperative).

Non-finite verbs:

These are verbs that do not show tense. There are three types of non-finite verbs:

  1. Gerunds – running, swimming, etc.
  2. Infinitives – to run, to swim, etc.

Examples of non-finite verbs include:

  • I have done the washing (combined with the finite verb have).
  • I will do the washing (combined with the finite verb will).
  • I want to do the washing! (combined with the finite verb want).

Action verbs:

Action verbs are one of the most common forms of verbs that you will think of. However, they are also dynamic verbs and action-packed words to express a physical action performed by the subject, like singing or dancing.

Examples of action verbs include:

  • The cheetah chases gazelles across a plain.
  • She kicked the ball into the net and scored the game-winning goal.

Linking verbs:

As the name might suggest, linking verbs serve the purpose of relating a subject to information about the topic. Instead of expressing an action, linking verbs connect the subject of the sentence to a subject complement that describes what it is like or describes its state of being (this could be a noun or an adjective). The verb ‘to be’ is the most common linking verb.

Examples of linking verbs include:

  • Peter’s room was a mess.
  • She looked happy because it was her birthday.

Auxiliary/helping verbs:

Auxiliary verbs form the tense, mood, and voice of other verbs. They are also commonly known as “helping verbs” as they are said to “help” the main verb which comes after them and establish the details of mood, tense, and voice in a sentence.

In summary, they can change the verb meaning of the following verb. It’s important to note that auxiliaries never occur alone in a sentence. If we remove the primary verb from a sentence, leaving only the auxiliary, the sentence will not make sense.

There are five types of auxiliary verbs, they are:

  1. Passive be – This type is used to form passive constructions, e.g.

The film was made in Hollywood.

It has a corresponding present form:

The film is made in Hollywood.

  1. Progressive be – This type has a clue in its name; the progressive expresses action in progress:

The older man is writing a poem.

It also has a past form:

The older man is writing a poem.

  1. Perfective have – The perfective auxiliary expresses an action that happened in the past but is still currently relevant.

She has broken her leg.

  1. Modal – Modal auxiliaries express permission, ability, obligation, or prediction. Modals include can/could, may/might, shall/should, will/would, and must:
  • You can have some cake if you like.
  • She may arrive early.
  • Marie will be a singer someday.
  • I really should leave now.
  • We must get there by half past.
  1. Dummy Do – This subclass contains only the verb do. It has several functions and verb meanings.

To form questions:

Do you like chocolate?

To form negative statements:

I do not like chocolate.

Giving orders:

Do not eat the chocolate.

For emphasis:

I do like chocolate.

We can use the acronym NICE to distinguish auxiliaries from main verbs. NICE stands for the following properties of auxiliaries:

Negation

Auxiliaries take not or n’t to form the negative, e.g., cannot, don’t, wouldn’t

Inversion

Auxiliaries invert with whatever precedes them when we want to make the sentence a question, e.g.

[I will] see you soon vs. [Will I] see you soon?

Code

Auxiliaries may look “stranded” where the main verb has been omitted:

John never dances, but Selena does

Emphasis

Auxiliaries can be used for emphasis:

I do like chocolate

Some more examples of auxiliary/helping verbs include:

  • I have been walking to school.
  • She is playing basketball.
  • They have been learning about verbs.
  • We have learned a lot today.

Can you work out what each type is?

Imperative verb:

An imperative verb exists in a grammatical phrase without a subject noun or pronoun. As imperative verbs appear in commands, these are usually concise and snappy sentences which are acted upon immediately; for example, they are often seen in instructional texts.

Examples of imperative verbs include:

  1. Stop what you are doing.
  2. Bake at 180 degrees for 20 minutes.
  3. They told me to wash the dishes.

Powerful verbs:

Powerful verbs are far more exciting than the regular verbs we tend to use most often. For example, verbs like ‘whisper’ and ‘demand’ are much more interesting than ‘say.’ They also do a better job of describing the action. If you’d like, you can read on to learn more about powerful verbs and how you can encourage your class or child to use them in their writing.

So, what is a powerful verb? Well, a robust verb is a verb that gives a lot more descriptive information within a context, which can make a reader more engaged.

A powerful verb example would be the word “run” being replaced with “sprint.” If you were writing a sports report, for instance, this would give the reader a lot more information about the act being performed. In addition, “sprint” creates a greater sense of urgency than its counterpart, “run.” So, the word “run” explains the action, but “sprint” further demonstrates the step by describing how the activity is being carried out.

Another powerful verb example would be using the word “whisper” instead of “say.” In specific contexts, using the word “whisper” might create a sense of secrecy, enticing the reader to continue with the story.

Just in case you’re looking for more powerful verb examples to teach your class or child, then here’s a short list of verbs and their powerful equivalents to get you started:

Regular Verb Powerful Verb Examples

Regular Verb

Powerful Verb Examples

To eat

To scoff, to devour, to wolf (down)

To drink

To gulp, to sip, to quaff

To sleep

To nap, to doze, to snooze

To think

To believe, to ruminate, to anticipate

To see

To glimpse, to spot, to identify

To want

To fancy, to desire, to long for

To find

To discover, to realize, to notice

Top of Form