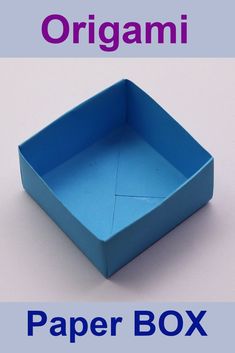
Origami, the traditional Japanese art of paper folding, has been a beloved activity for generations, providing a creative and accessible way for people to express their artistry. One of the simplest and most delightful projects to start with is the origami box. Not only is it easy to make, but it’s also incredibly fun and perfect for kids who are just getting into this paper craft. This article will guide you through the steps to create your very own origami box, which can be used to store treasures or give as a charming gift.
Materials Needed
– A square piece of paper (any size will work, but 6×6 inches is a good size for beginners)
– Optional: Decorations like stickers, markers, or glitter
Steps
1.Start with a Square: Take your square piece of paper and place it color side down on a flat surface.
2.Fold in Half: Fold the paper in half diagonally to form a triangle and create a crease. Unfold it back into a square.
3.Fold in Half Again: Fold the paper in half diagonally in the opposite direction and crease it well. Unfold it back into a square.
4.Create Guidelines: Flip the paper over so that the colored side is facing up. Fold each corner into the center of the paper, using the creases made from previous folds as guidelines.
5.The Sides: Take one corner and fold it to the center again. Do this for each corner.
6.Forming the Edges: Unfold two opposite corners back into their squared position.
7.Making the Sides Stand: On one unfolded side, lift the paper from the bottom and fold it upwards, creasing along what was previously the outer edges of those folded corners, forming one side of your box.
8.Securing The Box: Do this on the other unfolded side as well so you have two flaps standing up.
9.Folding Corner Flaps Inward: There are small triangle flaps sticking out on each of those sides; fold them inwards and press hard to create a crease.
10.Final Structure: Now lift those sides with folded triangle flaps upwards; they become two other sides of your box.
11.Locking The Structure: Tuck in these last two flaps underneath the folded edges from step 7—it should fit snugly to hold everything in place.
12.Finishing Touches: You should now have a sturdy origami box! If you wish, decorate it however you like using markers or stickers.
And that’s it! You’ve successfully created an easy and fun origami box suitable for kids—or even kids at heart!
This origami box project not only encourages creativity among young children but also helps develop their fine motor skills and attention to detail. They can use their boxes to hold small toys or as decorative items in their room. With practice and variations in folding techniques or paper designs, kids can come up with unique boxes all on their own, turning this simple exercise into hours of fun!
Remember that origami is an art of patience and precision; if your first box doesn’t come out perfect, don’t be discouraged! Keep practicing your folds and encouraging your kids’ efforts because each attempt will get better than the last.