Introduction
Exploring the differences between living and non-living things is a fundamental concept in science education. Engaging students through hands-on activities can greatly enhance their understanding of these differences and spark curiosity about the world. This article lists 20 exciting and interactive living vs non-living science activities that can be easily implemented in a classroom or homeschool setting.
1. Nature Scavenger Hunt: Have students explore their surroundings and collect examples of living and non-living things, then classify them accordingly.
2. Plant Observation: Provide each student with a potted plant, and have them observe its growth and care for it over several weeks, monitoring its progress as a living thing.
3. Microscopic Observation: Use microscopes to examine samples of plants, water, and soil to observe living organisms in their natural habitat.
4. Terrarium Building: Students can create mini-ecosystems using both living and non-living components, fostering an understanding of how they interact.
5. Aquatic Exploration: Have students investigate a pond or aquarium environment to identify living organisms versus non-living objects.
6. Decomposition Experiment: Set up controlled environments with various objects (such as food, paper, plastic) and observe how long it takes each one to decompose as an example of a living versus non-living process.
7. Baking Soda Volcano: Demonstrate the difference between organic life processes (like respiration) and non-living chemical reactions (such as the classic vinegar-baking soda reaction).
8. Seed Germination Comparison: Provide seeds pre-soaked in water against seeds that haven’t been soaked for students to observe which ones germinate faster, demonstrating how water is essential for life.
9. Artificial vs Natural Ecosystems: Compare real-world examples of artificial ecosystems (e.g., zoos) with natural ones (e.g., a forest) and discuss the influence of humans on living organisms within these environments.
10. Breathing Experiment: Students hold their breath and observe how the body needs a continuous supply of oxygen to function, illustrating the difference between living and non-living matter.
11. Play-Doh Habitats: Have students create habitats using both living components (such as plants and insects) and non-living elements (like rocks and soil) to represent various ecosystems.
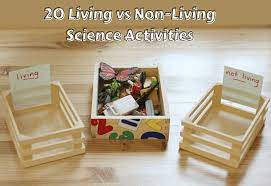
12. Living vs Non-Living Sorting Game: Using photographs or physical objects, challenge students to categorize items into groups of living and non-living things.
13. Fossil Exploration: Study fossils to explore evidence of past living organisms and discuss how their remains have changed over time.
14. Rescue the Worms: Have students retrieve worms from a mixture of soil, leaves, and rocks while discussing the physical characteristics that differentiate living from non-living things.
15. Habitat Construction: Students work in teams to construct habitats designed to support specific living organisms, considering appropriate resources for their survival.
16. Create a Food Web: Use drawings or craft materials to build a food web, demonstrating the interconnectedness of different living organisms.
17. Photosynthesis Experiment: Design an experiment showcasing how plants transform sunlight into energy (a process unique to living things).
18. Pollution’s Impact: Explore the detrimental effects of pollution on living organisms by observing polluted environments and discussing potential consequences.
19. Observing Life Cycles: Study the life cycles of various organisms (such as insects, amphibians, or plants), emphasizing the stages that characterize all living things.
20. The Importance of Water: Conduct experiments highlighting the role water plays in supporting life, such as examining drought-tolerant plants or exploring aquatic ecosystems.