Art Education

The Worry Waterfall – Anxiety Management Poster

In our fast-paced world, anxiety waits around every corner. The relentless pressure to succeed, to compete, and to navigate an ever-changing social and professional landscape has given rise to a collective breathlessness. It’s as if we are all standing under a waterfall of worries, struggling to keep our heads above water.

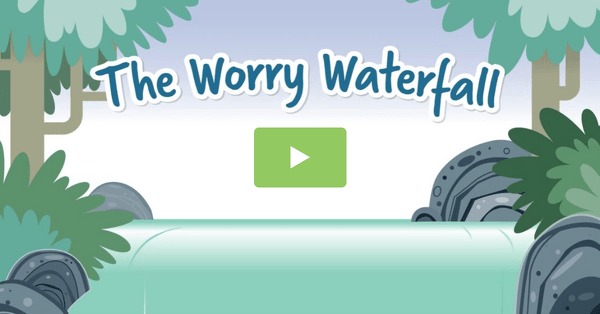
Enter the “Worry Waterfall” – an innovative anxiety management poster that provides not just a visual but also an actionable guide to managing those persistent thoughts that can overwhelm us. This poster isn’t merely decorative; it’s designed to be a functional tool in the battle against anxiety. It invites us to visualize our worries as water droplets cascading down a cliff face, pooling at the bottom before flowing away.

The beauty of the Worry Waterfall poster lies in its simplicity. It’s based on proven psychological principles and works by walking viewers through a series of steps that mimic cognitive-behavioral therapy techniques. Think of it as a map guiding users through rough emotional terrain.

At the top of the waterfall, users input their current worry or stressor. Beneath this, the poster prompts them to challenge the validity of this concern—is it based on fact or assumption? What’s the worst that could happen, and how likely is it? As one follows these prompts downwards, like water cascading over rocks, there’s a tangible sense of release as each irrational worry is broken down and scrutinized.

The midsection of the poster provides strategies for interrupting anxiety-provoking patterns: deep breathing exercises, mindfulness practices, and grounding techniques. Here then is where individuals can actively engage with their emotions—splashing in the pool of consciousness with tools that help regain control.

Finally, at the bottom of the Worry Waterfall, after acknowledging their feelings and applying coping mechanisms, users find space to reframe negative thoughts into positive affirmations or more realistic statements—a mental stepping stone directing them out from under pressure’s cascade and into calmer waters.

Prominently displayed in offices, homes or schools this poster serves as both a reminder and an instructor: your worries are navigable. With each step down the waterfall, this poster empowers individuals by illustrating that no matter how overwhelming the anxieties of life may seem, they can be dismantled piece by piece until they’re manageable droplets merging into a serene riverbed of thought.

In parallel with its pragmatic approach to anxiety management, the Worry Waterfall poster also carries an aesthetic appeal—often featuring calming colors and imagery that further enhance its therapeutic effect. So hang it on your wall and let it guide you through those moments when you need extra support—the Worry Waterfall is here to turn your anxieties from deluge to dribble.

How to Make a Puppet Out of a Paper Bag: Fun with Christmas Puppets

As the holiday season approaches, finding creative and interactive ways to engage in the festive spirit with children can be a delightful experience. One such activity that is sure to spark joy and imagination is making puppets out of paper bags – specifically, Christmas-themed puppets. This is not only a fun craft but also an opportunity for storytelling and performance. Here’s how you can create your own magical puppet characters using simple materials.

Materials Needed:

– Brown or white paper bags (lunch-size)

– Construction paper (various colors)

– Markers or crayons

– Scissors

– Glue or tape

– Optional: Yarn, buttons, fabric scraps, sequins, glitter glue for decoration

Instructions:

1. Set the Scene

Before you begin, decide what Christmas character your puppet will be. Will it be Santa Claus, an elf, a reindeer, or maybe a quirky snowman? Allow the kids to use their imagination and pick their favorite holiday figure.

2. Prepare the Paper Bag

Lay the paper bag flat on a table with the bottom flap face up; this will become the face of your puppet.

3. Cut and Decorate

Cut out pieces from the construction paper to make parts of your character. For example, if you’re making Santa, you would cut out a red hat and a white beard. For an elf, you could cut out pointy ears and a green hat.

4. Attach Facial Features

Using glue or tape, attach your cutouts onto the bottom flap of the bag. Draw details like eyes, a nose, and a mouth with markers or crayons.

5. Add Accessories

Glue on yarn for hair or a beard if needed. Attach buttons for coat buttons or decorations on hats. Use sequins or glitter glue to add sparkle to your puppet’s outfit – perhaps some shiny buttons on Santa’s suit or shimmering snowflakes on an ice queen’s gown.

6. Create the Body

Decorate the rest of the bag – which acts as the body of your puppet – according to your character’s attire.

7. Let it Dry

Allow everything to dry thoroughly before playing with your puppet.

8. Perform!

Put your hand inside the bag, so that your fingers go into the flap that forms the face—your thumb will control one side of the face while your fingers control the other side. Now you can make your character talk and move!

With creativity unleashed and Christmas spirits high, children can use these handmade puppets to put on shows for family and friends – telling tales of Santa’s adventures or singing along to classic holiday tunes with their new paper friends.

This simple yet engaging craft not only encourages artistic expression but also hones motor skills in young children through cutting, pasting, and drawing. So gather around some paper bags this Christmas season and create something that brings cheer and laughter into your home through crafting and play!

Role Play Area in the Classroom (Fruit and Vegetable Shop)

The classroom is not just a place for traditional learning; it’s a hub of creativity and imagination, especially when it includes a Role Play Area like the Fruit and Vegetable Shop. This innovative educational tool goes beyond teaching basic concepts of commerce and nutrition, nurturing a plethora of skills in young learners.

Imagine stepping into a classroom and being greeted by the vibrant colors and enticing aromas of a miniature fruit and vegetable shop. Here, children don the hats of shopkeepers, customers, and even inventory managers. This seemingly simple setup is a powerhouse of educational experiences that contributes to the cognitive, social, and emotional development of students.

Cognitive Development: Counting apples isn’t merely an exercise in repetition. When children engage in buying and selling produce, they’re unknowingly sharpening their mathematical acumen. They learn to count, add, subtract, weigh, measure, sort, classify, problem-solve, and even handle money – all under the guise of play.

Social Skills: The Fruit and Vegetable Shop serves as a microcosm of society. It encourages children to interact with their peers through role-playing various social interactions. They learn to communicate effectively, negotiate prices, understand the importance of sharing and turn-taking, cooperate with each other to keep the shop running smoothly, and develop empathy by stepping into someone else’s shoes for a while.

Emotional Growth: As children role-play different scenarios within the Fruit and Vegetable Shop environment, they experience a range of emotions associated with real-world experiences. It could be excitement over buying their favorite fruit or coping with disappointment if it’s ‘out of stock.’ These experiences help them understand and manage their emotions better.

Health Education: Beyond the play aspect lies an excellent opportunity for teachers to embed lessons about healthy eating habits. As children handle various fruits and vegetables, they also learn about their nutritional value. The shop becomes an interactive platform for discussing how food choices impact health.

Creativity: A Role Play Area such as this is fertile ground for imagination. It doesn’t take much for a box of bananas to become a treasure chest or an orange to represent a ball in an impromptu game.

Responsibility: Assigning roles like cleaner or shelf-stocker instills a sense of responsibility in children. They learn that running a shop (or any cooperative endeavor) requires everyone’s contribution and adherence to certain rules.

Language Development: Vocabulary naturally blossoms as children name the various fruits and vegetables available at their shop. They create signs, price tags, advertisements, improving both written and oral language skills.

In conclusion, implementing a Fruit and Vegetable Shop as part of the classroom’s Role Play Area can transform conventional learning spaces into dynamic ecosystems conducive to holistic development. Children learn best when they are engaged actively with their entire being—mind, body, and heart—and what better way to ensure this than through imaginative play that staples nutrition education onto life skills? It turns out that an apple a day does much more than keep the doctor away; it opens up a world filled with learning opportunities ripe for exploration!

9 Clever and Creative Ways to Use Paddle Pop Sticks in the Classroom

Paddle pop sticks, also known as craft sticks or popsicle sticks, are a popular item in many classrooms across the globe. These simple tools can be transformed into educational and enjoyable crafts and activities. Here are nine creative ways to incorporate them into your classroom practices:

1.Math Manipulatives: Paddle pop sticks can be excellent tools for teaching math concepts. Students can practice counting, grouping, and basic arithmetic by bundling the sticks with rubber bands. They can also arrange them into geometric shapes to explore concepts like area and perimeter.

2.Story Starters: Write different story elements such as characters, settings, or conflicts on individual sticks. Students can draw a handful of sticks at random to assemble a unique story plot to write about, promoting creative thinking and writing skills.

3.Classroom Management: Paint paddle pop sticks in different colors or label them with students’ names for various management tasks like randomly selecting a student for an answer, tracking classroom duties, or managing group work.

4.Plant Labels: In science projects that involve growing plants, use paddle pop sticks as plant labels. Students can write the name of the plant or the date it was planted on the stick and place it in the potting soil.

5.Puppet Shows: With some Decorationslike yarn for hair and markers for features, paddle pop sticks can become characters for student-created puppet shows. This not only encourages creativity but also helps develop storytelling skills.

6.Learning Rhythms: In music class, paddle pop sticks are perfect for teaching rhythm. Snap them together to create beats or use them as drumsticks to tap out rhythms on desks or books.

7.Puzzle Making: Have students color a picture on paper then glue it onto a set of paddle pop sticks lined up side by side. Once the glue dries, mix up the pieces for students to solve their puzzles or exchange with classmates.

8.Science Experiments: Use paddle pop sticks in science experiments to mix solutions or prop up objects within an experiment setup. They’re especially handy in experiments because they’re disposable and inexpensive.

9.Learning Languages: For language lessons, write words or phrases on the sticks and have students match translations, synonyms, or categorize them grammatically, aiding memorization through physical sorting processes.

By incorporating these fun and inventive uses of paddle pop sticks into your curriculum, you can enhance engagement and facilitate learning in multifaceted ways that cater to various educational needs—all while keeping your students’ attention firmly grasped like a paddle pop stick brimming with possibility!

Lunar New Year Craft Activity – Year Of The Pig

The Lunar New Year, also known as Spring Festival, is a time-honored celebration marking the turn of the lunar calendar, and it is rich in tradition and cultural significance. Each year in the lunar cycle is associated with one of twelve animals in the Chinese zodiac, and when it’s the Year of the Pig, it’s an opportunity to celebrate with creativity and joy. Here’s an engaging pig-themed craft activity perfect for families, schools or anyone looking to honor this special time.

 Materials Needed:

– Pink construction paper

– White cardstock

– Scissors

– Glue

– Markers or paints

– Googly eyes (optional)

 Instructions:

1.Pig Body: Start by cutting out a large oval shape from pink construction paper for the pig’s body.

2.Pig Head: Cut a smaller circle for the head and attach it to one end of the oval using glue.

3.Features: For features such as ears and snout, cut out two smaller ovals and one medium-sized circle respectively from the pink construction paper. Attach the ears at the top of the head and place the snout in the middle of the face circle.

4.Decoration: Use markers or paints to add details like nostrils on the snout and a smiling mouth just below it.

5.Eyes: If using googly eyes, stick them above the snout on either side; if not, use white cardstock to cut out two small circles for eyes and draw pupils in them with a marker before gluing them in place.

6.Final Touches: Embellish your pig with additional decorations if desired—think festive hats cut from construction paper or ribbons you can curl around a pencil and glue onto your pig’s body for some New Year flair.

7.Display: Once your pig craft is complete, display it proudly as part of your Lunar New Year celebration—it can be a standalone piece or part of a larger display featuring other zodiac animals and traditional decorations.

This simple yet delightful craft not only adds to the festive atmosphere but also means spending valuable time engaging in hands-on activities that pay homage to cultural traditions. Happy crafting, and here’s to good fortune in the Year of the Pig!

Halloween Craft Activities For Kids

As the leaves change color and the chill of autumn sets in, Halloween is just around the corner. For little ones eager to get into the spooky spirit, Halloween craft activities are a perfect way to celebrate the season. These activities not only spark creativity and encourage artistic expression but also provide an excellent opportunity for family bonding. Here are some easy and fun Halloween craft ideas that kids can enjoy.

1. Paper Plate Ghosts:

Simple, yet classic, paper plate ghosts are great for young children. All you need are white paper plates, white streamers or tissue paper, a black marker, and some string. Let your child draw a ghostly face on the paper plate, then glue or tape strips of streamers to the bottom for a floating effect. Punch a hole at the top and hang your child’s creation around the house for a delightfully spooky decoration.

2. Pumpkin Painting:

Pumpkin carving might be a bit tricky for smaller hands, but pumpkin painting is an excellent alternative. Buy some mini pumpkins and a variety of paint colors. Set up a painting station with brushes, sponges, and anything else your child might use to create their pumpkin masterpiece. The best part: there’s no right or wrong way to do it!

3. Monster Masks:

Get ready for trick-or-treating with homemade monster masks. You’ll need sturdy paper plates or cardstock cut into mask shapes, elastic string, and various craft supplies like markers, yarn (for hair), googly eyes, and anything else you have on hand. Guide your kids as they design their own unique monsters to show off on Halloween night.

4. Bat Mobiles:

These aren’t cars – they’re creepy-cute hanging decorations! Cut out bat shapes from black construction paper and let kids decorate them with stickers or glitter glue. Once decorated, use a hole punch on the top of each bat and string them onto a stick or embroidery hoop using different lengths of thread to create your mobile.

5. Spider Webs:

Using popsicle sticks and white yarn or string, you can create intricate spider webs together with your kids. Arrange three popsicle sticks in a star formation and glue together at the center. Wind the string around each stick to form your web, then add a little plastic spider for effect.

6. Candy Corn Garland:

For this sweet decoration, cut out candy corn shapes from colored paper (white, orange, and yellow). Let your kids decorate each piece with crayons or markers to add texture or patterns before stringing them together on a piece of yarn or ribbon.

7. Mummy Jars:

Wrap glass jars in strips of white cotton fabric or crepe paper to create mummified candle holders. Stick on some googly eyes for character, then place small LED candles inside for an eerie glow without any fire hazard.

By engaging in these Halloween craft activities with your children not only do you get to enjoy precious moments together but also help them develop fine motor skills and let their imaginations run wild amidst all the ghoulish fun! Happy crafting!

20 Amazing Sidewalk Chalk Ideas For Learning and Fun

Sidewalk chalk isn’t just for scribbling or hopscotch anymore – it’s a versatile tool to blend playtime with learning. Transform your driveway or sidewalk into an exciting, colorful classroom with these 20 amazing ideas.

1. Alphabet Hop: Draw large letters on the ground and have kids hop from one letter to another, spelling out words as they go.

2. Chalk Maze: Create a large, intricate maze that children can follow or decode.

3. Number Line Jumps: Paint a number line and have kids jump to add or subtract numbers with their steps.

4. Sidewalk Twister: Use chalk instead of a mat to play this twisty game; call out hand and foot placements correlated with colored circles on the ground.

5. Sight Word Stepping Stones: Write common sight words on the sidewalk and encourage children to step only on the words you call out.

6. Hopscotch Spelling: Add an educational spin to traditional hopscotch by using spelling words instead of numbers in the squares.

7. Pictionary Game: An outdoor version of Pictionary, where kids draw and guess objects or phrases on a large scale.

8. Nature Drawing Templates: Have kids trace natural objects like leaves or sticks, then color them in with chalk.

9. Chalk Bullseye: Create concentric circles with point values for practicing math while throwing bean bags onto the target.

10. Solar System Scale Model: Draw planets in relative distance from one another, educating about space in a fun way.

11. Time-Tracking Sundial: Use chalk to mark time intervals around a central point that uses a stick as the gnomon to cast shadows and tell time.

12. Anatomy Outlines: Trace each child’s silhouette and label body parts or organs for a life-sized biology lesson.

13. Rainbow Road: Draw several color paths for a magical journey where kids can learn colors as they pretend travel.

14. Cursive Practice Paths: Write out cursive letters or words in large format for children to trace with broad arm movements.

15. Fraction Pie Charts: Draw pie charts on the ground and have kids color in fractions as a visual math activity.

16. World Map Mural: Sketch out continents and have kids fill in countries, oceans, and landmarks they know.

17. Shape Scavenger Hunt: Draw various geometric shapes randomly across the pavement; assign shape-seeking missions to kids.

18. Ladder Drills: Similar to football drills, draw a ladder for agility training which improves coordination and speed for little athletes.

19. Outdoor Spelling Bee Pathway: Chalk words along a path; children spell them aloud as they step from one word to the next.

20. Artistic Masterpieces Gallery: Set aside sections of pavement where each child can draw their interpretation of famous artworks.

Grab a bucket of sidewalk chalk and let these ideas transform any patch of pavement into an engaging hub of creativity, learning, and endless fun!

Fun Ways Use Class Mascot

Integrating a class mascot into daily school activities can add an element of fun and camaraderie among students. Not only does it help build a sense of identity and pride within the classroom, but it can also be used creatively across various learning scenarios. Here are some engaging ways to incorporate your class mascot into the school day:

1. Mascot Morning Meeting: Begin the day by having the mascot lead the morning roll call or announcements. Students can take turns voicing the mascot, giving them a chance to practice public speaking in a fun and supportive environment.

2. Storytime Sidekick: During reading sessions, have the mascot sit alongside the storyteller. It might hold a book or act out parts of the story, which can encourage enthusiasm for reading and help students visualize the narrative.

3. Learning Buddy: Assign homework helpers by letting each student take home the mascot for an evening. They can document their adventures together and share it with the class the next day, promoting sharing and storytelling skills.

4. Mascot Mail: Create a mailbox for the class mascot where students can submit questions, suggestions, or compliments about school life. This can be an avenue for fostering communication and expressing creativity in writing.

5. Reward System Ambassador: Use your mascot as part of a reward system. Students can earn time with the mascot or special mascot stickers for outstanding behavior or achievements.

6. Theme Days with Mascot: Have theme days where students can dress up their class mascot according to what they’re learning—like a scientist during science week, or an historical figure during history lessons.

7. Traveling Mascot: If the class is exploring geography, send your mascot on “travels” to different parts of the classroom that are set up like different countries or landmarks that you are studying.

8. Artistic Inspiration: Encourage creative expression by having art sessions where students can draw, paint or create crafts based on your mascot, deepening their connection to it as well as developing their artistic abilities.

9. The Historian: When studying history or significant events, using your class mascot as a “witness” to these events can spark curiosity and make learning more relatable.

10. Fitness Friend: During physical education, have your mascot participate in exercises or sports to promote health and physical activity amongst students in an exciting way.

By incorporating a class mascot into school activities in these ways, teachers can create an immersive and dynamic learning experience that enhances student engagement while also reinforcing classroom unity and spirit.

How To Create a Bump It Up Display in The Classroom

Creating a “Bump It Up” display in a classroom is an interactive way to visually track and encourage student progress. A “Bump It Up” board is typically designed to motivate students to improve their work by setting goals and showing tangible steps to achieve higher levels of performance. Here’s a guide on how to create one for your classroom:

1. Define Learning Objectives: Determine clear, measurable objectives for the skills or content you want students to improve upon. These should align with curricular standards and be understandable for your students.

2. Create Achievement Levels: Break down the learning objective into 4-5 levels of achievement. Label these from basic understanding to mastery level. For instance, Levels 1-4 might range from “Starting to Understand” to “Exceeding Expectations.”

3. Design The Display: Use a bulletin board or wall space in the classroom as your canvas. Make it colorful and engaging but not too cluttered. Each level should be clearly defined, perhaps with borders or different background colors.

4. Develop Criteria Descriptions: For each level, write out criteria that describe what work at that level looks like. Use student-friendly language and be specific about expectations.

5. Include Exemplars: Provide sample pieces of work for each level so students have a concrete understanding of expectations. Where applicable, use anonymized real student work.

6. Make It Interactive: Create moveable components like stars or avatars with students’ names on them so they can physically move their marker up as they progress.

7. Encourage Reflection: Have a space where students can write down what they did to go up a level and what they plan to do next.

8. Update Regularly: Regularly assess student work and have conferences with them about moving up the levels if they meet the criteria.

9. Celebrate Achievements: Recognize when students move up a level; positive reinforcement can motivate continued effort and improvement.

Remember, the aim of a “Bump It Up” board is not only to promote academic growth but also to build confidence and autonomy in learning. Make sure it’s accessible to all students and differentiated to reflect varying needs and abilities within your class.

Creating an Inclusive Classroom Diversity Heart Art Activity

Creating an inclusive classroom environment is not merely about ensuring that educational facilities are physically accessible, but also about fostering a culture where diversity is celebrated and all students feel valued and understood. One way educators can cultivate such an environment is through engaging activities that promote awareness and inclusion.

Immediately, one thinks of the “Diversity at the Heart” art activity, an exercise designed to visually demonstrate the beauty and importance of a diverse classroom. This activity encourages students to collaborate on a collective piece of art which represents the various backgrounds, beliefs, interests, cultures, and abilities within the group. Here’s how it can be implemented:

Setting Up The Diversity Heart Art Activity

1. Begin with an open discussion about diversity: what it means and why it’s significant in our communities and classrooms.

2. Explain the activity: Each student will create a small artwork or symbol representing their identity or background to contribute to a larger heart-shaped collage.

3. Provide materials: Offer various art supplies like colored papers, markers, fabric scraps, magazines for cutting out images, glue, and so on.

Steps Involved in the Activity

1. Each student spends time reflecting on what aspects of their identity they would like to share.

2. Students create their individual pieces with the provided materials.

3. Once complete, gather all pieces and start constructing the heart collage on a large board or canvas, positioned at the center of the classroom for everyone to see.

4. Encourage students to discuss their contributions as you assemble the heart.

5. Display the completed heart prominently in the classroom as a visual reminder of the class’s commitment to inclusivity.

This “Diversity at the Heart” art project does more than provide a hands-on creative exercise – it creates a sense of unity in diversity. It reminds students that every classmate has something unique to offer and that these differences collectively make up the beating heart of their shared learning space.

Not only does this activity teach inclusion by celebration rather than mere tolerance of differences, but it also serves as a cornerstone for reflection and dialogue about individual value and community throughout the school year.

Advocates for inclusive education champion activities like this for their power to foster empathy among students by visually and actively engaging them in conversations about diversity. By utilizing creativity and collaboration, educators set the stage for an inclusive classroom where every student is engaged and recognized as an essential part of the whole – a lesson that extends far beyond their time in school into how they view and contribute to society as adults.