Art Education

20 Amazing Sidewalk Chalk Ideas for Learning and Fun

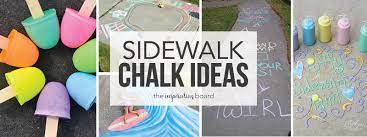
Sidewalk chalk isn’t just for hopscotch anymore – it’s a versatile tool for learning and having a blast outdoors. Whether you’re a teacher, parent, or even a babysitter, these sidewalk chalk ideas are perfect for incorporating play into education. Here are twenty amazing ideas to get the creativity flowing and the learning started.
1. Alphabet Hop: Write out the alphabet in large, colorful letters. Challenge kids to hop from one letter to another to spell out words.
2. Number Line Fun: Create a long number line and have children practice counting by hopping along it. They can also use it to learn addition and subtraction by jumping forward or backward.
3. Chalk Mazes: Draw intricate mazes for kids to follow with their fingers or navigate while walking.
4. Shape Scavenger Hunt: Draw various shapes in different colors. Ask the kiddos to find all the circles, squares, triangles, etc.
5. Sight Word Stairs: Write common sight words on outdoor stair steps and have children read them as they go up and down.
6. Twister Math: Adapt the game of Twister using colored circles with numbers or equations inside for math practice.
7. Nature Drawing Imitation: Encourage children to draw chalk versions of leaves, flowers, or other items they find in nature.
8. World Map Hopscotch: Create a simplified world map and use it for geography lessons and hopping games.
9. Chalk Cityscape: Allow imagination to run wild by drawing roads, buildings, and traffic signs to create an interactive cityscape.
10. Spelling Bug: Draw a large bug with different sections containing letters for spelling practice – spell words by connecting sections.
11. Solar System Drawing: Illustrate and label the planets on the sidewalk for an astronomy lesson that stretches across the playground.
12. Jump to Conclusions Mat: Sketch out different conclusions kids can jump to as they answer questions or solve problems.
13. Animal Track Matchup: Draw various animal footprints and let children guess which animal made them.
14. Life-Size Board Games: Use chalk to create life-size board games like checkers where kids can be the pieces themselves.
15. Emotion Station: Make faces with different emotions and have discussions about feelings as children stand on them.
16. Letter Leapfrog: Challenge kids to leapfrog over letters on the ground forming words or completing the alphabet.
17. Time Telling Clocks: Draw multiple clock faces for teaching about time; add movable hour and minute hands made from cardboard or paper.
18. Human Anatomy Tracing: Kids can trace each other’s silhouettes with chalk and then label bones, organs, or body parts within their drawings.
19. Musical Notes Staff Lines: Teach music by drawing staff lines on the concrete; have students place notes correctly and sing along to their compositions.
20. Fitness Adventure Trail: Combine obstacle course drawings with fitness challenges written next to each section (like “do 10 jumping jacks here”).
From learning core subjects in an interactive way to just enjoying some artistic fun, these activities are bound to engage any child while making use of simple sidewalk chalk – proving that learning really can be fun!

Hello Greeting Cards Template

In this fast-paced digital age, the art of sending a greeting card may seem like a tradition of yesteryear. However, there is a beauty and sincerity in receiving a handwritten note that an email or instant message simply cannot convey. Hello Greeting Cards offer a refreshing and personal way to connect with friends, family, and colleagues, perfect for saying “hello” in a special and memorable fashion.

Whether for a special occasion or just to brighten someone’s day, Hello Greeting Cards provide an array of designs to suit every taste and sentiment. These cards become keepsakes that people treasure, often saving them for years as a tangible reminder of a precious moment in time. From minimalist to elaborate designs, whimsical illustrations to elegant motifs, each card promises to deliver your warm regards with style and grace.

Why Choose Hello Greeting Cards?

1.Unmatched Personal Touch: In an era of impersonal digital communication, receiving a card through the post is a meaningful gesture that stands out.

2.Variety of Designs: With a broad selection available, you’ll find the ideal card that resonates with your personality and best expresses your message.

3.High-Quality Materials: To ensure durability and a premium feel, these greeting cards are crafted from fine paper and inks.

4.Versatile: Say “hello,” thank you, congratulations, or simple words of encouragement with the right card for the occasion.

5.Keepsake Value: More than just a mere card, it’s something the recipient can hold onto forever, bringing back memories every time they glance at it.

Tips for Sending Hello Greeting Cards:

– Personalize It: Take the time to add a heartfelt hand-written note inside your Hello Greeting Card. It elevates your message and shows the recipient that you genuinely care.

– Timing is Key: While ‘hello’ cards are appropriate any time, think about sending these cards when someone might need an unexpected pick-me-up or simply to stay in touch.

– Pair with A Small Gift: If the situation calls for it, pair your Hello Greeting Card with a small gift or gift card as an added token of appreciation.

Hello Greeting Cards stand as an emblem of thoughtfulness in our modern world where we so often neglect the personal touch. Rediscover the joy of giving (and receiving) by choosing from our vast collection of one-of-a-kind greeting cards that perfectly capture the spirit of saying hello.

A Christmas Exploding Gift Box | The Ultimate Christmas Craft

As the holiday season approaches, craft enthusiasts and gift-givers alike search for new and inventive ways to present their presents. The Christmas exploding gift box is a novel concept that combines the excitement of surprise with the charm of crafting.

What exactly is an exploding gift box? Contrary to what its name might imply, there’s nothing dangerous about it. Instead, it’s a multi-layered, handmade box that “explodes” open to reveal photos, decorations, and gifts hidden inside each panel.

Creating your exploding gift box is akin to assembling a treasure trove of festive joy. To begin, you choose a series of increasingly large cardstock squares which you’ll fold and attach to create the layers of your box. Decorative paper in Christmas prints or colors is often used to cover each panel for a festive feel.

But what makes these boxes truly special are the personalized touches. You can decorate each panel with stickers, mementos, handwritten notes, or even tiny trinkets and ornaments. Pictures are popular additions, making this craft not only a gift but also a mini scrapbook.

Then comes the center of the box: here lies the main surprise. Many opt for a small wrapped present – perhaps jewelry or another cherished item – that awaits its discovery when the layers burst open.

Another great thing about exploding gift boxes is their versatility; they can be intricately designed or simple, depending on your skill level and preference. Plus, beyond their initial purpose as an exciting way to give gifts, they also double as memorable keepsakes that recipients can enjoy long after the festivities have ended.

In conclusion, the exploding gift box stands out as the ultimate Christmas craft. It’s enjoyable to make, thrilling to open, and meaningful to cherish, encapsulating the spirit of giving in an innovative package. This holiday season ditch the wrapping paper and tape for something more theatrical – an exploding gift box that delivers wonder with every unfastened lid!


Easy Christmas Wreath Crafts for Kids (Template Download!)

The festive season is a wonderful time to engage in creative activities with children, and making Christmas wreaths is both a fun and accessible craft. Not only do these wreaths become cherished decorations year after year, but they also serve as an excellent opportunity for kids to learn about colors, shapes, and textures while developing their fine motor skills. Below are some simple ideas for Christmas wreath crafts that kids can enjoy, with templates available for download to get you started.

 Craft 1: Paper Plate & Tissue Paper Wreath

Materials Needed:

– Paper plates

– Green tissue paper

– Red pom-poms or stickers

– Glue

– Scissors

– Ribbon

– Printable leaf template

Instructions:

1.Cut the center out of a paper plate to create the base of your wreath.

2.Download and print the leaf template provided.

3.Tear or cut the green tissue paper into small pieces.

4.Apply glue generously over the paper plate ring.

5.Stick the tissue pieces around the ring, overlapping them to create texture.

6.Glue red pom-poms or stickers onto the wreath to represent berries.

7.Tie a ribbon in a bow and glue it to the top of the wreath for hanging.

[Download the Leaf Template]()

 Craft 2: Handprint Wreath

Materials Needed:

– Construction paper (green, red)

– Pencil

– Scissors

– Glue

– Ribbon

Instructions:

1.Trace your child’s hand on the green construction paper several times.

2.Cut out all the handprints.

3.Arrange and glue the handprints in a circular shape on another piece of green construction paper to form a wreath base.

4.Cut out red bow shapes from red construction paper and glue them at the bottom of the wreath.

5.Punch a hole at the top and thread through ribbon for hanging.

 Craft 3: Ribbon & Bells Wreath

Materials Needed:

– Styrofoam ring or cardboard ring

– Assorted ribbons

– Small jingle bells

– Hot glue gun (to be used by adults)

– Scissors

Instructions:

1.Select various ribbons in different widths and colors.

2.Cut lengths of ribbon that are long enough to wrap around your chosen ring with excess to tie.

3.Tie ribbons around the ring at intervals, allowing them to lay flat against it.

4.Thread one or two jingle bells onto each ribbon before tying knots to secure them.

5.Continue until the entire ring is covered, layering ribbons for a full look.

These simple craft ideas offer a delightful way to spend quality time with kids during the holidays while creating beautiful ornaments that can adorn your home year after year. The downloadable templates provide an easy start, ensuring that even those less confident in their crafting abilities can produce spectacular results with little effort.

With these easy-to-make Christmas wreath crafts for children, you’ll enjoy a merry crafting session that turns into an unforgettable holiday tradition!

24 Author’s Purpose Anchor Charts and Activities to Inspire Your Teaching

Developing an understanding of an author’s purpose is integral to teaching students how to analyze and appreciate literature. By focusing on why an author writes a text – to persuade, inform, entertain, or explain – educators can enhance reading comprehension and critical thinking skills. Here are 24 anchor charts and activities that can enliven your teaching strategies around this concept:

1.Persuade-Inform-Entertain (PIE) Anchor Chart: Design a colorful chart illustrating the three main purposes of writing with examples.

2.Author’s Purpose Sort: Provide students with various texts and ask them to categorize them according to the author’s intent.

3.Interactive PIE Flipbook: Have each student create a flipbook where they can compile examples of texts that persuade, inform, or entertain.

4.Real-World Scenarios: Discuss situations in which the author’s purpose may overlap, such as an informative advertisement meant to persuade.

5.Author’s Intent Detective: Turn your students into detectives who must determine the author’s intent by examining clues within a text.

6.Persuasive Techniques Poster: Highlight common persuasive techniques authors use with bright visuals and explanations.

7.Informational Text Features Guide: Create an anchor chart pinpointing features like graphs, headings, and captions that signal informational texts.

8.Entertainment Value Brainstorm: Ask students to brainstorm what makes a text entertaining and produce an anchor chart from their ideas.

9.Purpose Matching Game: Develop a card game where students match pieces of writing to their correct purpose.

10.Skit Performance: Have students script and perform skits that depict different writing purposes in action.

11.Author’s Purpose Pie Tasting: A novel activity where different “flavors” of pie correspond to various purposes—students can “taste” each by reading sample texts.

12.Writing Workshop: Encourage children to write paragraphs or short essays for different purposes and share them with classmates.

13.Digital Scavenger Hunt: Use online resources for finding texts with particular authorial intents and compile them in a digital format.

14.Classroom Posters Set: Produce individual posters for persuasion, information, entertainment for constant visual reminders around the classroom.

15.Purpose Debate Club: Engage students in debates on pieces of text, arguing about the primary intention of the author.

16.The Author’s Purpose Relay Race: Incorporate kinesthetic learning by having teams “race” to sort examples into the right categories.

17.Book Review Station: Students can write book reviews identifying the author’s purpose and explaining its effectiveness.

18.Interactive Bulletin Board: Create a board where students can pin examples of different purposes they find in their reading assignments.

19.Author Intention Journaling: Integrate journal prompts that encourage reflection on the purpose of different texts read by the student.

20.Guest Writer Sessions: Invite authors to discuss their writing process and intended purpose when creating their works.

21.Analyzing Arguments Activity: Delve into opinion articles with your class and dissect the arguments to determine purposeful persuasion techniques used by its author.

22.The Role-Playing Roundtable: Students take turns portraying authors to explain why they wrote their piece using clear purpose indicators.

23.Cause and Effect Charting: Connect author’s choices in text structure, language, and content to its overall purpose through cause-and-effect diagrams.

24.Infographic Creation: Students use their knowledge of persuading, informing or entertaining texts to design infographics about real-world issues or subjects they’ve studied.

Christmas Craft Fun and Festive Activities for Your Class

With the holiday season upon us, incorporating Christmas craft fun into your classroom can be a delightful way to spread cheer while nurturing creativity among your students. Not only do these activities help in fine-tuning motor skills, but they also provide an excellent opportunity for students to learn about the importance of tradition and celebration. Here are some joyous Christmas craft ideas and festive activities that are sure to make your class merry.

1. Paper Plate Santa Claus: You’ll need paper plates, cotton balls, red construction paper, and glue. Students can create Santa’s jolly face by gluing cotton balls for his beard and crafting a hat from the red paper.

2. Popsicle Stick Ornaments: Popsicle sticks can easily be transformed into tree ornaments with some paint, glitter, and a little imagination. Children can paint them green and arrange them in a triangle for a simple Christmas tree, or use them to create stars and snowflakes.

3. Holiday Wreaths: Using construction paper, have the students cut out various sizes of their hands to create colorful wreaths. They can then decorate their paper hands with glitter, stickers, or even a light dusting of artificial snow before arranging them in a circle.

4. Gingerbread House Decorating: Pre-assemble gingerbread houses using milk cartons for stability and let the children decorate with frosting, candies, and sprinkles. This is not only fun but also a sensory experience that involves taste, touch, and smell.

5. Christmas Card Making: Encourage your students to make personalized Christmas cards for their loved ones using cardstock, markers, stickers, and other decorative materials. This can be tied into a writing activity where they express their holiday wishes or describe their favorite Christmas memory.

6. Snowman Sock Friends: Have students bring an old white sock from home and fill it with rice or beans to create a snowman. Tie off sections with ribbon to form the body and head, and then decorate with buttons, fabric scraps for scarves, and markers for faces.

7. Salt Dough Ornaments: Salt dough is easy to make with just flour, salt, and water. Students can cut out shapes using cookie cutters and then paint or embellish them once they’re dry. Don’t forget to poke a hole at the top before drying so they can be hung on the tree.

8. Classroom Decoration Competition: Assign small groups in the class different sections of the classroom to decorate – winner gets bragging rights or a small prize.

9. Holiday Music Performance: Prepare a simple musical number or encourage the children to perform classic carols during a festive music session where everyone gets involved – instruments optional!

10. Secret Santa Gift Exchange: Introduce the concept of giving through Secret Santa gift exchanges where children draw names and present small handmade gifts to their classmates.

To wrap up these festive activities, consider having a ‘Christmas Show-and-Tell’ session where students can showcase their crafts and talk about what they enjoyed most about making them. This will instill not only pride in their work but also boost their public speaking skills.

Wishing you all happy holidays filled with fun crafts, learning experiences, and heaps of Christmas cheer!

Roll to Create a Haunted House Halloween Activity

Halloween brings with it the thrill of costumes, candies, and the time-honored tradition of scaring and being scared. If you’re looking for a unique activity to spice up your Halloween celebrations, a “Roll to Create a Haunted House” game can be an exciting way to engage friends and family.

Here’s how it works: You’ll need a pair of dice and a sheet that lists various haunted house elements which correspond to each number you can roll (from 2 to 12). Participants will take turns rolling the dice and using their results to collectively build an imaginative haunted house.

The chart below outlines possible outcomes for each dice roll:

2 – Sinister Spirits: Add a ghostly presence in one of the rooms.

3 – Creeping Critters: Describe rats, spiders, or insects infesting an area.

4 – Cobwebbed Corner: A room draped completely in thick, dusty cobwebs.

5 – Hidden Passageway: Discover a secret tunnel or doorway.

6 – Eerie Lighting: Adjust the atmosphere with flickering candles or strobe lights.

7 – Phantom Portraits: Portrait paintings with eyes that seem to follow you.

8 – Spook-tacular Soundscapes: Introduce eerie sound effects or ghostly whispers.

9 – Mischievous Poltergeist: A playful but spooky entity causes benign mischief.

10 – Haunted Artifacts: Describe cursed objects scattered throughout.

11 – Bone Chilling Draft: An inexplicably cold spot that sends shivers down your spine.

12 – The Final Room: End your tale with an intense encounter (a boss ghost, ancient curse, etc.).

The end result is a collaborative storytelling session where every roll adds another piece to your haunted house narrative. You can set the scene for the haunted house in someone’s home or have people describe their own haunted additions based on their rolls. This activity not only stirs the creativity within participants but also ensures that everyone leaves the gathering with their very own shared ghost story.

You’re just rolls away from an unforgettable night filled with frightful delight! Grab the dice, roll out your imagination, and let your haunted house come eerily alive!

Rainforest Bird Art

Tropical splendor takes wing in the form of rainforest bird art, capturing the vibrant essence of avian life amidst lush greenery and bountiful nature. In every brushstroke, artists convey the dynamism and diversity of these feathered beings. Their paintings brim with bright hues and intricate details, much like the biodiverse habitats their subjects call home.

Rainforest bird art not only delights the eye but also serves as a crucial reminder of our planet’s fragile ecosystems. Through their work, artists inspire conservation efforts and bring awareness to the plights faced by these birds – from deforestation to climate change impacts.

Collectors and nature enthusiasts alike find joy in these artworks, often fueling a passion for ornithology and environmental stewardship. Whether it graces a gallery wall or an intimate corner of a home, rainforest bird art is a testament to the beauty of our natural world and the enduring power of creativity in celebrating and preserving it.

How Does Groundhog Day WorkPlus Activities for Kids

Groundhog Day is an annual event that takes place on February 2nd, primarily in the United States and Canada. The tradition hinges on the behavior of a groundhog, which is a rodent belonging to the group of large ground squirrels known as marmots. According to folklore, if the groundhog emerges from its burrow and sees its shadow due to clear weather, it will retreat back into its burrow, and winter will proceed for six more weeks. If it does not see its shadow because of cloudiness, spring will arrive early.

The most famous Groundhog Day celebration is held in Punxsutawney, Pennsylvania, where Punxsutawney Phil is the center of attention. Phil’s predictions are made at Gobbler’s Knob, a rural area located just outside town. The event has garnered tremendous popularity over the years, especially after the release of the 1993 film “Groundhog Day” starring Bill Murray.

But Groundhog Day isn’t just about weather prediction traditions; it’s also an opportunity for fun and educational activities for children. Here are several activities that can help kids get involved with Groundhog Day:

1. Shadow Drawing: Have children explore how shadows work by tracing shadows outdoors on a sunny day or indoors using a lamp. This can help explain why a groundhog might see its shadow.

2. Groundhog Puppet Craft: Kids can create their own groundhog puppets using recycled materials like cardboard tubes or paper bags. They can then put on their own Groundhog Day performances.

3. Weather Charting: Leading up to Groundhog Day, children can keep track of the weather to predict what the groundhog will see. This encourages basic meteorological understanding and recording skills.

4. Story Time: Read books about Groundhog Day and discuss the history and folklore surrounding this special day.

5. Science Experiments: Perform simple science experiments to understand meteorology and animal behavior, such as how animals like groundhogs hibernate.

6. Burrow Building: Have kids build model burrows using boxes and tunnels or create drawings of what they think a groundhog’s home looks like underground.

7. Educational Videos: Watch educational videos about groundhogs and discuss interesting facts about these animals, including their life cycle and habitat.

Remember that the key element in these activities for kids is the combination of fun and learning. By celebrating Groundhog Day with various interesting activities, children will be able to appreciate this quirky holiday while also grasping fundamental concepts about weather patterns and animal habits.

Easy and Fun Origami Box for Kids

Origami, the traditional Japanese art of paper folding, has been a beloved activity for generations, providing a creative and accessible way for people to express their artistry. One of the simplest and most delightful projects to start with is the origami box. Not only is it easy to make, but it’s also incredibly fun and perfect for kids who are just getting into this paper craft. This article will guide you through the steps to create your very own origami box, which can be used to store treasures or give as a charming gift.

 Materials Needed

– A square piece of paper (any size will work, but 6×6 inches is a good size for beginners)

– Optional: Decorations like stickers, markers, or glitter

 Steps

1.Start with a Square: Take your square piece of paper and place it color side down on a flat surface.

2.Fold in Half: Fold the paper in half diagonally to form a triangle and create a crease. Unfold it back into a square.

3.Fold in Half Again: Fold the paper in half diagonally in the opposite direction and crease it well. Unfold it back into a square.

4.Create Guidelines: Flip the paper over so that the colored side is facing up. Fold each corner into the center of the paper, using the creases made from previous folds as guidelines.

5.The Sides: Take one corner and fold it to the center again. Do this for each corner.

6.Forming the Edges: Unfold two opposite corners back into their squared position.

7.Making the Sides Stand: On one unfolded side, lift the paper from the bottom and fold it upwards, creasing along what was previously the outer edges of those folded corners, forming one side of your box.

8.Securing The Box: Do this on the other unfolded side as well so you have two flaps standing up.

9.Folding Corner Flaps Inward: There are small triangle flaps sticking out on each of those sides; fold them inwards and press hard to create a crease.

10.Final Structure: Now lift those sides with folded triangle flaps upwards; they become two other sides of your box.

11.Locking The Structure: Tuck in these last two flaps underneath the folded edges from step 7—it should fit snugly to hold everything in place.

12.Finishing Touches: You should now have a sturdy origami box! If you wish, decorate it however you like using markers or stickers.

And that’s it! You’ve successfully created an easy and fun origami box suitable for kids—or even kids at heart!

This origami box project not only encourages creativity among young children but also helps develop their fine motor skills and attention to detail. They can use their boxes to hold small toys or as decorative items in their room. With practice and variations in folding techniques or paper designs, kids can come up with unique boxes all on their own, turning this simple exercise into hours of fun!

Remember that origami is an art of patience and precision; if your first box doesn’t come out perfect, don’t be discouraged! Keep practicing your folds and encouraging your kids’ efforts because each attempt will get better than the last.