Tech Advice

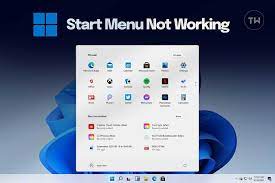
Start Menu not Working in Windows 11? Here’s How to Fix It

If you’ve upgraded to Windows 11, you might face a common issue with the Start menu not functioning as it should. Don’t fret! Here are several methods you can try to resolve this problem and get your Start menu working again.

1. Restart Windows Explorer

Often, this simple solution can solve the malfunctioning Start menu issue. To restart Windows Explorer:

a. Right-click on the Taskbar and select Task Manager.

b. In the Processes tab, find Windows Explorer.

c. Right-click on it and choose Restart.

2. Update to the Latest Version

Ensure your system is up-to-date by checking for new updates:

a. Press Windows key + I to open Settings.

b. Click on the Updates & Security section.

c. Click Check for updates and install if there are any available updates.

3. Troubleshoot the Start Menu

You can use the built-in troubleshooter in Windows to detect and fix any problems with your Start menu:

a. Press Windows key + I to open Settings.

b. Click on System, thenTroubleshoot.

c. Scroll down to Other troubleshooters and click on them.

d. Find the Start Menu option, click it, and then click Run.

4. Re-register your Start menu app

You can also try re-registering your Start menu application using Windows PowerShell:

a. Right-click on the Start button and select Windows Terminal (Admin) or PowerShell (Admin).

b. Type or paste the following command: Get-AppXPackage -AllUsers | Foreach {Add-AppxPackage -DisableDevelopmentMode -Register

“$($_.InstallLocation)\AppXManifest.xml”}

c. Press Enter and wait for the process to finish.

5. Create a new user account

Creating a new user account may fix issues with corrupt files in your current user account:

a. Press Windows key + I to open Settings.

b. Click on Accounts, then Family & other users.

c. Click Add someone else to this PC and follow the on-screen instructions to create

a new account.

6. Reset Your PC

If all else fails, you might need to reset your PC while keeping personal files:

a. Press Windows key + I to open Settings.

b. Click on System, then Recovery.

c. Under Reset this PC, click Get started and choose the Keep my files option.
Remember to always backup your important data before making significant changes to your system. Hopefully, one of these solutions works for you and helps you get your Start menu back on track in Windows 11.

Sonos Arc Review: The All-in-One Atmos Soundbar to Beat

The world of home audio has witnessed a remarkable evolution in recent years, with new technologies promising high-quality, immersive sound experiences. Among these innovations is the Dolby Atmos sound technology, which has brought a revolution in surround sound. The Sonos Arc is a prime example of this, setting the bar high for other Atmos soundbars in the market. In this article, we delve into an in-depth review of the Sonos Arc, exploring its features and performance to determine if it’s truly the all-in-one soundbar to beat.

Design and Build

The Sonos Arc sports an elegant, minimalist design that is bound to blend well with any modern home theatre setup. With a sleek 45-inch width and available in both black and white color options, it effectively complements larger televisions without overwhelming the room’s aesthetics. The build quality is impeccable – the soundbar features a precision-crafted plastic chassis with a seamless metal grille that exudes durability and style.

Features

Sonos Arc comes packed with an array of features that make it stand out from its competitors. Equipped with 11 high-performance drivers (including eight elliptical woofers and three silk-dome tweeters), it delivers better audio coverage than your average soundbar. Moreover, Dolby Atmos compatibility ensures you enjoy three-dimensional audio with impressive clarity, detail, and depth.

Setup and Integration

Setting up the Sonos Arc is a breeze, thanks to its user-friendly app that walks you through the entire process. You can connect it to your television using either the HDMI eARC/ARC port or an optical output. It also seamlessly integrates into an existing Sonos multi-room system or can be combined with other Sonos products like Sub or One SL for an even more immersive experience.

Performance

The main reason why people are raving about the Sonos Arc is its incredible performance in delivering top-notch audio quality. Dolby Atmos compatibility creates a believable surround sound experience and adds height to the audio, making you feel as if you’re in a cinema. With adaptive Trueplay tuning, the soundbar calibrates itself to the room’s unique characteristics and intelligently adjusts the audio output to provide unparalleled clarity and detail.

Pros and Cons

Pros:

– Stunning, immersive audio with Dolby Atmos support

– Elegant design with robust build quality

– Seamless integration into existing Sonos systems

– User-friendly setup process

Cons:

– Relatively expensive compared to other alternatives in the market

– No Bluetooth support

Verdict

The Sonos Arc stands as an exceptional all-in-one Atmos soundbar that lives up to its reputation. With a captivating design and impressive performance, it’s hard to deny that this soundbar sets a high benchmark for others to follow. If you’re willing to invest in a top-tier audio solution for your home theatre, the Sonos Arc is definitely worth considering.

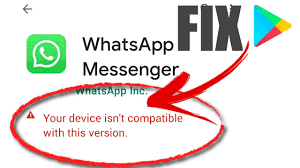
Top 5 Ways to Fix “Your Device Isn’t Compatible with This Version” on Android

Introduction:

At times, when trying to download an app from the Google Play Store, you might encounter the error message “Your device isn’t compatible with this version.” This issue could arise due to various reasons – your device might be running an outdated version of Android, or the app simply may not be designed for your device. However, there are several methods you can try to resolve the problem and successfully install the app. In this article, we will discuss the top five ways to fix “Your device isn’t compatible with this version” on Android.

1. Update Your Device’s Software

One of the primary reasons for the compatibility error message is outdated software on your Android device.

– Go to Settings > System (or About Phone) > Software Update.

– Check if any updates are available and install them.

– Reboot your device after installation and try downloading the app again.

2. Clear Google Play Store Cache & Data

Sometimes, residual data and cache in Google Play Store could be responsible for generating the error message.

– Navigate to Settings > Apps (or Application Manager) > Google Play Store.

– Tap Storage and then Clear Cache & Clear Data.

– Restart your device and open Google Play Store to download the app again.

3. Use an Alternative App Store or APK

If you still encounter compatibility issues, consider using an alternative app store like Amazon Appstore or APKPure, which could offer different versions of the same app.

Alternatively, you could download an APK (Android Package Kit) file from a reliable source like APKMirror. Make sure to enable installation from unknown sources in Settings > Security > Unknown Sources before proceeding with APK installation.

4. Install a Custom ROM

Another possible solution is installing a custom ROM compatible with your device and offering more freedom concerning software updates and app downloads.

It is crucial to research and choose a reputable custom ROM, like LineageOS or Paranoid Android. Remember that installing custom ROMs might void your warranty and may involve risks, such as bricking your device.

5. Contact the App Developer

If none of the above methods work, try contacting the app developer through their support channels. They might be able to assist you with a compatible version or troubleshooting steps to resolve the issue.

Conclusion:

Encountering the “Your device isn’t compatible with this version” error on Android can be frustrating. However, through these five methods – updating your device’s software, clearing Google Play Store cache and data, using alternative app stores or APKs, installing a custom ROM, or contacting the app developer – you should be able to resolve the issue and install your desired app successfully. It is essential to always prioritize device security and only download apps from trusted sources to avoid potential risks and malware infections.

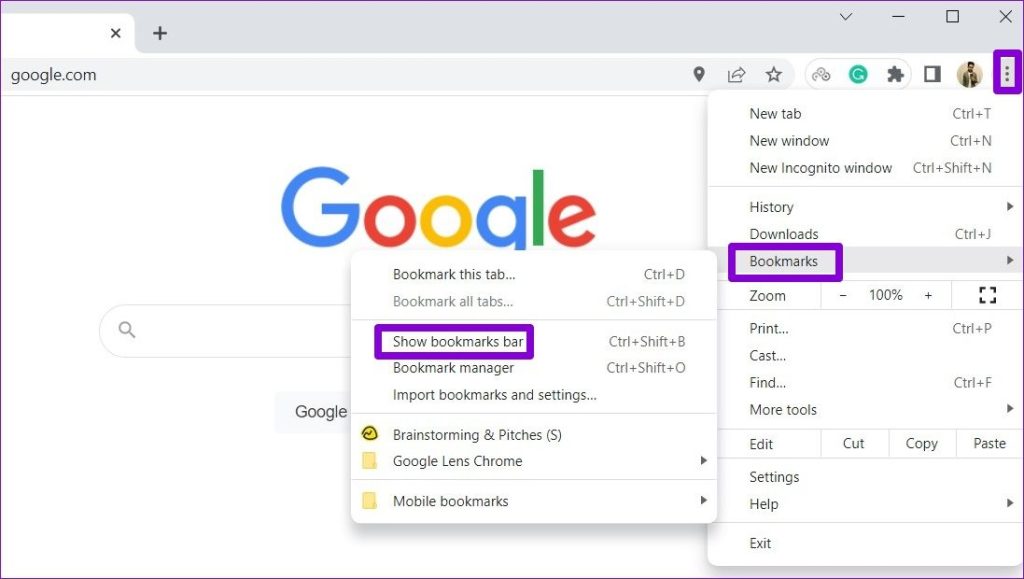
Top 6 Ways to Restore the Missing Google Chrome Toolbar

Introduction:

Google Chrome is among the most popular web browsers in the world, helping millions of users navigate the internet with ease. One key element of the browser is its toolbar, which offers quick access to bookmarks, history, and other frequently used features. However, there are instances where the toolbar may go missing. In this article, we will explore the top six ways to restore your missing Google Chrome toolbar successfully.

1. Restart Google Chrome

The first troubleshooting step is to restart Google Chrome. Sometimes, a minor glitch or an extension may cause the toolbar to disappear. Close all open windows of Google Chrome, and then reopen the browser to see if the toolbar is restored.

2. Reset Chrome Settings to Default

Restoring Chrome settings to their default can help you recover a lost toolbar. To do this:

a) Click in the three vertical dots in the top-right corner of Chrome.

b) Go to Settings >Advanced.

c) Scroll down and click on “Restore settings to their original defaults.”

d) Confirm by clicking “Reset settings.”
Please note that this process will disable installed extensions and clear temporary data such as cookies.

3. Check for Hidden Extensions

Sometimes, third-party extensions can interfere with your browser’s toolbar. If you have recently

installed any extensions or plugins, try disabling them one by one to determine which one might be causing the issue.

4. Update Google Chrome

Ensuring that you are running the latest version of Google Chrome can help resolve

a missing toolbar issue. To check for updates:

a) Click on the three vertical dots in the top-right corner of Chrome.

b) Go to Help >About Google Chrome.

c) If an update is available, follow the on-screen instructions to complete it.

5. Reinstall Google Chrome

Uninstalling and reinstalling Google Chrome can be an effective solution to restore its missing toolbar. To do this, go to your operating system’s control panel or app settings, and uninstall the browser. Next, download the latest version from the official Google Chrome website and install it on your device.

6. Create a New User Profile

Finally, creating a new user profile can potentially resolve issues with a missing toolbar:

a) Click on the profile icon in the top-right corner of Chrome.

b) Click on “Add” to create a new profile.

c) Fill out your information and complete the process.

d) Check if the toolbar is visible in the new profile.

Conclusion:

Having access to your Google Chrome toolbar is essential for smooth browsing experience. By following one or more of these six methods, you should be able to restore your missing toolbar and enjoy enhanced productivity as you navigate the web.

2 Quick Ways to Clean Your Grill Without a Grill Brush

A clean grill is essential for ensuring that your outdoor cooking experience is top-notch. Frequent and thorough cleaning not only extends the life of your grill but also ensures your food tastes amazing. However, sometimes you may find yourself without a grill brush at hand. Fret not! Here are two quick ways to clean your grill without using a grill brush.

1. Use Aluminum Foil

Aluminum foil is a versatile household item, and its use extends far beyond kitchen applications. It can also come to the rescue when you have to clean your grill without a brush. Here’s how:

Step 1: Begin by letting your grill cool down. Ensure it’s warm but not hot to the touch, as this will make cleaning more accessible and safer.

Step 2: Tear off a large piece of aluminum foil, approximately the length of your forearm. Fold the foil into a thick pad that can comfortably fit within your hand.

Step 3: Dampen the aluminum foil pad slightly with water. This step ensures that it easily picks up residue from the grates.

Step 4: Using tongs or heat-resistant gloves, hold onto one end of the aluminum foil pad and scrub the grates thoroughly. The abrasive surface of the foil will easily remove any food particles and debris.

Step 5: Wipe down the grates with a damp cloth or paper towel once you’ve finished scrubbing them with the foil pad. Now, your grill is as good as new!

2. Use an Onion

Believe it or not, an onion can be a fantastic substitute for a grill brush! The natural acidity of onions contributes to breaking down grease and grime on your grates.

Step 1: Preheat your grill to ensure it’s warm but not too hot before cleaning.

Step 2: Cut an onion in half, leaving one end of the onion uncut to act as a handle.

Step 3: Hold the onion handle-side down using tongs, and rub it across the grill grates. The moist, warm surface of the onion will help to remove debris and grease from the grates.

Step 4: After scrubbing with the onion, wipe down your grill grates with a damp cloth or paper towel to remove any remaining residue. Your grill is now clean and ready for your next cookout extravaganza!

By utilizing either aluminum foil or an onion, you can quickly and easily clean your grill without needing a grill brush. These methods are not only convenient but also environmentally friendly, as both items are biodegradable. So, next time you find yourself without a grill brush, don’t worry—give one of these creative alternatives a try!

Congratulations on Passing Your Exam: Wishes, Quotes, and Messages

Introduction:

Passing an exam is a significant milestone in anyone’s life. It marks the culmination of hard work, dedication, and perseverance. Celebrating this achievement with friends and loved ones is essential, as it encourages them to strive for more success in the future. This article aims to provide you with a variety of wishes, quotes, and messages that you can use to express your congratulations and heartfelt sentiments towards their accomplishment.

Wishes:

1. Congratulations on passing your exam! Your hard work has finally paid off, and you deserve all the accolades coming your way.

2. Great job on acing your test! This is just the beginning of greater things to come in your life.

3. Your stellar performance in this exam is an indication of your passion and commitment towards excellence. Well done!

4. The determination you showed during your preparation has yielded fantastic results. Congratulations on passing your exams!

5. You have proven that hard work is indeed the key to success. Well done on your remarkable achievement!

Quotes:

1. “Success is not final, failure is not fatal; it is the courage to continue that counts.” – Winston Churchill

2. “Education is the most powerful weapon which you can use to change the world.” – Nelson Mandela

3. “The roots of education are bitter, but the fruit is sweet.” – Aristotle

4. “Excellence is not a skill; it’s an attitude.” – Ralph Marston

5. “Believe you can, and you’re halfway there.” – Theodore Roosevelt

Messages:

1. I’m so proud of your exceptional performance in this exam! You have once again showcased your commitment towards academic excellence.

2. Congratulations on passing your exam with flying colors! May this success propel you to greater heights in both your personal and professional life.

3. Your impressive score is a testament to the unwavering dedication you’ve shown throughout your preparation. Keep up the fantastic work!

4. Exams are not just a test of your knowledge but also of your resilience, and you have come out victorious in both aspects. Congratulations on a job well done!

5. You have not only passed your exam but also set a new benchmark for others to follow. Keep shining, and congratulations on your achievement!

Conclusion:

Fostering a congratulatory environment when someone close to you achieves success is essential in maintaining strong relationships and instilling confidence in their abilities. Use the wishes, quotes, and messages above to genuinely express your happiness for their accomplishment. Remember, celebrating each other’s victories strengthens bonds and encourages continuous growth and development.

Navigating The Waters: Using Google Maps for a Boat Route

Introduction

Google Maps has long been an essential tool for land-based travel, helping millions of users reach their destinations efficiently. But did you know that this versatile app can also assist with boat routes? For boaters, planning a safe and enjoyable journey on water is just as important as plotting a drive in a car. In this article, we will explain how to use Google Maps to chart out a boat route and ensure smooth sailing.

Step 1: Plan Your Route

Launch Google Maps on your PC, smartphone or tablet and enter your desired destination in the search bar. For even more detail, zoom in on specific waterways to identify marinas, docks or other key points of interest. By clicking and dragging the map, you can customize your route to take advantage of the most scenic or practical path through the water.

Step 2: Measure Distances

Google Maps includes a convenient distance-measuring tool that can provide accurate measurements between two points. This is especially useful for determining the length of your boat route and estimating travel times. To use this feature:

1. Right-click on your starting point.

2. Select “Measure Distance” from the context menu.

3. Click on your destination point.

4. The distance will be displayed in miles or kilometers (depending on your settings).

Step 3: Check Weather Conditions

Before setting sail, gather essential weather information by adding the relevant layers to your Google Maps view:

1. Click on the menu button (three horizontal lines) in the upper-left corner of the screen.

2. Scroll down and click “Weather.”

3. Once activated, weather data such as temperature and precipitation will be displayed on the map.

Step 4: Take Advantage of Street View

Google Street View may also provide valuable information for planning your boat route. In certain locations, it offers 360-degree panoramic images of marinas and waterways. To access Street View, simply click and drag the yellow “Pegman” icon onto a blue-highlighted waterway or marina.

Step 5: Download Offline Maps

Keep your nautical navigation going even without internet access by downloading your planned route for offline use. With this feature, you can always have access to your boat route and vital information about the area, even when outside of cellular range.

1. In the Google Maps menu, click on “Offline Maps.”

2. Follow the instructions to download the desired region.

3. Make sure to download your map before leaving for your trip.

Conclusion

While Google Maps does not provide every feature required for full-fledged nautical navigation, it offers a reliable and flexible platform for planning boat routes. By leveraging its user-friendly tools and features, you can create a personalized route plan that ensures a smooth sailing experience. Always remember to combine real-time weather conditions and local information with your Google Maps-planned route for maximum safety and enjoyment on the water.

Top 7 Ways to Fix Facebook Messenger Notification Sound Not Working

Introduction:

In today’s fast-paced world, instant messaging applications like Facebook Messenger have become indispensable tools for communication. Imagine the inconvenience if you suddenly stop receiving notification sounds, causing you to miss important messages. Worry not! This article outlines the top seven ways to fix Facebook Messenger notification sound not working to help you stay connected at all times.

1. Check App Notification Settings:

First and foremost, ensure that the notification settings for Facebook Messenger are enabled. Visit your device’s app settings and enable all required permissions such as the push notification option, ensuring that everything is correctly set up.

2. Adjust Volume Settings:

Sometimes, notification sounds might become unhearable due to low volume or silent mode. To ensure this is not the case, verify your device’s volume settings and turn off silent mode or do-not-disturb mode, if enabled.

3. Update Facebook Messenger:

Using an outdated version of Messenger may cause issues with notification sounds. It is recommended that you update the application regularly by visiting the app store on your device and checking for updates. An updated version may fix bugs or problems with earlier versions.

4. Clear App Cache and Data:

Cached data can cause performance problems with applications, including disrupting notification sounds. Navigate to your device’s app settings and locate Facebook Messenger. Select ‘clear cache’ and ‘clear data’ options then restart the application to see whether the problem has been resolved.

5. Reinstall Facebook Messenger:

If updating and clearing app cache hasn’t resolved the issue, consider uninstalling and reinstalling Facebook Messenger from scratch. This ensures a clean installation of the latest version with no residual data from previous installations.

6. Check Device System Updates:

Outdated system software might conflict with some application features like notifications, affecting their functionality. Keep your device’s system software up-to-date to ensure all applications run smoothly by regularly checking for system updates in your device settings.

7. Factory Reset:

If all else fails, a factory reset may just do the trick. A factory reset will revert your device to its original state, eliminating any system errors or settings issues that might have caused notification sounds to stop working. Keep in mind that this step should be taken as a last resort as it will erase all your data, so make sure to back up your information before performing a factory reset.

Conclusion:

Awareness of these quick and easy fixes can save you from unnecessary stress and missed messages due to Facebook Messenger’s notification sound not working. Regularly updating both the application and device software can help avoid these issues and ensure optimal performance of your Messenger app.

Fond Farewells: Crafting the Perfect Goodbye Message for Colleagues and Employers

In the professional world, sometimes saying goodbye is inevitable. Whether you’re leaving the company for a new opportunity or simply switching departments, crafting a thoughtful and well-written goodbye message can leave a lasting impression on those you’ve worked with. In this article, we’ll explore some tips and examples for penning a heartfelt farewell message to colleagues and employers to show your appreciation for your time spent together.

1. Be Genuine: The golden rule of writing a goodbye message is to stay genuine and humble. No matter the circumstances or the emotions experienced during your tenure, always aim to express your true feelings with sincerity. Your colleagues will appreciate a meaningful message from the heart rather than a generic or superficial one-size-fits-all approach.

2. Thank your colleagues: Use your farewell as an opportunity to thank those who have supported you during your time at the company. Highlight positive aspects of your experience, such as how much you learned, any noteworthy achievements, or even fun memories shared together. Expressing gratitude not only leaves people feeling appreciated but also builds personal connections that could extend beyond the workplace.

3. Convey well wishes: Your departure message should showcase warmth towards others. Wish your colleagues success in their future endeavors and let them know you are cheering them on from the sidelines. In any profession, fostering strong relationships with former co-workers can pave the way for future networking and collaboration opportunities.

4. Be concise: While it’s important to relay your thoughts effectively, remember that brevity is key. Keep your message concise and respectful of others’ time, being mindful not to ramble or overindulge in details.

5. Share contact information: Don’t forget to include your LinkedIn profile or an email address where people can stay connected with you beyond your last day in the office. Goodbyes aren’t always permanent – leaving the door open for continued connections is always a smart move.

Example of a Goodbye Message:

Subject: Farewell from [Your Name]

Dear [Colleague’s Name],

As many of you already know, my time at [Company Name] has come to an end as I’ll be moving on to a new opportunity with [New Company]. I wanted to personally reach out and express my heartfelt gratitude for the support and camaraderie you’ve shown me throughout my journey here.

Working with you has been a true pleasure, and every day has brought new opportunities to learn and grow together. I will always treasure the memories we’ve created, as well as the dedication and teamwork that make this company shine.

While I’m excited about this new chapter in my life, I will miss [Company Name] dearly, as well as all the extraordinary individuals who have shaped my experience here. I genuinely wish each of you success and happiness in your future endeavors.

To stay in touch, please feel free to connect with me on LinkedIn or email me at [Your Email]. Thank you once again for the incredible experience at [Company Name], and here’s to staying connected!

Warmest regards,

[Your Name]

Graduation Wishes, Quotes, and Messages for Sister

Introduction:

Graduation day is a significant milestone in every student’s life. No matter the stage of education – high school, college, or postgraduate studies – it marks the end of one chapter and the beginning of another. As family members and loved ones gather to celebrate this momentous occasion, it’s important to express your love, admiration, and pride in your sister’s achievements. We’ve compiled a list of heartfelt and inspiring graduation messages to help you make her day extra memorable.

Graduation Wishes for Your Sister:

1. Congratulations on your graduation, my dear sister! You have worked incredibly hard over the course of your studies, and I am so proud of all that you have accomplished. Cheers to the bright future that awaits you!

2. To my amazing sister – you did it! Your dedication and determination have never gone unnoticed. I can’t wait to see where life takes you next. Congratulations on this well-deserved achievement!

3. My dearest sister, today marks an important day in your life as you step into the real world with a shining degree in hand. I cannot express how thrilled I am for you on your graduation day. Continue striving for greatness in all that you do!

Inspirational Quotes for Graduation:

1. “You have brains in your head. You have feet in your shoes. You can steer yourself any direction you choose.” – Dr. Seuss

2. “Your education is a dress rehearsal for a life that is yours to lead.” – Nora Ephron

3. “Go confidently in the direction of your dreams! Live the life you’ve imagined!” – Henry David Thoreau

Personalized Graduation Messages for Sister:

1. (Name), my sweet sister! Here’s to embracing new challenges, adventures, and opportunities that will come your way as a college graduate! Remember, I’ll always be here to support you on every step of the journey. Congrats!

2 .It’s been an incredible journey, and I’m so proud of the amazing woman you’ve become. Your passion, intellect, and creativity have truly shone through during your time at (University). Cheers to the next chapter and everything that life has in store for you. Congrats on your graduation, (Name)!

3. Dearest (Name), watching you accept your diploma today fills my heart with immense pride. While your road to success is just beginning, never forget how far you’ve already come and every hurdle you’ve tackled head-on. Keep reaching for the stars – I know great things are ahead for you! Congratulations on your graduation!

Conclusion:

Graduation is a special day that marks a significant milestone in the journey of life. As your sister conquers this tremendous achievement, it’s essential to shower her with love and admiration through heartfelt messages and quotes like those mentioned above. Whether it’s a personalized note or drawing inspiration from famous phrases, these tokens of appreciation will not only motivate her going forward but will also create lasting memories long after the cap and gown have been put away.