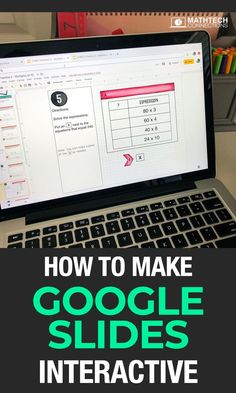
Emojis have become a ubiquitous part of digital communication, providing a fun and engaging way to express emotions and convey messages. They can also be an innovative tool for teachers looking to enhance learning in the classroom. Here’s how educators can use emoji to hook their students on learning:
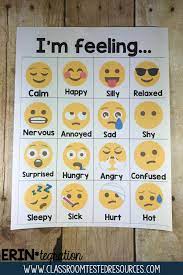
1. Emotional Check-ins: Start the day by asking students how they’re feeling, using emojis to express their emotions. This not only helps build emotional intelligence but allows students to communicate their feelings in a comfortable way.
2. React to Reading: While discussing a book or story, ask students to choose emojis that represent their feelings about the plot or characters. This can stimulate conversation and ensure that all students are actively engaged.
3. Summarize with Emojis: Challenge students to summarize a lesson or story using only emojis. This encourages them to think critically about the most important aspects and how best to represent them visually.
4. Feedback and Grading: Instead of traditional marks, use emojis to give feedback on assignments. A thumbs-up or star might indicate mastery, while a thinking face could suggest that there’s room for improvement.
5. Emoji Story Starters: Provide a string of emojis and have students write stories based on the sequence given. This exercise sparks creativity and gets them excited about writing.
6. Visual Vocabulary: Help students remember new words by associating them with an emoji. This mnemonic device can make vocabulary building more memorable and enjoyable.
7. Ice Breakers and Games: Use emojis as prompts for classroom games and icebreakers, such as “guess the emoji” where students have to identify phrases or concepts based on a series of emojis.
8. Instructions and Reminders: Simplify classroom instructions or reminders by incorporating relevant emojis. For example, an emoji of an ear next to instructions can emphasize the importance of listening carefully.
9. Social Media Projects: If you’re discussing social media literacy, have your students create posts or profiles utilizing emojis effectively as part of the content they generate.
10. Cultural Understanding: Educate students about how different cultures may interpret emojis differently, fostering discussions around cultural diversity and digital communication norms.
By integrating emojis into educational practices, teachers can enhance engagement, facilitate better communication, and provide a diverse range of opportunities for learning. It’s important for educators to ensure that these activities are inclusive and accessible for all learners, keeping in mind that interpretation of visuals like emojis can vary widely amongst individuals.
Free Online Digital Timers For The Classroom
In today’s digital age, it is essential for educators to integrate technology into the classroom to enhance learning and classroom management. One simple yet effective tool is the use of free online digital timers. These timers offer a variety of functions that are beneficial for both teachers and students.
Firstly, online digital timers can help manage classroom activities efficiently. By setting a timer for specific tasks or assessments, teachers can encourage students to stay focused and manage their time effectively. It also adds an element of gamification to learning, which can motivate students to complete their tasks more quickly.
Moreover, these timers are easily accessible and require no additional software installations, making them a convenient resource for any classroom with internet access. They can be projected on an interactive whiteboard or displayed on a screen so that all students can keep track of the countdown during activities.
Different types of online timers cater to various educational needs. For example, some have alarm sounds that signal the end of a countdown, while others provide visual cues such as a color change. There are even customizable timers where teachers can set specific time intervals for structured activities like reading sessions, group discussions, or tests.
Using free online digital timers also helps in establishing routines. For instance, teachers can start each class with a 5-minute timer for settling in and preparing materials, signaling to students that it’s time to concentrate once the timer ends.
Additionally, these digital tools often come with features such as stopwatches and lap timers, useful for scientific experiments or physical education activities. And because they are free, schools do not have to allocate additional budgets for purchasing physical timer devices.
In conclusion, free online digital timers are versatile tools that complement various classroom environments and teaching methodologies. They assist in imposing structure while remaining flexible to the needs of each class session. As education continues to evolve with technology, such simple tools become indispensable in creating an engaging and productive learning experience.
Be The Coolest Teacher Around Bitmoji in The Classroom 2
As the world of education continuously evolves with technology, teachers are finding innovative ways to connect with their students and create engaging learning environments. One of the latest trends that are making waves across classrooms is the use of Bitmoji, a personalized emoji that can make teaching more relatable and fun. Here’s how you can become the coolest teacher around by integrating Bitmoji in your classroom.
Embrace Technology and Personalization
Firstly, embracing technology in the classroom goes a long way in connecting with students who are digital natives. By creating your own Bitmoji, you’re stepping into their world. You can personalize your Bitmoji to look like you, which adds a quirky and approachable dimension to your teacher persona.
Create an Inviting Classroom Atmosphere
Transform bulletin boards, worksheets, presentations, and even virtual classroom backgrounds with your bitmoji character. An avatar cheering on students can make the learning environment feel more inviting and less intimidating.
Communicate in Their Language
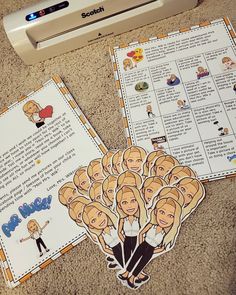
Use Bitmoji stickers to give feedback on assignments or in chat platforms like Google Classroom. A “Great Job!” or “Keep it up!” from a cartoon version of you can boost morale and motivate students.
Bitmoji Virtual Classroom
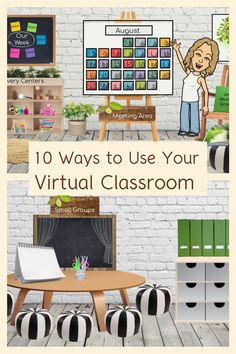
If you’re teaching remotely or want to spice up your online presence, create a Bitmoji virtual classroom where students can click on different items to navigate resources or assignments.
Lesson Planning and Assignments
Incorporate Bitmoji into lesson plans or on assignment sheets for visual interest. It not only captures attention but also provides comic relief.
Reading Corner with Bitmojis
Design a reading corner featuring famous authors’ avatars and add your own reading next to them. Encourage students to create their own Bitmojis to represent their current reads.
Engage in Digital Storytelling
Use Bitmoji scenes to engage students in digital storytelling. These visually appealing stories can enhance their creativity and writing skills.
Teach Digital Responsibility
While having fun, reinforce digital citizenship by discussing the importance of online privacy and persona when using apps such as Bitmoji.
By incorporating a touch of humor and personality into your teaching methods with Bitmojis, you’re likely to win over your students and be dubbed the coolest teacher around. Not only will this make lessons more enjoyable, but it will also help foster a positive learner-teacher relationship that goes beyond traditional teaching methods.
How to Build Virtual Bingo for Kids (Using Google Slides)
Bingo has always been a family-friendly game that kids enjoy. With the advent of digital tools, building a virtual Bingo game for children is both a fun and educational experience you can easily orchestrate from the comfort of your home or classroom. Google Slides is a versatile platform that can be used to create an interactive Bingo experience. Here’s how to set up your virtual Bingo game using Google Slides:
Step 1: Create a New Google Slides Presentation
Head over to Google Slides and start a new presentation. You can choose a blank slide or use one of the templates provided by Google Slides. Make your first slide a title slide, naming your Bingo game and adding any decorative images or themes you’d like.
Step 2: Design Your Bingo Cards
Each additional slide will serve as a different Bingo card. In general, a traditional Bingo card is a 5×5 grid, with the middle space typically being ‘free’. To make your grid, use the ‘Table’ tool in Google Slides to insert a 5×5 table into each slide.
For making this kid-friendly, replace numbers with items such as animals, fruits, colors, words they are learning, or pictures relevant to an educational theme. You can search for images online or use clipart.
Step 3: Randomize Each Card
To ensure that each child’s Bingo card is unique, you’ll need to randomize the placement of items on each slide. This step might be manually intensive but it’s important for an authentic gameplay experience. Create as many cards as you need for the number of players you have.
Step 4: Instructions Slide
Before playing, include an instruction slide explaining how the game will be played virtually. You can include rules like how to mark off items (such as using emojis or inserting shapes), what constitutes as bingo (a full line horizontally, vertically, or diagonally), and how kids should signal when they have bingo.
Step 5: Game Master Slide
As the host, create an additional slide with all possible Bingo items listed randomly. During gameplay, you will use this list to call out items one by one.
Step 6: Sharing Your Bingo Game
Once your slides are set up, share your presentation with participants through email or by creating shareable links. Make sure to restrict permissions to comment or view only so that players do not accidentally alter other players’ cards.
Step 7: Play Virtually
During the game session, use video conferencing tools such as Zoom, Google Meet or Skype to connect with all players. Each child will keep their Google Slides open in another window or on another device to mark their cards when items are called out.
Remember that interacting with virtual tools also offers learning opportunities about using technology responsibly and effectively for kids.
That’s it! With these simple steps, you’ve now turned this classic game into an engaging virtual adventure that combines fun and learning using accessible digital tools like Google Slides. Enjoy playing Virtual Bingo with kids!
How to Convert PDFs to Google Slides (For Google Classroom and More)
Transferring the content of a PDF file to Google Slides can be an essential skill for educators, professionals, and anyone who needs to share information in a more interactive and visually appealing format. Whether it’s for a Google Classroom lesson or a business presentation, converting a PDF into Google Slides allows you to edit and present the information as needed. Here’s how to do it:
1.Open Google Drive: Begin by navigating to drive.google.com in your web browser. Make sure you’re logged into the Google account where you want to save your Google Slides.
2.Upload the PDF File: Click on the “+ New” button on the left-hand side of the screen and choose “File upload.” Select the PDF file you wish to convert from your local storage and click “Open” to upload it to your drive.
3.Open with Google Slides: Once the file is uploaded, right-click on it in your Drive list and select “Open with,” then choose “Google Slides.” This will create a new Google Slide document with each page of the PDF imported as an image on its own slide.
4.Edit Your Slides: After you’ve converted the PDF, each page may appear as a non-editable image. To edit text or add new elements, you’ll want to overlay text boxes, shapes, or images using the tools provided in Google Slides.
5.Save and Share: Once you’ve made all your edits, you can easily share your new presentation within Google Classroom by clicking “Share” and entering the email addresses of your classroom members, or by providing them with a link to view or edit the slides.
While this process is straightforward, keep in mind that some complex PDF files may not convert perfectly due to differences in formatting between PDFs and Google Slides. Be prepared to make some manual adjustments as needed.
By following these steps, anyone can quickly convert educational materials, reports, business documents, and more from static PDFs into dynamic and interactive Google Slides presentations suitable for a wide range of uses including educational environments like Google Classroom.
Digital Teacher Planners | Why and How Teachers are Planning Digitally
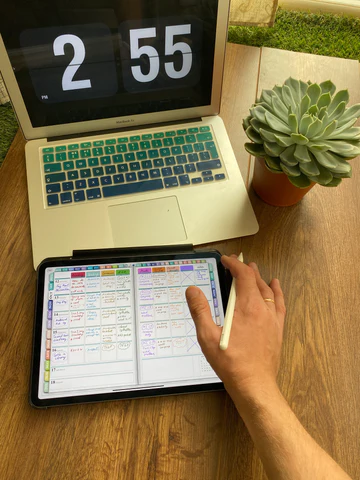
In the fast-paced world of modern education, efficiency and organization are paramount for teachers. Traditional methods of planning using paper-based planners can be limiting, cumbersome, and often not eco-friendly. This is where digital teacher planners come in, offering a flexible and interactive alternative that caters to the dynamic needs of educators today.
Why Teachers are Planning Digitally
Accessibility: Digital planners can be accessed from any device with an internet connection. Teachers do not have to carry bulky planners; with cloud-based services, their plans are just a few clicks away, anytime and anywhere.
Customization: Unlike paper planners with fixed layouts, digital planners allow educators to customize the look and feel according to their preferences. Features like drag-and-drop, resizing text boxes, and color-coding enhance the planning experience significantly.
Efficiency: With templates for lesson plans, grading systems, and calendars integrated into digital planners, teachers can save time by avoiding repetitive tasks. Automation features can quickly populate fields like dates and subjects across the planner.
Collaboration: Digital planners make it easy for teachers to share their schedules with colleagues, students, or parents. This facilitates better communication and cohesiveness in educational planning.
Environmental Impact: The shift to digital reduces the need for paper, contributing to environmental sustainability efforts within schools.
How Teachers are Planning Digitally
Teachers exploring digital planning have a variety of tools at their disposal:
1. Specialized Apps: Apps designed specifically for teachers include features tailored to classroom management such as attendance tracking, assignment logging, and curriculum mapping.
2. General Productivity Tools: Tools like Google Calendar or Microsoft Outlook offer robust scheduling features that can be used effectively for lesson planning.
3. Note-taking Software: Applications such as Evernote or OneNote provide platforms where teachers can organize their lessons creatively and comprehensively.
4. Learning Management Systems (LMS): Platforms like Canvas or Blackboard go beyond simple planning; they integrate administrative tasks with lesson planning and direct student interaction.
5. Project Management Software: Software such as Trello or Asana can also be adapted for educational planning, offering visual boards to track progress and milestones.
In conclusion, the movement towards digital teacher planners is driven by a desire for greater effectiveness in preparation and delivery of education. Digital tools offer flexibility, efficiency, accessibility, customization options that traditional methods cannot match. As technology continues to evolve, it is likely we will see even more innovative solutions emerging to meet the ever-changing demands of educators worldwide.
The Contemporary Dilemma: Screen Time, Conflict, and Opportunity in Britain’s Digital Landscape
Output: The impacts of screen time and media can be a significant talking point amongst parents, teachers, and even kids themselves. While excessive screen time can lead to negative outcomes, it’s important to recognize that not all screen time is detrimental. Educational platforms like Teach Starter offer engaging learning materials that can make screen time beneficial.
The blog post on Teach Starter discusses how screen media can be either a source of conflict or an opportunity based on how it is used. It highlights the importance of setting boundaries around screen use and recognizing that when used thoughtfully and creatively, screen time can be a powerful educational tool.
Parents and educators are advised to look for high-quality content that is educational and aligns with their children’s learning goals. Teach Starter provides resources that can transform potentially negative screen time into an interactive and productive experience for children. The platform offers numerous teaching resources that cater to the curriculum requirements in different countries, including the UK.
In conclusion, the key message from the Teach Starter blog post is to understand and utilize screen media as a positive opportunity for learning rather than merely as a reason for conflict. By doing so, children can benefit from digital advancements without falling prey to the pitfalls of excessive passive consumption.
Video Backgrounds for Teachers (FREE Download)
Teaching in the digital age has evolved significantly, with teachers continually seeking innovative ways to captivate and engage their students. One such tool that has become increasingly popular in educational settings is video backgrounds. These visual aids can transform a mundane lecture into an immersive experience, helping to illustrate points more vividly and maintain students’ attention.
What Are Video Backgrounds?
Video backgrounds are looped video clips or animated graphics that play behind the main content during a presentation or a virtual class session. They can range from subtle motion, like gentle waves or a serene landscape, to thematic illustrations related to the lesson’s content. The right background video can accentuate the teaching material without distracting from it.
Why Use Video Backgrounds for Teaching?
The use of video backgrounds in teaching can serve several purposes:
1. Visual Stimulation: Students today are accustomed to multimedia experiences. Video backgrounds provide visual stimulation that could keep them engaged during online classes or while watching pre-recorded lessons.
2. Contextualization: For example, while teaching about marine life, a video background displaying an aquatic environment can help set the scene and provide context for the discussion.
3. Emotional Connection: The right visuals can evoke emotions and set the tone for a topic, aiding in memory retention and making lessons more memorable.
4. Branding: Teachers who produce their own content might use consistent video backgrounds as part of their branding strategy, making their educational videos instantly recognizable.
Free Video Background Resources for Teachers
1. Pixabay – Offers a wide array of free stock video clips that are ideal for use as video backgrounds.
Website: https://www.pixabay.com
2. Pexels – Another great source for high-quality, free stock videos which could be used as teaching aids.
Website: https://www.pexels.com
3. Videezy – Provides free HD stock footage and motion graphics that could enhance any lesson plan.
Website: https://www.videezy.com
4. Coverr – Perfect for finding unique and engaging background videos without any licensing hassles.
Website: https://www.coverr.co
5. Life of Vids – A curated collection of free-to-use videos with no attribution required; ideal for educational settings.
Website: https://www.lifeofvids.com
Utilizing these resources, teachers can now integrate captivating video backgrounds into their classes without worrying about costs. Their free download feature also makes it accessible to all educators aiming to enrich their students’ learning experience through modern technology.
To ensure effectiveness when using video backgrounds in a classroom setting, teachers should be mindful of a few best practices:
– Choose backgrounds that support the lesson’s content rather than distract from it.
– Opt for subtle motion to avoid drawing attention away from the primary material.
– Test your chosen video background before the lesson to ensure it works seamlessly with your teaching platform.
– Pay attention to the length of the clip; seamless loops are preferable so as not to disturb continuity.
– Always credit creators when required by the license; it’s important both legally and ethically.
In conclusion, video backgrounds have the potential to greatly enhance educational experiences for students by providing dynamic visual contexts that standard still images cannot match. With resources freely available, teachers can easily incorporate this tool into their digital classrooms, creating stimulating and effective learning environments tailored to twenty-first-century learners.
Discovering 19 Sites and Apps for Digital Storytelling
Introduction
Digital storytelling is a creative and engaging way for individuals to share their experiences, ideas, and thoughts using various multimedia tools. It has become increasingly popular as more people seek to connect with others through personal stories. In this article, we will explore 19 amazing sites and apps that are useful for creating digital stories.
1. Adobe Spark
Adobe Spark offers a suite of design tools for creating stunning visual content, including digital stories, social graphics, and videos.
2. Pixton
Pixton allows users to create personalized comic strips with their choice of characters, backgrounds, dialogue, and more.
3. Book Creator
Book Creator is an easy-to-use tool for designing and publishing digital books that showcase images, text, audio, and video.
4. Glogster
Glogster enables users to create interactive multimedia posters that incorporate text, graphics, audio clips, and videos.
5. Storybird
Storybird provides a platform for young writers to collaborate with professional artists in creating unique illustrated stories.
6. WeVideo
WeVideo is a powerful online video editing software that makes it easy to create compelling digital stories with transitions and special effects.
7. Animoto
Animoto helps users turn their photos and video clips into animated slideshows by providing a wide array of customizable templates.
8. Toontastic 3D
Toontastic 3D allows kids to create animated stories with three-dimensional characters by simply dragging them across the screen.
9. StoryMapJS
StoryMapJS is an interactive mapping tool that helps users visualize geo-located narratives by linking locations on a map with multimedia content.
10. Sutori
Sutori is a collaborative platform for creating multimedia presentations in the form of vertical timelines or picture books.
11. ThingLink
ThingLink enables users to create interactive images by adding annotations with links, text, videos, or audio to their photos.
12. Inklewriter
Inklewriter is a text-based platform for creating branching narratives or interactive fiction with embedded choices for readers.
13. Scribblitt
Scribblitt is a website designed for young authors to write, illustrate, and publish their digital stories or books.
14. Little Bird Tales
Little Bird Tales allows kids to create multimedia stories by drawing pictures, adding text, and recording their voices.
15. Shadow Puppet Edu
Shadow Puppet Edu is an app for creating engaging stories using photos, audio narration, and music.
16. StoryJumper
StoryJumper offers an online platform for kids to create and publish their own storybooks with templates and custom illustrations.
17. ComiXwriter
ComiXwriter is a scriptwriting software focused on creating comic books and graphic novels complete with editing tools for illustrating and storyboarding.
18. WriteReader
WriteReader helps children learn to read by enabling them to write their own digital stories with assistance from adults in the form of feedback and support.
19. Twine
Twine is an open-source tool for designing interactive fiction or choose-your-own-adventure stories in a nonlinear format.
Conclusion
With these 19 sites and apps for digital storytelling at your fingertips, you can unleash your creativity in countless ways. From comics to interactive novels, there are plenty of options to choose from when it comes time to tell your story. Give one (or several) of these sites a try and introduce a whole new world of digital storytelling into your life!
Photography and filming in school: when the Data Protection Act applies
Introduction
In the modern age, cameras have become an integral part of our lives. From smartphones to professional gear, capturing moments through photography and filming has become second nature for many. In educational institutions like schools, capturing events such as sports days, graduation ceremonies, plays, or school trips is a common practice. However, under certain circumstances, taking photographs and recording videos in schools may fall under the purview of the Data Protection Act (DPA). This article delves into understanding when the DPA applies to photography and filming in schools.
Understanding the Data Protection Act
The Data Protection Act (DPA) is a law designed to protect individuals’ privacy by regulating how personal data is collected, stored, used, and accessed. Personal data refers to any information relating to an identifiable living individual, including their name, address, telephone number, or even photographs or videos that can identify them.
When Does the DPA Apply?
In most situations concerning photographs and filming within schools, the DPA will come into effect when:
1. The purpose of capturing a photograph or video is for official school use,
2. The images are stored electronically (digital format) and can be used to identify individuals,
3. Individuals captured in the images have not provided their explicit consent.
For example, taking school portraits might fall under the scope of the DPA if they are used without consent for official documentation such as student identification cards or electronic records.
DPA Exceptions for Schools
There are certain exceptions where DPA does not apply to photography or filming within schools:
1. If the photos or videos are intended solely for personal use, such as by family members capturing special moments,
2. If material captured is part of a journalism project undertaken by students,
3. If images are not stored electronically but rather as physical prints only.
In these cases, obtaining consent from individuals before capturing their image is still considered best practice.
Consent and Safeguarding
When it comes to collecting and using personal data, schools have a duty to be transparent and obtain consent from those involved. Consent must be:
1. Freely given – the individual must not be subject to coercion or pressure,
2. Informed – the purpose for capturing or using the images must be clearly explained,
3. Unambiguous – an individual should clearly indicate their agreement through a positive act (either written or oral).
It is important for schools to have a clear photography and filming policy in place that outlines how personal data in the form of images will be processed, handled, stored, and used.
Conclusion
In summary, the Data Protection Act applies to photography and filming activities when personal data is being captured, stored, or used electronically within schools without explicit consent. Schools must ensure they have a robust consent process in place to safeguard students and staff’s privacy while also fostering an environment that allows valuable memories to be captured responsibly.
