Tech Advice

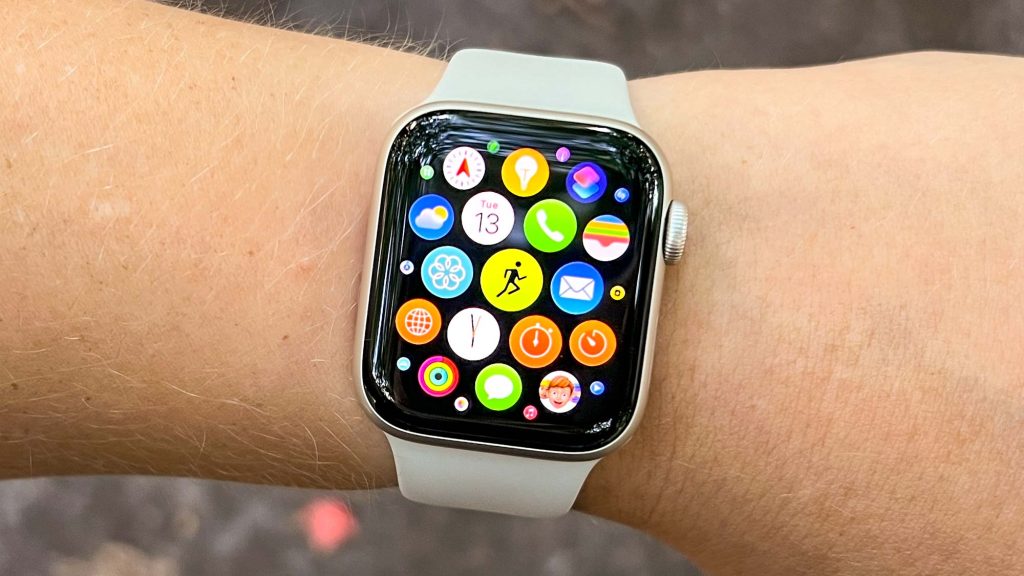
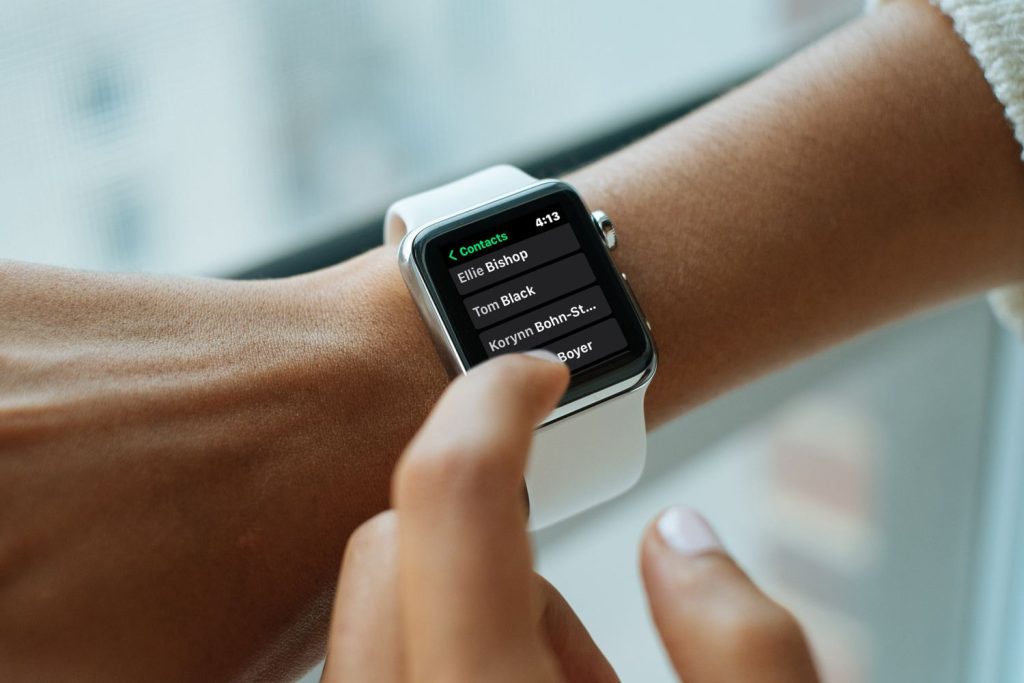
Apple Watch Not Showing Contact Names: How to Fix the Problem

The Apple Watch is a fantastic piece of technology that brings convenience and functionality to your wrist. However, like any device, it can sometimes have its quirks. One issue that some users have experienced is that their Apple Watch is not showing contact names, even when they’re saved in their phone. Thankfully, this problem can be fixed easily by following a few simple steps.

1. Restart Your Apple Watch

Sometimes, all your watch needs is a little refresh. Hold down the side button on your Apple Watch until you see a slider appear on the screen. Swipe the slider from left to right to power off the device fully. After the watch turns off, hold down the side button again until you see the Apple logo, indicating that the watch is restarting.

2. Check Your Contacts Sync Settings

You need to ensure that your iPhone and Apple Watch have their contact information synced correctly. On your iPhone, go to Settings > Bluetooth and ensure that Bluetooth is enabled. Then, tap on your Apple Watch under “My Devices” and tap “i” next to it.
Scroll down and find Contacts under “Mirror my iPhone.” Make sure that Contacts are toggled on – this will ensure your contact names are synced between your iPhone and Apple Watch.

3. Update Your iPhone and Apple Watch

At times, outdated software can cause glitches with various features, including displaying contact names on your Apple Watch. To update your devices’ software:

iPhone:

– Go to Settings > General > Software Update

– If there’s an update available, tap “Download and Install”

Apple Watch:

– Place your watch on its charger

– On your iPhone, open the Watch app

– Go to My Watch > General > Software Update

– If there’s an update available, tap “Download and Install”

4. Reset Sync Data

If everything else fails, resetting sync data could resolve the issue with contact names not appearing on your Apple Watch. This process will erase all saved contact information and resync it from your iPhone.

Here’s how to reset sync data:

– On your iPhone, open the Watch app

– Go to My Watch > General > Reset

– Scroll down and tap “Reset Sync Data”, which will delete and resync your contact information

By following these steps, you should be able to resolve the issue of your Apple Watch not showing contact names. It’s essential to keep your devices updated, periodically check sync settings, and reach out to Apple Support if any further issues arise. That way, you can continue enjoying the convenience and practicality of your Apple Watch.

Connecting a Mouse and Keyboard to Your Steam Deck – A Comprehensive Guide

Introduction:

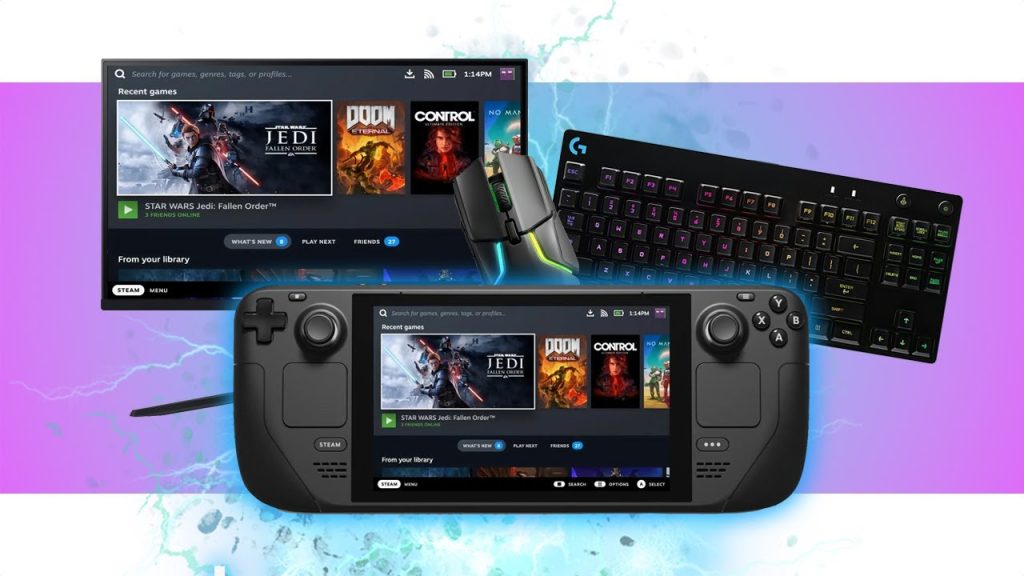
The Steam Deck is an innovative portable gaming device developed by Valve that promises to revolutionize on-the-go gaming experiences. However, there may be instances where you want to connect a mouse and keyboard to your Steam Deck for enhanced control or additional functionality. In this article, we will discuss the process of connecting a mouse and keyboard to your Steam Deck and explore some practical use cases for such a setup.

1. Utilizing USB-C ports for connectivity:

The Steam Deck features a USB-C port that can be used for a variety of purposes, including connecting external peripherals like a mouse and keyboard. One method of connecting these devices is through a USB-C hub or adapter. Many popular hubs and adapters come with multiple USB-A ports that enable you to plug in your desired peripherals directly.

2. Bluetooth compatibility:

Apart from using USB-C ports, the Steam Deck supports Bluetooth technology, which allows wireless connectivity with compatible devices. If your mouse and keyboard are Bluetooth-enabled, follow these steps:

a) Turn on the Bluetooth function on both your mouse and keyboard.

b) On your Steam Deck, navigate to the settings menu.

c) Access the Bluetooth options and initiate the pairing process.

d) Select your mouse and keyboard from the list of available devices.

e) Follow any on-screen instructions to complete the pairing process.

3. Customizing control settings:

Once you have successfully connected your mouse and keyboard to the Steam Deck, it’s essential to configure the control settings according to your preferences. Launch a game that supports keyboard and mouse input, access its options menu, and adjust key bindings or sensitivity settings as desired.

4. Practical use cases:

There are several reasons why connecting a mouse and keyboard to your Steam Deck may be beneficial. These include:

a) Strategy games: Complex strategy games often require precise inputs that may be easier to manage with a mouse and keyboard.

b) First-person shooters (FPS): Many players prefer using a mouse and keyboard for increased accuracy and control in FPS games.

c) Steam Remote Play: The Steam Deck features Remote Play functionality that allows you to stream games from your PC. Using a keyboard and mouse may prove more comfortable when playing traditionally designed PC games.

d) Productivity: A connected mouse and keyboard enable the possibility of using the Steam Deck as a makeshift computer for tasks like typing or web browsing.

Conclusion:

The ability to connect a mouse and keyboard to the Steam Deck is an excellent option for those seeking more versatility with their portable gaming device. By utilizing USB-C ports or Bluetooth technology, you can quickly expand its functionality and enjoy various use cases that cater to your individual preferences. So go ahead, experiment with different setups, and unlock the full potential of your Steam Deck.

The Trade-Offs of Chrome’s Enhanced Safe Browsing Mode

Introduction:

With the constantly evolving landscape of cybersecurity threats, it has become more important than ever to ensure that your browsing experience is as secure as possible. One such option for Chrome users to strengthen their browser security is by using the Enhanced Safe Browsing mode. However, this added security comes with some trade-offs. This article will explore the advantages and sacrifices that come with using Chrome’s Enhanced Safe Browsing mode.

The Benefits of Enhanced Safe Browsing Mode:

1. Improved Protection Against Malware and Phishing: Enhanced Safe Browsing mode adds an additional layer of security to protect users from various online threats, including malware, phishing attacks, and other malicious websites. It works by sharing real-time data with Google about visited sites to enable quicker and more accurate threat assessments.

2. Faster Warnings About Suspicious Downloads: With this mode enabled, Chrome provides quicker warnings about potentially harmful files before they are downloaded onto your device. This can help prevent malware infections and other security issues resulting from downloading suspicious files.

3. Enhanced Password Security: When logging into sites in Enhanced Safe Browsing Mode, Chrome will quickly alert you if your credentials have been compromised in a data breach, empowering you to change your passwords promptly.
The Trade-Offs of Using Enhanced Safe Browsing Mode:

1. Privacy Concerns: As mentioned earlier, the Enhanced Safe Browsing mode shares real-time browsing data with Google. While this improves threat detection and response times, it also raises privacy concerns among some users who may be uncomfortable with sharing their browsing history and habits with Google.

2. Increased Data Usage: Due to its real-time threat detection mechanism, this feature may consume more data compared to standard browsing modes. This could be a concern for users with limited data plans or slow internet connections.

3. Potential False Alarms: While the goal is to provide advanced warning about potential threats, Enhanced Safe Browsing mode might sometimes generate false alarms for certain websites or downloads that are not actually harmful. This could lead to an over-cautious browsing experience and may cause frustration for some users.

In Conclusion:

Chrome’s Enhanced Safe Browsing mode offers improved protection against various online threats at the cost of potentially sacrificing privacy and increasing data usage. Ultimately, it is up to each individual user to decide whether the added security outweighs the trade-offs. As always, a balanced approach to online security is essential, including regularly updating software, implementing strong passwords, and being cautious of suspicious links and downloads.

Top 8 Ways to Fix Microsoft Outlook Web Not Working

Introduction:

Microsoft Outlook Web is an essential tool for professionals and individuals alike to manage their emails and stay connected. However, sometimes users face issues with the platform, making it difficult or even impossible to access their accounts. In this article, we will explore the top 8 ways to fix Microsoft Outlook Web not working so that you can resume your email management without any further hassle.

1. Check Internet Connection:

First and foremost, ensure that you have a stable internet connection. If you cannot access other websites or web services, try resetting your modem or router. You can also check your internet speed using various online tools to ensure it is sufficient for a smooth browsing experience.

2. Clear Browser Cache and Cookies:

Accumulated cache and cookies can cause issues with Outlook Web as they may contain outdated data or corrupted files. To fix this, clear your browser’s cache and cookies and then restart the browser before trying to access Outlook Web again.

3. Update Your Browser:

Outdated browsers can cause compatibility issues with modern web applications such as Outlook Web. Keeping your browser updated ensures optimal performance and fewer glitches. Visit your browser’s official website to check for updates or enable automatic updates in the settings.

4. Disable Browser Extensions:

Some browser extensions may interfere with Outlook Web’s functionality, causing it not to work correctly. To identify if an extension is causing the problem, disable all extensions temporarily and see if the issue is resolved. If it is, you can enable extensions one by one to find out which one is causing the issue.

5. Use a Different Browser:

Another way to troubleshoot issues with Outlook Web is by trying a different browser altogether. If you are experiencing problems with one browser, switch to another one such as Google Chrome, Firefox, Microsoft Edge or Safari to see if the issue persists.

6. Use Outlook Desktop Client:

If you want to access your emails while the problems with Outlook Web are being resolved, consider using the Outlook desktop client as an alternative. The desktop client provides all the features of the web version and also allows offline access to your emails.

7. Check Microsoft Service Status:

Sometimes server or service-related issues can cause Outlook Web not to work as expected. To verify if there is a widespread problem, check Microsoft’s service status page for any ongoing issues or outages impacting Outlook.

8. Contact Microsoft Support:

In case the issue persists even after trying all the above steps, reach out to Microsoft Support for assistance. They can guide you through further troubleshooting steps, provide updates on any known issues, and help resolve specific problems with your account.

Conclusion:

Experiencing issues with Microsoft’s Outlook Web can be frustrating; however, the solutions mentioned above can help you quickly identify and resolve common problems. By trying these methods, you stand a better chance of restoring your access to Outlook Web and continue managing your emails with ease.

Non-Apple MP3 Players Compatible with iTunes

Introduction:

iTunes has long been the go-to software for managing and organizing music collections. Although Apple devices are synonymous with iTunes, you might be surprised to learn that there are also non-Apple MP3 players compatible with the popular software. Discover a world of alternatives that offer seamless integration with your iTunes library.

1. Sony Walkman NW-A105

Sony’s Walkman NW-A105 boasts a sleek design, excellent sound quality, and compatibility with iTunes. Simply connect the device via USB to your computer or use an app like iSyncr to transfer your playlists, albums, and individual tracks hassle-free. Equipped with Android 9.0 Pie and popular streaming services, this Walkman is perfect for users who want flexibility in their music choices.

2. Sandisk Sansa Clip Jam

The affordable and lightweight Sandisk Sansa Clip Jam is another great option if you’re looking for a non-Apple player that works well with iTunes. With 8GB of storage space, it can easily accommodate a large portion of your music collection. You can sync the device using iTunes or drag-and-drop files from your computer.

3. Astell & Kern A&norma SR25

Astell & Kern’s A&norma SR25 offers high-fidelity sound quality, which makes it a solid choice for audiophiles searching for an MP3 player compatible with iTunes. Though pricier than other options on this list, it justifies its cost by providing stellar audio performance and seamless integration with your iTunes library.

4. AGPTEK A02 Music Player

The AGPTEK A02 MP3 player is another budget-friendly alternative that works perfectly with iTunes. Boasting 8GB of internal storage and expandable memory up to 128GB through a microSD card slot, this device accommodates all your music needs. Sync your iTunes library via USB cable or by dragging-and-dropping files from your computer.

5. FiiO M6 Hi-Res Lossless Music Player

FiiO’s M6 Hi-Res Lossless Music Player delivers outstanding sound quality and is compatible with iTunes. The built-in Android OS allows you to wirelessly transfer your music using AirPlay and apps like iSyncr. Furthermore, the device supports numerous popular audio formats and even has support for major streaming services.

Conclusion:

You don’t have to stick with Apple devices if you’re a dedicated iTunes user. These non-Apple MP3 players offer a diverse range of options, from budget-friendly choices to high-end models with advanced audio features. Find your perfect companion device to enjoy seamless synchronization with your iTunes library today!

How to Fix OneDrive’s “The tag present in the reparse point buffer is invalid” Error on Windows

OneDrive has become an essential tool for storing and sharing files, syncing them across devices and ensuring that your data is always accessible. However, like any software, OneDrive can occasionally run into issues. One such error is the “The tag present in the reparse point buffer is invalid” message that some Windows users may encounter. In this article, we will discuss how to fix this issue so you can continue using OneDrive seamlessly.

1. Update Windows and OneDrive

One of the first things you should try when encountering any error is to check for available updates for both Windows and OneDrive. Updates often include bug fixes and improvements that can resolve your issue.

To update OneDrive:

– Right-click the OneDrive icon in the system tray on your Windows taskbar.

– Click on “Help & Settings.”

– Select “Check for updates.”

To update Windows:

– Click on the Start button and select Settings (the gear icon).

– Go to “Update & Security.”

– Click “Check for updates” to see if there are any available updates.

2. Unlink and Re-link your OneDrive account

Sometimes, unlinking from OneDrive and then re-linking your account can resolve this error:

– Right-click on the OneDrive icon in your taskbar.

– Go to “Help & Settings” and click on “Settings.”

– Under the “Account” tab, click on “Unlink this PC.”

– Follow the prompts and sign in again with your Microsoft Account credentials.

3. Use Command Prompt to delete reparse points

Reparse points are a type of data buffer used by NTFS file systems for various purposes. The error could be due to a problem with a reparse point in your OneDrive folder.

You can delete reparse points using Command Prompt as follows:

– Press the Windows key + X and select “Command Prompt (Admin).”

– Type “cd %userprofile%\OneDrive” and press Enter.

– Run the following command to find all problematic reparse points:dir /a:l /s /b

– Once you have identified the files with reparse points, use this command to delete them safely:
fsutil reparsepoint delete <path to file>

After deleting the reparse points, restart your computer and check if the issue is resolved.

4. Reset OneDrive

If none of the above steps work, you can try resetting OneDrive. This will not delete your files but may resolve any underlying issues causing the error.

– Press the Windows key + R to open the Run dialog.

– Copy and paste this command into Run: %localappdata%\Microsoft\OneDrive\onedrive.exe /reset

– Press Enter and wait for OneDrive to reset itself.

By following these steps, you should be able to fix the “The tag present in the reparse point buffer is invalid” error on Windows. If the problem persists, you may need to contact Microsoft Support for further assistance.

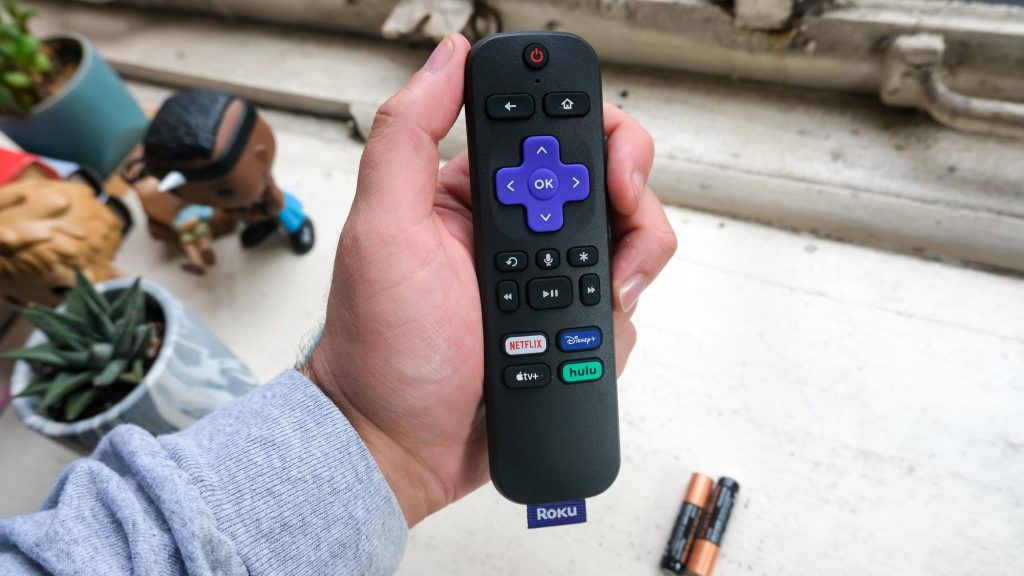
How to Fix It When Roku Remote App Won’t Connect

Introduction:

The Roku remote app is a convenient solution that allows users to control their Roku streaming devices from their smartphones. However, issues may arise causing the app not to connect to the device. In this article, we will be discussing steps you can take to fix the problem when your Roku remote app won’t connect.

1. Check your Wi-Fi connection:

Ensure that both your smartphone and Roku device are connected to the same Wi-Fi network. This is crucial for the remote app to function properly. If they are not on the same network, connect them accordingly and try again.

2. Update your Roku device and app:

Make sure both your Roku device and remote app are updated to their latest versions. Outdated software might lead to compatibility issues and cause the app not to work as intended.

To update your Roku device, go to ‘Settings’ > ‘System’ > ‘System update’ > ‘Check now.’
For the Roku app, check for updates in the Apple App Store or Google Play Store depending on your smartphone’s platform.

3. Restart your devices:

Turn off your smartphone and Roku device completely, then restart them after a few seconds. This simple reboot can often fix many underlying issues.

4. Reset your router:

If you’re still having issues after restarting both devices, consider rebooting your Wi-Fi router as well. Unplug it from the power source, wait 30 seconds, and then reconnect it. Once the Wi-Fi signal is stable, try connecting with the remote app again.

5. Reinstall the Roku remote app:

A corrupted application file might be at fault here; try uninstalling and then reinstalling the app on your smartphone.

6. Check if there are any network obstructions:

Physical objects like walls or large electrical appliances might interfere with Wi-Fi signals or create dead zones in certain areas of your home. Try to move closer to your router or rearrange your devices to avoid these obstructions.

7. Use an alternative remote app:

If none of the above solutions work and you still can’t connect, try using a third-party remote app like RoByte or Remote for Roku as they may have different compatibility settings.

Conclusion:

If your Roku remote app won’t connect to your device, follow these steps to troubleshoot and fix the issue. Ensuring strong Wi-Fi connection, keeping your devices updated, and exploring alternative options will help you regain control of your streaming experience.

How to Get NVIDIA GeForce NOW Free for 6 Months

Introduction:

NVIDIA GeForce NOW is a popular cloud gaming service that allows you to play your favorite games on any compatible device. Fortunately, there’s a way for you to enjoy this service free for six months! In this article, we’ll outline the steps you can take to get NVIDIA GeForce NOW free for half a year.

Step 1: Check your eligibility

To be eligible for the six-month free trial, you must meet the following criteria:

– Be a new NVIDIA GeForce NOW user or have an inactive account.

– Have a compatible device such as a Windows PC, macOS computer, NVIDIA SHIELD TV, or an Android device.

– Reside in a country where NVIDIA GeForce NOW is available.

Step 2: Find a promotional code

Keep an eye out for special promotions from NVIDIA or its partners. These promotions often include codes that grant you access to six months of free service. You can find these promo codes by searching online or subscribing to newsletters from tech websites and influencers.

Step 3: Create an NVIDIA account

To access NVIDIA GeForce NOW, you need to create an account if you haven’t done so already. Visit the NVIDIA GeForce NOW website and click on ‘Join Today’. You’ll be asked to provide some basic personal information and complete the registration process.

Step 4: Redeem your promotional code

After creating your account and ensuring that your device is compatible with the service, it’s time to redeem your promotional code. Log into your NVIDIA account and navigate to the ‘Account Management’ section. Find the ‘Redeem’ tab, enter your promotional code, and follow the prompts to complete the redemption process.

Step 5: Download and install the app

Download and install the NVIDIA GeForce NOW app onto your compatible device. You can find links to download the app on their website or various app stores. Once installed, log in using your NVIDIA account credentials.

Step 6: Activate your free six-month trial

Once logged in, your free trial should automatically begin. For six months, you will be able to access all features and benefits of NVIDIA GeForce NOW without paying any subscription fees. Remember to keep track of when your trial ends to avoid unexpected charges after the free period expires.

Conclusion:

With these simple steps, you can enjoy NVIDIA GeForce NOW for free for an astonishing six months! Don’t miss out on this incredible opportunity to experience cloud gaming at its finest, and make sure to share this guide with friends and family members who might also want to take advantage of this fantastic offer.

The Best Apps for the Apple Watch Ultra

Introduction:

The Apple Watch Ultra is a game-changer in the field of smartwatch technology, offering users an unparalleled level of convenience and productivity in their day-to-day lives. In this article, we will explore some of the best apps specifically designed to maximize your experience with the Apple Watch Ultra.

1. Strava:

Strava is a must-have app for fitness enthusiasts who want to track their workouts and connect with friends. With its compatibility with the Apple Watch Ultra, users can monitor their heart rate, distance traveled, and calories burnt in real-time. Additionally, GPS tracking allows for analyzing your routes and performances, motivating you to improve over time.

2. Todoist:

Stay on top of your tasks with Todoist, an exceptional task management app suitable for the Apple Watch Ultra. Set reminders, create to-do lists, and prioritize tasks right from your wrist. Todoist’s seamless integration with other devices ensures you never miss out on important tasks or deadlines.

3. Citymapper:

Navigating your way through an unfamiliar city could be daunting; however, Citymapper makes it easy for Apple Watch Ultra users. Offering turn-by-turn navigation right on your wrist, this app ensures you won’t get lost while exploring new destinations. Public transport updates and real-time ETAs make it incredibly convenient for commuters as well.

4. CARROT Weather:

CARROT Weather keeps you updated with hyper-local weather forecasts tailored for your specific location. Its compatibility with the Apple Watch Ultra ensures accurate weather predictions and timely alerts for severe conditions.

5. Sleep++:

Monitor your sleep quality using Sleep++. This app tracks your sleep patterns and provides insights into your sleeping habits through data analysis. With its compatibility with the Apple Watch Ultra, you will receive nightly sleep recommendations customized to improve your overall sleep quality.

6. SoundHound:

For music lovers seeking quick song recognition, SoundHound is the ultimate app. It identifies songs playing around you, within a matter of seconds. With its compatibility with the Apple Watch Ultra, users can now identify any tune from their wrist and access lyrics instantly.

7. Nike Run Club:

Another fitness tool, the Nike Run Club app makes running more enjoyable for Apple Watch Ultra users. The app not only tracks your runs but also offers guided workouts and customized coaching plans tailored to your goals.

Conclusion:

The Apple Watch Ultra is an innovative smartwatch that offers a wealth of potential for improving your daily life. By utilizing these top apps, you can optimize your experience and take full advantage of this cutting-edge device’s capabilities. Whether it’s monitoring your health, staying organized, or exploring new cities, these apps have got you covered.

How to View Saved Credit Card Numbers in Safari on iPhone and iPad

Introduction:

In today’s fast-paced digital world, convenience and efficiency are prioritized. Safari users on iPhone and iPad have the option to save their credit card information for easier online shopping. This article will guide you through the process of viewing your saved credit card numbers in Safari on your iPhone or iPad.

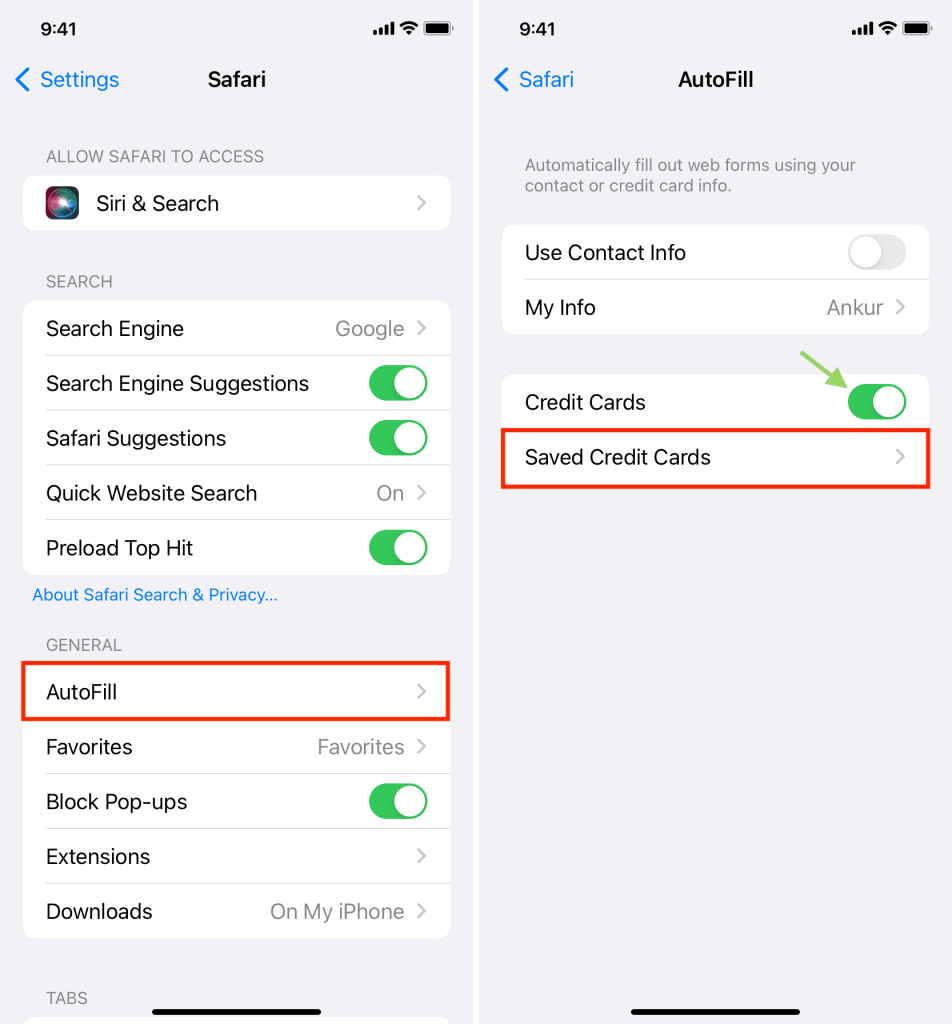
Step 1: Open Settings

To begin, locate and open the “Settings” app on your device. This icon usually features a gear symbol.

Step 2: Scroll Down to Safari

Within the “Settings” menu, scroll down until you find the “Safari” option. Tap on it to access the Safari settings.

Step 3: Access Autofill Options

Once you’ve opened Safari settings, scroll down and locate the “Autofill” section. This is where you can manage saved credit card information. Tap on “Autofill” to proceed.

Step 4: Enter Password or Use Touch/Face ID

Safari requires identity verification for security purposes before showing saved credit card details. Upon selecting Autofill, you will be prompted to provide your device password or use Touch ID/Face ID to verify your identity.

Step 5: Manage Credit Card Information

Following successful identity verification, you will see a list of saved credit cards associated with your account. To view individual card details, tap on a specific card. This will display the card number (partially obscured), expiry date, and any other available information attached to that particular card.

Step 6: Editing Credit Card Details (Optional)

If necessary, you can also make changes to saved card information. To do this, click “Edit” on the top-right corner of the screen, modify the necessary fields as required, and then tap “Done.”

Conclusion:

Knowing how to view saved credit card numbers in Safari on iPhone or iPad increases convenience and enhances your online shopping experience. By following the steps outlined in this article, you can easily manage and access your saved credit card details in a secure manner.