Tech Advice

How to Find and Remove Duplicates in Numbers on Mac

Introduction

When working with data in spreadsheets, duplicated content can often cause confusion and lead to inaccurate results. Hence, it becomes crucial to identify and remove duplicate data points efficiently. Apple’s Numbers application on Mac offers several easy-to-use features to find and eliminate duplicates, helping you maintain a clean and reliable dataset.

Identifying Duplicates in Numbers

1. Open the Numbers app on your Mac and launch the spreadsheet containing the data you wish to check for duplicates.

2. Select all the cells in the column or row where you want to find duplicates by clicking on the header (column) or row number.

3. Now, click on “Format” in the top navigation bar and then choose “Conditional Highlighting” from the drop-down menu.

4. Under “Rule” select “Cell contains,” then pick “Duplicate value” from the list of options that appear.

5. Customize how you want duplicates to be highlighted by choosing a format such as font style, color or background color. Click “Done” when you are satisfied with your formatting choices.

Duplicates are now visually highlighted, making them easier to spot within your spreadsheet.

Removing Duplicates in Numbers

1. To remove duplicate entries, first select all cells in the column where duplicates exist.

2. Click on “Organize” in the top navigation bar, followed by choosing “Sort & Filter”.

3. Now select “Filter” from the options listed under “Sort & Filter”.

4. In the filter menu that appears beside your selected data, click “Add a Filter Rule”.

5. Set the rule to exclude duplicate values by selecting “Unique value only”. Hit “Done” after choosing this option.

The duplicate data points are now filtered out, leaving only unique entries visible in your spreadsheet.

Conclusion

Finding and removing duplicates is essential for maintaining accurate datasets in any spreadsheet application like Apple’s Numbers on Mac. By following these simple steps, you can identify and eliminate duplicate content with ease, ensuring that your data remains consistent and reliable for whatever purpose it serves.


Best E-Ink Tablets for 2023: Devices Made for Reading and Writing

Introduction:

As technology continues to evolve, e-ink tablets have become more popular among avid readers and writers, offering an enjoyable and convenient digital experience. In 2023, several e-ink tablets stand out as the top choices in this niche market. Let’s explore these devices and their unique features that make them the best picks for reading and writing enthusiasts.

1. Remarkable 3:

The Remarkable 3 stands out with its paper-like display that mimics the feel of actual paper when writing or drawing. With a high-resolution display, users enjoy excellent text clarity and precise pen input, making it perfect for note-taking, sketching, or leisurely reading. The tablet also boasts extensive battery life, allowing users to work or read for extended periods without worrying about charging.

2. Onyx BOOX Note Air 2:

Featuring a sleek design and a large 10.3-inch e-ink display, the Onyx BOOX Note Air 2 offers a balanced combination of an e-reader and a digital notepad. Its adjustable front light ensures comfort during either daytime or nighttime use. Additionally, the Note Air 2 supports various file formats including PDFs and EPUBs, making it a versatile choice for readers who prefer having multiple options beyond books from a single store.

3. Amazon Kindle Oasis:

As one of the most popular e-ink devices on the market, the Amazon Kindle Oasis boasts a sharp high-resolution display with adjustable warm light settings to offer comfortable reading sessions regardless of ambient lighting conditions. The ergonomic design features page turn buttons for intuitive navigation through texts with ease. Kindle Oasis users also enjoy access to an extensive library of books available on Amazon’s platform.

4. Kobo Forma:

The Kobo Forma is designed with innovative comfort in mind – offering durable waterproofing and an 8-inch e-ink display, providing an enjoyable reading experience no matter the environment. With built-in OverDrive support, Kobo Forma users can borrow eBooks from local libraries without leaving the comfort of their homes. The device also utilizes adjustable warm and cool lighting settings to ensure the best reading conditions.

5. Sony DPT-CP1:

Focused on professionals and academics, the 10.3-inch Sony DPT-CP1 is an excellent choice for those seeking a premium e-ink tablet experience. The high-resolution flexible e-ink screen allows for crisp text and images while also excelling at handling large documents and complex PDFs. The long-lasting battery life makes it ideal for those who often work on the go.

Conclusion:

Choosing the best e-ink tablet involves considering factors such as screen size, design, battery life, file format compatibility, and additional features tailored to each device’s target audience. By picking one of these top devices of 2023, readers and writers can enjoy a seamless digital experience that closely mimics the feel of traditional paper books and notepads while leveraging modern technology’s convenience and versatility.

How to See How Much Money You’ve Spent on Steam Games

Introduction:

As gamers, we often lose track of how much money we have spent on our beloved games, especially when it comes to digital platforms like Steam. Fortunately, Valve has made it simple for Steam users to keep an eye on their spending habits. In this article, we will explain how you can see how much money you’ve spent on Steam games.

Step 1: Log in to your Steam account

The first step is to log in to your Steam account through the Steam client or the web portal at https://store.steampowered.com/. Make sure you have access to the email address and password tied to your account.

Step 2: Visit the Account Details page

Once logged in, hover over your profile name at the top right corner of the screen. A drop-down menu will appear; click on ‘Account details’ from the list of options.

Step 3: Access your Purchase History

On the Account Details page, scroll down until you find the “Store & Purchase History” section. Click on “View purchase history” to access your entire purchase records on Steam.

Step 4: Analyze your spending history

Your purchase history will show you a chronological list of all transactions made through your Steam account. This includes not only game purchases but also in-game transactions, downloadable content (DLC), and other forms of digital media such as movies and soundtrack albums.

To see the total amount spent, you can go through each transaction and make a note of their cost, then tally them up. Alternatively, use Ctrl+F (Cmd+F for Mac users) and search for “TotalSpend” (without quotes) to locate the grand total within your purchase history page source code.

Step 5: Use third-party website tools

If scrolling through pages of purchase history seems tedious or time-consuming, you can try using third-party websites designed to pull up your Steam spending data. Some popular sites with this feature are SteamDB (https://steamdb.info/calculator/) and Steam Gauge (https://www.mysteamgauge.com/). Simply enter your Steam profile URL, and these sites will generate detailed reports on your gaming habits, including total money spent.

Conclusion:

Monitoring your spending on Steam can help you become more financially conscious and avoid overspending on games you may never play or complete. Follow the steps mentioned above to keep track of your investments in the digital gaming world and make more informed decisions about future purchases. Happy gaming!

Top 6 Ways to Fix “Cannot Verify Server Identity” Error on iPhone

Introduction:

The “Cannot Verify Server Identity” error on iPhone is a common issue faced by users when trying to connect to a specific website or server. This can be frustrating and hinder productivity. However, you don’t have to worry too much – there are several ways to fix this issue. In this article, we will discuss the top six ways to resolve the “Cannot Verify Server Identity” error on your iPhone.

1. Check Internet Connection:

A weak or unstable internet connection can cause the “Cannot Verify Server Identity” error. Before trying any other solutions, make sure you are connected to a strong Wi-Fi network or have sufficient mobile data.

2. Set Correct Date & Time:

Incorrect date and time settings on your iPhone can lead to the error as well. To fix this, go to Settings > General > Date & Time, and ensure that the “Set Automatically” option is enabled.

3. Clear Safari History and Cache:

If you’re using Safari as your browser, clearing the browsing history and cache can help resolve this error. To do this, go to Settings > Safari, scroll down, and tap “Clear History and Website Data.”

4. Check If Trusted Certificates Are Installed:

The “Cannot Verify Server Identity” error can occur if there are no trusted certificates installed on your device. To check for installed certificates, go to Settings > General > About, scroll down, and tap on “Certificate Trust Settings.” If there are no trusted certificates, follow guidelines provided by the website administrator or server host to install them.

5. Restart Your iPhone:

Sometimes a simple restart can also fix this issue. Press and hold the power button for a few seconds until you see the “slide to power off” screen, then slide it off. After approximately 30 seconds, press and hold the power button again until the Apple logo appears to restart your iPhone.

6. Update iOS:

If you’ve tried all the methods mentioned above and still face the error, it could be due to an outdated version of iOS. Check if there is an update available by going to Settings > General > Software Update. Follow the onscreen instructions to update your iOS if an update is available.

Conclusion:

The “Cannot Verify Server Identity” error on iPhone can be an annoyance, but with these six simple fixes, you should be able to resolve it and get back to browsing the internet on your device seamlessly. Remember to always keep your iPhone updated and maintain trusted certificates to prevent such issues in the future.

How to Use an External Drive with a Chromebook

Introduction:

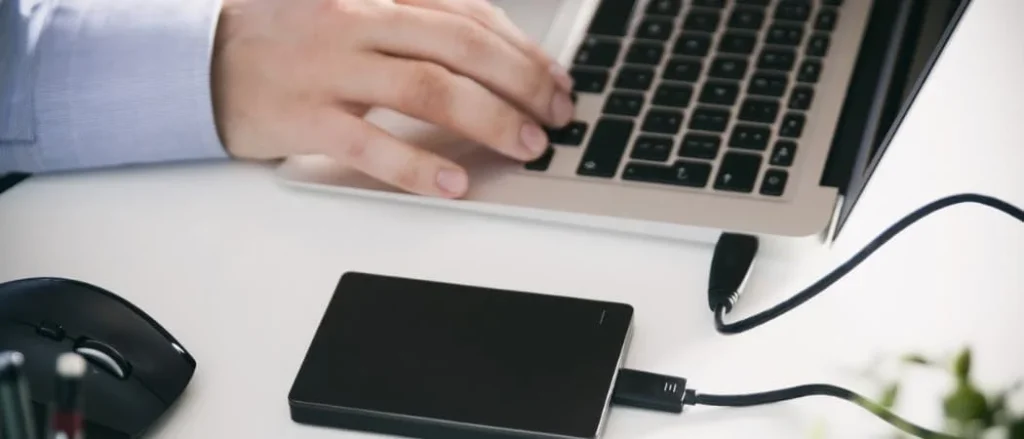
Chromebooks are popular devices due to their simplicity, affordability, and speed. However, one downside of Chromebooks is the limited amount of built-in storage. Thankfully, this issue can be easily resolved by using an external drive to store additional files for your Chromebook.
Here’s how to use an external drive with a Chromebook for seamless data transfers and increased storage capacity.

Step 1: Choose the Right External Drive

Before anything else, you need to find a compatible external drive for your Chromebook. The most common types of external drives are USB flash drives and external hard drives. Make sure to choose one that uses USB Type-A or Type-C connection so it can be directly connected to your Chromebook without needing an adapter.

Step 2: Connect the Drive to Your Chromebook

Once you’ve chosen the right external drive, it’s time to connect it. Locate your Chromebook’s USB port (either Type-A or Type-C), and plug in your drive. Your device should automatically recognize and display the external drive in the Files app once connected.

Step 3: Accessing Files on the External Drive

To access all the files stored in your external drive, open the Files app on your Chromebook. You should see your connected external drive listed under “Devices” on the left-hand side of the window. Click on it to browse through your files stored in the drive.

Step 4: Add, Move or Transfer Files between Chromebook and External Drive

Adding files or transferring them between your Chromebook and external drive is simple:

– To copy a file from your Chromebook’s internal storage to the external drive, find it within the Files app, right-click on it and select “Copy.” Then navigate to your desired folder within the connected external drive, right-click again and choose “Paste.”

– To move a file from one location to another, follow the same process but choose “Cut” instead of “Copy.”

– To transfer files from your external drive to your Chromebook’s internal storage, locate the files within the drive and simply drag-and-drop them to any directory found in the “My files” section.

Step 5: Safely Eject Your External Drive

Once you’re done transferring files or accessing them from your external drive, it’s essential to safely eject it before removing it from the USB port. Open the Files app, locate your connected external drive under “Devices,” click the three-dot menu icon beside its name and select “Eject device.” You can now safely unplug your external drive.

Conclusion:

Using an external drive with a Chromebook is a handy solution for storage issues or transferring data. By finding a compatible drive, managing your files and apps using Google’s built-in applications, and following these straightforward steps, you can effortlessly expand your Chromebook’s storage capabilities and work more efficiently.

Resolving the Issue of Not Receiving Verification Code Texts on Android Devices

Introduction:

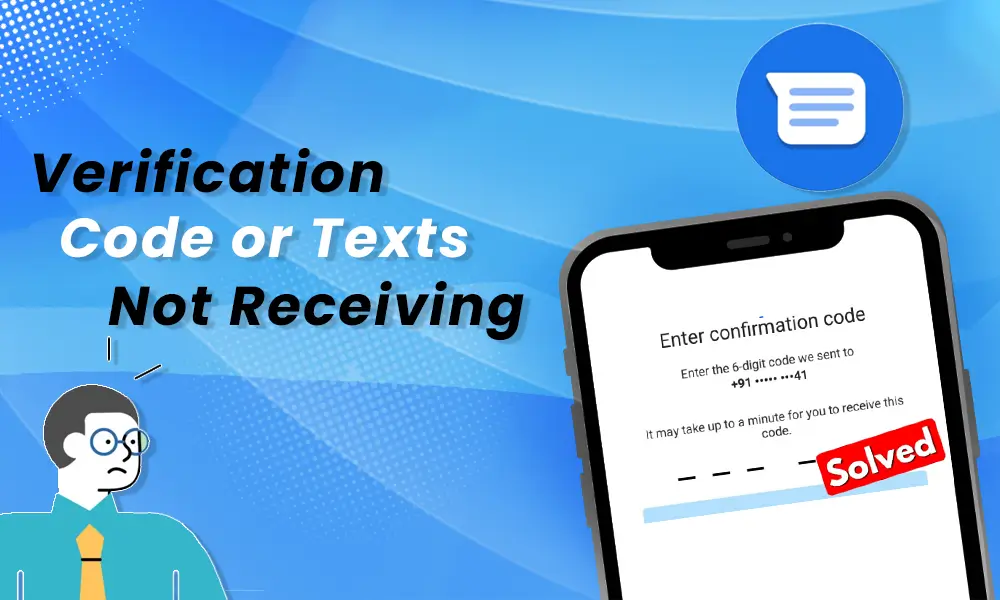
There are times when you may not receive verification code texts on your Android device, even if you’re sure you’ve entered the correct mobile number. This can be frustrating, especially when you need to access your accounts or verify your identity. Don’t worry – there are several ways to fix this problem. In this article, we’ll explore various methods to help ensure that you receive those crucial messages.

1. Check for Signal Issues:

Sometimes, a weak signal or temporary network problem can cause delays in receiving texts. Make sure that your device has a stable connection to your network provider. If you’re in an area with low signal coverage, try moving to a location with better reception and request the code again.

2. Restart Your Phone:

It might sound simple, but a quick restart might resolve any glitches affecting your Android device’s messaging system. Simply turn off your phone, wait for a few seconds, and then power it back on. After that, request the verification code again.

3. Update Your Messaging App:

An outdated messaging app might cause problems when receiving verification code texts. Go to the Google Play Store and check for updates to both your device’s built-in messaging app and any third-party apps that you use for texting.

4. Clear Your Messaging App Cache:

Cache files could be causing issues with receiving text messages. To clear them out of your messaging app, go to Settings > Apps > Messaging App > Storage > Clear Cache. Then request the verification code again.

5. Disable Third-Party Messaging Apps:

Some third-party messaging apps can block verification codes or short-code messages from reaching your inbox. Disable or uninstall these applications temporarily, and try requesting the code again using your device’s native messaging app.

6. Contact Your Network Provider:

If all else fails and you still haven’t received the code after trying these solutions, contact your network provider. They may be able to assist you in resolving the issue or provide information about any known short-code messaging outages.

Conclusion:

Not receiving verification code texts on your Android device can be frustrating, but there are several methods to troubleshoot and resolve this problem. By following the steps outlined above, you should be able to receive those crucial text messages and complete your verification process in no time. Remember, if none of these solutions work, contacting your network provider can also help you find a solution.

Samsung Galaxy Z Fold Evolution: Comparing Galaxy Z Fold 4, Galaxy Z Fold 3, and Galaxy Z Fold 2

Over the years, Samsung has continued to revolutionize the smartphone market with its innovative designs and features. The Galaxy Z Fold series is no exception. In this article, we’ll explore the changes that have occurred in the Samsung Galaxy Z Fold lineup from the Galaxy Z Fold 2 to the latest Galaxy Z Fold 4.

Samsung Galaxy Z Fold 2: The Beginning of a New Era

Released in September 2020, the Samsung Galaxy Z Fold 2 marked a significant step forward in foldable phone technology. It boasted a cutting-edge hinge design, allowing for smoother folding action and a more durable device overall. With a 7.6-inch interior display and a secondary 6.2-inch external display, it provided users with a tablet-like experience in a pocket-sized form factor.
Samsung made sure that hardware specs didn’t lag either; with a Snapdragon 865+ processor, up to 12GB of RAM, and up to 256GB of storage, it was well-equipped for demanding tasks.

Samsung Galaxy Z Fold 3: Refinement & Durability

Following up on its predecessor’s success, the Galaxy Z Fold 3 arrived in August 2021 with numerous improvements both internally and externally. Users were treated to an upgraded hinge that provided an even smoother folding experience while still maintaining durability.
The most significant change was the introduction of an under-display front-facing camera on the main display, allowing for an uninterrupted screen experience without any notches or punch holes. Additionally, Samsung increased water resistance with an IPX8 rating – a first for foldable phones.
Performance-wise, the device came with a Snapdragon 888 chipset, providing excellent user experience with improved efficiency and speed.

Samsung Galaxy Z Fold 4: The Ultimate Folding Experience?

While official specifications are yet to be released, the upcoming Galaxy Z Fold 4 is expected to build upon the improvements seen in previous generations. Rumors have suggested that Samsung will further refine the hinge mechanism for improved durability and potentially even a slimmer form factor.
Speculations also hint at a stronger folding display material, allowing for increased scratch resistance. Camera improvements, enhanced battery life, and upgraded hardware are all expected features of the new device.

Conclusion

In conclusion, each iteration of the Samsung Galaxy Z Fold series has brought new innovations and refinements to foldable smartphone technology. From the Galaxy Z Fold 2’s groundbreaking hinge design to the Galaxy Z Fold 3’s addition of water resistance and under-display camera, Samsung has continuously pushed the envelope on what’s possible within this exciting niche market. The anticipated Galaxy Z Fold 4 is set to continue this trend with even more improvements. Only time will tell how Samsung will further revolutionize foldable smartphones and reshape our expectations for mobile devices in general.

Title: Solar Battery Buying Guide – Everything You Need to Know

Introduction:

Solar energy is becoming increasingly popular as a renewable source of power, and many homeowners are considering investing in solar battery storage systems. In this article, we’ll cover everything you need to know before purchasing a solar battery, from types and sizes to maintenance and lifespan.

Types of Solar Batteries:

There are various types of solar batteries available on the market. The three main types are lead-acid, lithium-ion, and saltwater batteries, each offering its own set of benefits and drawbacks:

1. Lead-acid: The most common and affordable option, lead-acid batteries have a relatively short lifespan compared to other options.

2. Lithium-ion: These batteries have a longer lifespan and higher efficiency but come with a higher price tag.

3. Saltwater: A more environmentally friendly option than the previous two types, saltwater batteries are still not widely available due to their emerging status within the industry.

Capacity and Size:

When choosing a solar battery, consider the capacity (measured in kilowatt-hours or kWh) and size appropriate for your needs. A larger system may be needed for those whose homes consume significant amounts of energy daily.

Lifespan:

The average lifespan of a solar battery ranges from 5 to 15 years. To maximize your investment, choose a battery with a long enough lifespan to coincide with your solar panel system’s warranty. Also, take note that extreme temperatures can shorten a battery’s life – proper insulation may offset such adverse effects.

Depth of Discharge (DoD) and Round-Trip Efficiency:

Depth of Discharge refers to the percentage of a battery’s energy capacity that can be used before its efficiency sharply declines. Higher DoD implies greater usage potential per charge cycle. Round-trip efficiency refers to the percentage of energy retained while being converted to electricity and stored within the battery. A higher round-trip efficiency results in more available power for use.

Maintenance:

While lithium-ion batteries typically require minimal maintenance, lead-acid batteries tend to need regular upkeep. Maintaining proper electrolyte levels and preventing sulfate buildup can extend a lead-acid battery’s lifespan.

Warranty:

A solar battery warranty is important in ensuring protection against manufacturing defects or performance issues. Pay attention to the warranty duration and consider a reputable company when making your investment.

In Conclusion:

As solar energy becomes more prevalent, investing in solar battery storage is an attractive option for homeowners striving for a more sustainable and cost-effective lifestyle. Understanding the various types of batteries, their capacity, lifespan, depth of discharge, round-trip efficiency, and maintenance requirements will enable you to make an educated decision for your specific needs. Remember to take into account your energy consumption levels and select a reputable company offering a solid warranty before making your purchase.

How to Put Your MacBook in Airplane Mode

Airplane mode is a useful feature on devices like smartphones and tablets when you want to quickly disable all wireless communication, particularly when traveling on an airplane. While MacBooks do not have a designated “airplane mode” like mobile devices, the process of achieving the same effect is quite simple. In this article, we will guide you through the steps to put your MacBook in airplane mode.

Step 1: Turn off Wi-Fi

Disabling Wi-Fi is the first step to put your MacBook in airplane mode. To do this, follow these steps:

1. Locate the Wi-Fi icon in your MacBook’s menu bar (top right corner of the screen).

2. Click on the Wi-Fi icon.

3. Select “Turn Wi-Fi Off” from the drop-down menu.

Step 2: Turn off Bluetooth

Bluetooth is another wireless communication feature that should be turned off during airplane mode. Here’s how:

1. Find the Bluetooth icon in your MacBook’s menu bar (next to Wi-Fi or accessed by clicking on the Control Center icon).

2. Click on the Bluetooth icon.

3. Select “Turn Bluetooth Off” from the drop-down menu.

If you can’t find the Bluetooth icon, go to System Preferences > Bluetooth and uncheck “Show Bluetooth in menu bar.” Then, click “Turn Bluetooth Off.”

Step 3: Pause iCloud syncing and any other background data transfers

Pausing iCloud syncing and other background data transfers can help save battery life while in airplane mode. Follow these steps to pause iCloud syncing:

1. Go to System Preferences (click on the Apple logo in the top left corner and select System Preferences).

2. Click on Apple ID.

3. Uncheck all boxes under “Apps on this Mac using iCloud” to pause syncing.

4. Close System Preferences.

To resume syncing, follow the same process and recheck the boxes.
Additionally, if you have any apps that transfer data in the background (e.g., Dropbox or Google Drive), pause those as well to ensure no wireless communication occurs.

Step 4: Disable notifications (optional)

While not directly related to wireless communication, disabling notifications can help reduce distractions and save battery life while in airplane mode. Follow these steps:

1. Go to System Preferences.

2. Click on Notifications.

3. Choose the “Do Not Disturb” tab and check the box for “Enable Do Not Disturb.”

4. Set a schedule for when you want notifications to be disabled or silence them indefinitely by picking the “From” and “To” times.
Now your MacBook is effectively in airplane mode with no wireless communication taking place. To re-enable Wi-Fi, Bluetooth, iCloud syncing, and notifications, simply repeat these steps and turn each feature back on as needed.

In conclusion, while MacBooks may not have a dedicated airplane mode like iPhones or iPads, putting your MacBook in airplane mode is still an easy and quick process. Disabling wireless communication features will help you comply with airline regulations and save battery life during your travels.

How to Make Calls and Texts from Your Smartphone Without Cell Service

Introduction:

In today’s world, staying connected is essential. However, there are times when you may find yourself without cell service, making it difficult to reach out to others using your smartphone. Fortunately, technology has evolved to provide solutions for making calls and texts even when a traditional mobile network is not available. In this article, we will explore how you can overcome the limitations of a lack of cell service by using various methods to stay connected.

WiFi Calling:

One way to make calls and send texts without depending on cellular networks is through WiFi calling. Many smartphones now support this feature that enables voice and text messages to be transmitted over a WiFi network instead of relying on a cellular connection. To use WiFi calling, you must have an active internet connection and a compatible smartphone.

Here’s how to enable WiFi calling on your device:

1. For Android devices: Open the Settings app -> Tap on Network & Internet -> Select Mobile network -> Toggle on Wi-Fi Calling.

2. For iOS devices: Go to Settings -> Tap on Phone -> Click on Wi-Fi Calling -> Enable Wi-Fi Calling on This iPhone.
VoIP Services:

Voice over Internet Protocol (VoIP) services allow users to place audio calls over an internet connection instead of relying on cell service. Many popular applications like Skype, WhatsApp, Viber, and Zoom utilize VoIP technology for communications. By using these apps, you can easily bypass the need for cellular connectivity when making calls or sending texts.

Offline Messaging Apps:

In situations where there is no internet or cellular connection available at all, offline messaging apps can come in handy. These apps use Bluetooth or peer-to-peer WiFi connections to establish a communication network between smartphones that are in close proximity. Some examples include Bridgefy, FireChat, and Briar. Although their range might be limited compared to traditional cellular networks, they are perfect for crowded events or natural disasters where cell service might be unavailable.

Satellite Phones and Messengers:

In remote areas where cell coverage is non-existent, satellite communication devices can function as a lifeline. Satellite phones operate independently of terrestrial networks and use orbiting satellites to transmit calls and texts, allowing them to work virtually anywhere on the planet. In addition to dedicated satellite phones, there are also satellite messenger devices like the Garmin inReach that pair with your smartphone and offer two-way text messaging capabilities via satellite networks.

Conclusion:

Losing cell service no longer means being disconnected from the world. With a combination of WiFi calling, VoIP services, offline messaging apps, and satellite communication devices, you can find a solution to stay connected and communicate with your friends, family, or colleagues regardless of your location or cellular network availability.