Tech Advice

Which Car Brands Last the Longest?

Introduction:

When it comes to purchasing a vehicle, durability and longevity are often at the top of the list for considerations. After all, nobody wants to invest their hard-earned money into a car that won’t stand the test of time. In this article, we will explore which car brands are known to last the longest based on their reputation and studies conducted in the automobile industry.

1) Toyota

Toyota has long established itself as a reliable car manufacturer with numerous models known for their durability, such as the Camry, Corolla, and Tacoma. Numerous studies have shown that Toyota vehicles are often able to reach well over 200,000 miles with proper maintenance. The company’s innovative production methods and commitment to quality have contributed to their cars’ remarkable longevity.

2) Honda

Another Japanese automaker known for its dependability is Honda. Vehicles like the Civic and Accord have been popular choices for decades due to their reliability and excellent fuel economy. Many Honda owners report their vehicles lasting well beyond 200,000 miles with routine maintenance.

3) Subaru

Subaru’s emphasis on safety, performance, and longevity has made it a popular choice for many consumers. Known for their all-wheel-drive systems, vehicles like the Forester and Outback provide versatility and have been reported to last well over 200,000 miles when well-maintained.

4) Volvo

Swedish automaker Volvo has built its reputation on producing vehicles that combine safety, innovative technology, and durability. While some of its models may come at a higher price point than other brands on this list, many Volvo owners consider it an investment worth making since these vehicles are known to last decades when properly cared for.

5) BMW

While BMW is primarily known for its luxury vehicles with impressive performance capabilities, it also scores high in terms of longevity. Models like the 3-Series and 5-Series often surpass 200,000 miles with regular maintenance and care. Investing in a BMW can be a worthwhile decision for those who value a combination of prestige and dependability.

Conclusion:

While the longevity of any vehicle is largely dependent on how well it is maintained by its owner, certain brands have consistently demonstrated their commitment to building long-lasting cars. Toyota, Honda, Subaru, Volvo, and BMW are among the top manufacturers known for producing vehicles with impressive lifespans. Before making your next car purchase, consider researching the long-term reliability of the make and model you plan to buy – an investment in a durable vehicle can save you time, money, and stress in the long run.

How to Get a Record of Your AT&T Cell Phone Texts

Introduction:

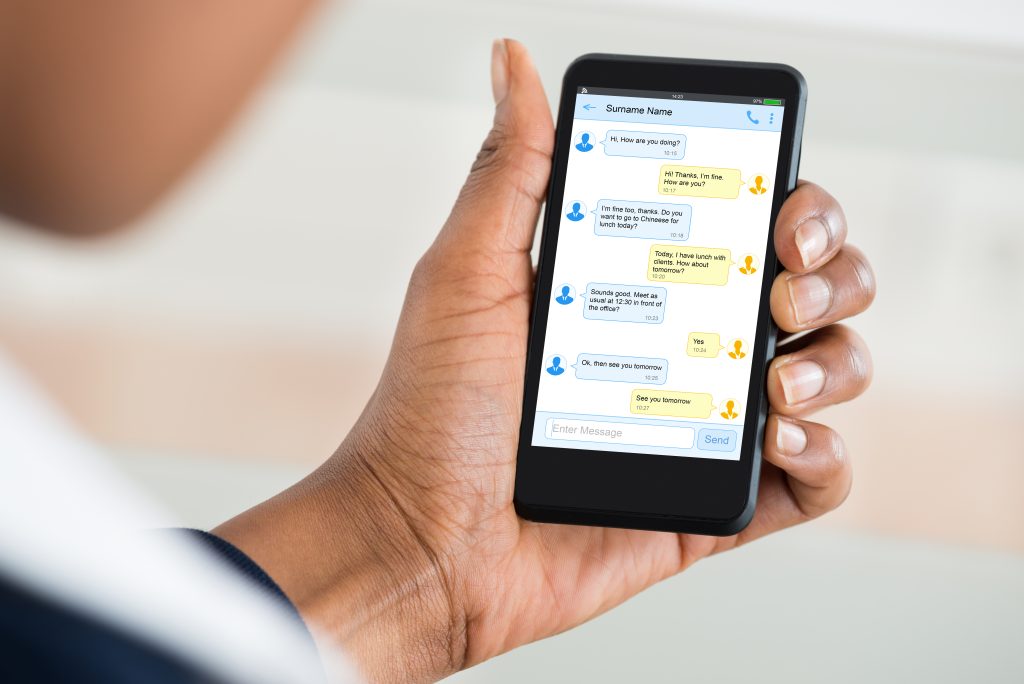
In today’s fast-paced digital world, text messaging has become a primary mode of communication for many. AT&T users may find themselves in situations where they need a record of their cell phone texts for personal, professional, or legal reasons. Fortunately, there are ways to obtain these records. This article will guide you through the process of obtaining a log of your AT&T texts.

Step 1: Access Your Online Account

To get a record of your AT&T cell phone text messages, first and foremost, you’ll need to access your AT&T online account. Visit the official website (https://www.att.com) and log in using your email address and password associated with your account. If you have not yet registered for an online account, you’ll need to create one before proceeding.

Step 2: Go to the Usage Section

Once logged in, look for the “Billing & Usage” tab which is typically located at the top or in a sidebar. Click on it and then select “Usage” from the available options. This section provides an overview of your current usage data, including calls, texts, and data.

Step 3: Get Text Message Details

In the usage section, you’ll find a summary of your texting activity alongside other data usage stats. To see detailed information about your text messages, click on “View Usage Details”. A new screen will display a comprehensive list of all incoming and outgoing text messages with corresponding dates and times during the selected billing period.

Note: It is important to remember that while this feature provides you with details about the volume, time, date, and numbers involved in text exchanges; it does not display the content of those messages.

Step 4: Download or Print Records

If you want to have a physical or digital copy of your text message records for future reference or legal purposes, you can download or print the log. To download, look for an option to export the usage data as a CSV or Excel file.

For printing, most browsers allow you to print the page directly from the website. Press Ctrl+P or Cmd+P on your keyboard (depending on your computer) and follow the prompts to print.

Alternative Option: Contact AT&T Customer Support

If you are unable to access your online account or prefer assistance from a customer support representative, you can call AT&T’s customer service at 1-800-331-0500. They can provide you with information on how to obtain a record of your text messages based on your individual circumstances or help resolve any issues with your online account.

Conclusion:

Obtaining a record of your AT&T cell phone texts is relatively simple and can be done through their online portal or by contacting their customer support team. Keep in mind that while you can access information regarding dates, times and phone numbers, acquiring the content of those text messages requires a legal subpoena. Make sure to store these records securely to prevent any misuse of personal information.

How to Fix It When Pluto TV Isn’t Working on Roku

Introduction:

Pluto TV, a popular streaming service with an extensive library of movies, TV shows, and web videos, is a go-to IPTV platform for millions of Roku users. However, like any tech product, glitches may occasionally arise, leaving users frustrated and unable to enjoy their favorite content. If you’re one of those people struggling with Pluto TV not working on your Roku device, worry not! In this article, we’ll guide you through some simple troubleshooting steps to get you back to binge-watching in no time.

1. Check Your Internet Connection:

First and foremost, ensure that your internet connection is stable. Try restarting your WiFi router by unplugging it for about 30 seconds and plugging it back in. If you still can’t connect after that, test your connection with other devices or streaming services to identify if the problem lies with the internet connection or Pluto TV.

2. Restart Your Roku Device:

Sometimes, restarting your Roku device can help resolve minor software issues. To do this, simply unplug the device from its power source for about 30 seconds and plug it back in. Alternatively, go to “Settings” > “System” > “System Restart” on your Roku device.

3. Update Your Devices:

Keeping both your Roku device and the Pluto TV app up-to-date is essential for optimal performance. Check for updates by going to “Settings” > “System” > “Software Update” on your Roku device.
To update the Pluto TV app itself, visit the Roku Channel Store, find the Pluto TV app and if there’s an update available, click on it to install.

4. Reinstall Pluto TV:

If updating didn’t help resolve the issue, try uninstalling and reinstalling Pluto TV on your Roku device. Navigate to the home screen on your Roku device and highlight the Pluto TV app. Press the ‘*’ button on your remote and select “Remove channel.” Restart your Roku device and reinstall the Pluto TV app from the Roku Channel Store.

5. Disable VPN or Proxy Connections:

If you’re using a VPN or proxy connection, try disabling it temporarily as this can sometimes cause compatibility issues with streaming services like Pluto TV.

6. Factory Reset Your Roku Device:

As a last resort, if all else fails, performing a factory reset on your Roku device will return it to its original settings, allowing you to start from scratch. Please note that this will remove all your apps, channels, and settings. To perform a factory reset, go to “Settings” > “System” > “Advanced System Settings,” and select “Factory Reset.”

Conclusion:

If Pluto TV isn’t working on your Roku device, following these troubleshooting steps should help you identify and resolve the issue. Remember to ensure a stable internet connection, update your devices regularly, and don’t shy away from reaching out to Pluto TV’s support team if required. Happy streaming!

How to Track the Location of a Cell Phone Using an IP Address

Introduction:

In today’s connected world, smartphones have become an extension of ourselves. As technology advances, our dependence on these devices only increases. Sometimes, it becomes essential to track the location of a cell phone for various reasons – be it tracking a stolen device or keeping tabs on a loved one. One effective way to do this is by using the IP address of the cell phone. In this article, we will discuss various methods and tools that can help you track a cell phone’s location using its IP address.

Step 1: Find the IP Address of the Cell Phone

To track the location of a cell phone using its IP address, you first need to find it. This can be done through various methods such as sending an email or using an app that reveals IP addresses. Another option is to use social media platforms like WhatsApp, where you can access the individual’s IP address they are connected to when they click on a link you send.

Step 2: Use GeoIP Services

With the IP address in hand, you can now use GeoIP services such as MaxMind GeoIP2 or IPinfo.io, which provide geolocation data based on IP addresses. These services will give you accurate information about the physical location (city, state, country) of the device associated with that particular IP address.

Step 3: Use Online Geolocation Tools

Numerous websites and online tools can help you pinpoint a cell phone’s exact location using its IP address. Some popular options include IPLocation.net, GeoBytes IP Locator, and WhatIsMyIPAddress.com’s Geolocation Tool. These tools typically require you to input the IP address and will instantly display relevant information about its geolocation.

Step 4: Utilize Mobile Tracking Apps

If you require even more accurate tracking or real-time monitoring services, several mobile
tracking apps available on the market cater specifically to this need. Some popular options include mSpy, FlexiSpy, and Cerberus Phone Security. These apps usually require installation on the target device but offer features like GPS tracking, call logs, and messaging details alongside IP address-based tracking.

Step 5: Reach Out to Law Enforcement (if necessary)

If you suspect that the tracked cell phone may be involved in illegal activities or if the phone was stolen, it is advisable to contact local law enforcement agencies and provide them with the relevant information. The police can then use advanced tools or services that track cell phones more accurately.

Conclusion:

Tracking the location of a cell phone using its IP address is not only possible but relatively simple with the right tools and methods at your disposal. While this method is not always 100% accurate due to dynamic IP addresses and VPN usage, it can still give you a general idea of the cell phone’s location. Remember to exercise caution and good judgment when tracking someone’s cell phone location without consent, as it may lead to privacy violations or legal issues.

Embracing Technology in Modern Education: A Path to Success

Introduction:

In today’s digital age, almost every aspect of our lives is touched by technology. From communication to entertainment, we continue to witness significant transformations. For this reason, the education sector must keep pace with the rapidly evolving digital landscape. This article will explore the importance of integrating technology into teaching and learning and provide insights on how schools can successfully incorporate innovation into their curricula.

The Necessity of Technology in Education:

We cannot deny the vital role technology plays in improving student learning outcomes. Research has shown that when leveraged effectively, educational technology advances students’ problem-solving skills, critical thinking, and collaboration abilities. Here are some key reasons why schools should embrace technology:

1. Improved Access to Information: Technological resources such as e-books, online libraries, and educational platforms have made knowledge accessible to all students at any time, no matter their geographical location.

2. Adapting Learning to Individual Needs: With personalized learning becoming a priority, technology allows educators to tailor instruction based on each student’s unique learning needs, preferences, and progress.

3. Enhanced Communication and Collaboration: Interactive tools like video conferencing apps and social media platforms have facilitated collaborative learning environments where students can easily communicate with their peers and teachers across the globe.

4. Problem-Solving Skills: Technology provides opportunities for students to work on real-world problems and projects in science, mathematics, engineering, and other STEAM disciplines.

5. Motivation and Engagement: Emerging technologies such as gamification keep students motivated by providing a fun learning experience that sparks curiosity and cultivates long-lasting interest in various subjects.

Best Practices for Implementing Technology in Schools:
Proper implementation of technology in the classroom is crucial for achieving success. Consider these best practices when adopting educational innovations:

1. Invest in Professional Development: Teachers need guidance on how to effectively integrate technology into their teaching practices. Offer regular professional development opportunities to ensure faculty members can confidently use digital tools and resources.

2. Foster a Culture of Innovation: Encourage ongoing experimentation with new teaching approaches and encourage students, teachers, and administrators to embrace technology as an essential component of the learning process.

3. Choose Appropriate Technology: Evaluate the educational benefits of each technology before introducing it into the classroom. Select digital tools that align with your school’s curriculum objectives, promote student engagement, and enhance learning outcomes.

4. Focus on Digital Citizenship: Teach students about online safety, privacy, and responsible use of technology. Embed digital citizenship lessons into classroom discussions and activities to help them navigate the digital world safely and ethically.

5. Assess and Monitor Progress: Regularly evaluate the effectiveness of technological integration within your school by monitoring student progress, tracking teacher usage, and conducting surveys to gather feedback from all stakeholders.

Conclusion:

The integration of technology in education is no longer optional; it is indispensable. By embracing educational innovation, schools can provide a well-rounded, engaging learning environment that prepares students for the challenges they’ll face in their future careers. Still, implementation requires careful planning and support from all stakeholders in the educational community. So let’s come together to create a future where technology ignites curiosity, fosters collaboration, and transforms education for generations to come.

Line vs. WhatsApp: A Comparison of Two Popular Messaging Apps

Introduction:

In the digital age, instant messaging apps have become an essential part of our lives. They allow us to stay connected with friends and family, no matter where we are in the world. Two of the most popular messaging apps are Line and WhatsApp. In this article, we will delve into the features of both apps, evaluate their pros and cons, and help you decide which one suits your needs best.

Features:

1. Messaging and Calls: Both Line and WhatsApp offer voice calls and free messaging using end-to-end encryption technology to ensure privacy and security.

2. Group Chats: On both platforms, users can create group chats with multiple contacts, making it easier to communicate or collaborate in larger groups.

3. Video Calling: Line and WhatsApp offer video calling for face-to-face conversations.

4. File Sharing: Both apps allow sharing of various file types like photos, videos, documents, etc.

5. Emoticons & Stickers: Line offers a wide variety of stickers and emoticons to choose from, while WhatsApp emphasizes simplicity with limited but recognizable emoticons.

6. Social Feature (Timeline): Line distinguishes itself from WhatsApp by providing a Timeline where users can post status updates or content for friends to see.

7. Business Accounts: Both Line and WhatsApp have integrated support for official accounts from brands and businesses to enable customer interaction and advertisement.

Pros and Cons:

Line:

– Pros: Extensive sticker selection; timeline feature for socializing; better animated message effects

– Cons: Less popular outside Asia; consumes more data and battery life; can be overwhelming for new users

WhatsApp:

– Pros: Widely used around the world; simplicity in design; lower data consumption

– Cons: Limited sticker selection; lacks built-in social features like Timeline; fewer animated message effects

Conclusion:

When comparing Line vs. WhatsApp, consider your priorities and preferences. If you are looking for a messaging app with a touch of social media and love sharing stickers in your chats, Line may be the better choice. However, if you prefer a minimalist, efficient, and globally popular app for communication purposes, WhatsApp is likely the better fit.

Ultimately, both apps have evolved immensely over the years, offering users seamless communication experiences. So whether you lean towards Line or WhatsApp, rest assured that staying connected with your loved ones is only a tap away.

Ecobee Smart Thermostat Enhanced vs. Nest Thermostat: Is Ecobee or Nest the Best?

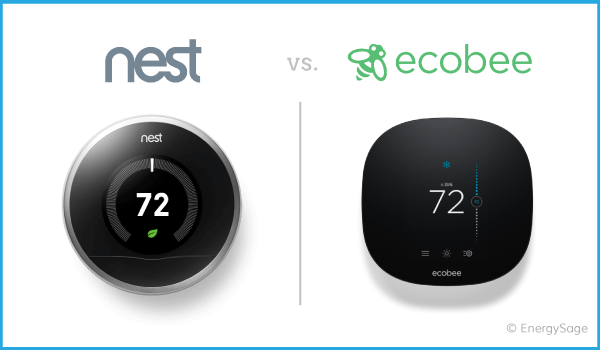
In the world of smart thermostats, two brands have risen to the top as leading contenders: Ecobee and Nest. Both offer high-quality, energy-efficient solutions for homeowners looking to save on their energy bills and create a more comfortable living environment. So, which one should you choose? In this article, we will compare the Ecobee Smart Thermostat Enhanced and the Nest Thermostat to help you make an informed decision.

Design and Appearance

Ecobee’s Smart Thermostat Enhanced has a sleek, modern design with a high-resolution touchscreen display. It displays the current temperature along with other relevant information like outdoor temperature, humidity, and weather forecast. The device measures 4.29 x 4.29 x 1 inches.

On the other hand, Nest’s Thermostat features a minimalist design with a simple dial for control. The device is also smaller than Ecobee’s offering at 3.19 x 3.19 x 1.14 inches, making it ideal for those who prefer a more unobtrusive thermostat.

Features

The Ecobee Smart Thermostat Enhanced comes with several convenient features, including remote sensors to help manage hot and cold spots around your home, occupancy sensing to adjust temperature settings based on your presence, and Alexa built-in for voice-controlled temperature adjustments.

Nest’s Thermostat also offers voice control through Google Assistant or Amazon Alexa, but it does not come with remote sensors. Instead, it relies solely on its learning algorithms to learn your preferences over time and create a customized schedule to maximize comfort and energy savings.

Integration

Both thermostats can be integrated with various smart home platforms and devices. The Ecobee Smart Thermostat Enhanced is compatible with Apple HomeKit, Samsung SmartThings, Google Assistant, Amazon Alexa, and IFTTT.

Nest’s Thermostat, being a Google product, works seamlessly with Google Assistant and other Google devices. It also supports Amazon Alexa and IFTTT, but it does not have native support for Apple HomeKit or Samsung SmartThings.

Energy Savings

Both thermostats can significantly reduce your energy consumption. Ecobee’s Smart Thermostat Enhanced claims to save up to 23% on energy costs, while Nest’s Thermostat boasts energy savings of up to 12-15%. These estimates will vary depending on your usage patterns and local climate.

Price and Warranty

The Ecobee Smart Thermostat Enhanced costs around $249, while Nest’s Thermostat retails for approximately $129. Both products come with a two-year limited warranty for added peace of mind.

Conclusion

Ultimately, the choice between the Ecobee Smart Thermostat Enhanced and the Nest Thermostat will depend on your individual preferences and priorities. If you value features like remote sensors and compatibility with a broader range of smart home ecosystems, the Ecobee may be the best choice for you. On the other hand, if you are drawn to a minimalist design and highly intuitive learning algorithms at a lower price point, the Nest Thermostat might be more suitable for your needs.

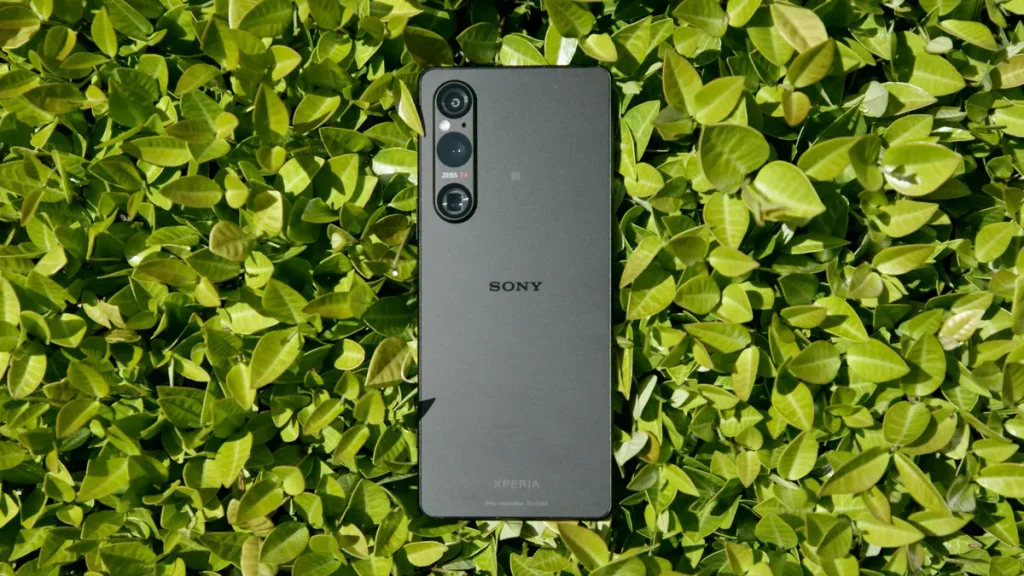
Sony Xperia 1 V Review: A Step Closer to Besting Apple and Samsung

In the highly competitive world of smartphones, there are always new contenders vying for a spot at the top. One such contender is the Sony Xperia 1 V, which aims to take on the likes of Apple and Samsung with its impressive feature set and cutting-edge technologies. In this article, we’ll dive into what makes the Sony Xperia 1 V a worthy competitor in the smartphone market.

Design and Display

The Sony Xperia 1 V sports a sleek and modern design that is both eye-catching and functional. With its slim profile, metal frame, and Corning Gorilla Glass on both front and back sides, it exudes premium quality. The 6.5-inch 4K OLED display offers HDR10 support and superb colour accuracy, ensuring that images and videos look stunning with true-to-life colours.

Performance

Under the hood, the Sony Xperia 1 V is powered by a Qualcomm Snapdragon 855 processor, paired with 6GB of RAM. This powerful combination enables smooth multitasking, quick app launches, and overall excellent performance when tackling demanding tasks. It also features a respectable battery life thanks to its 3,330mAh battery with fast-charging capabilities.

Camera Capabilities

One of the standout features of the Sony Xperia 1 V is its camera setup. It features a triple-lens system that includes a wide-angle lens, ultra-wide-angle lens, and telephoto lens. These lenses are supported by advanced software that allows for impressive photography capabilities such as Eye Autofocus, Creative Look filters, and up to 5x hybrid zoom. Additionally, it provides excellent low-light performance thanks to its large sensor size.

Audio Excellence

Audio enthusiasts will appreciate the Dolby Atmos-enabled stereo speakers on the Sony Xperia 1 V which deliver immersive audio experiences while watching movies or listening to music. Coupled with LDAC and DSEE HX technologies, ensuring high-quality audio playback, the smartphone is designed to please even the most discerning audiophiles.

Software and Features

Running on Android 9.0 Pie, the Sony Xperia 1 V offers a user-friendly interface and essential features such as Google Assistant, a fingerprint sensor, and face unlock. The device also comes with numerous Sony-specific features, including Side Sense which enables quick access to apps and other functions via a swipe near the phone’s edge.

Final Verdict

The Sony Xperia 1 V is undoubtedly a strong contender in the smartphone market with its top-notch display, excellent performance, impressive camera capabilities, and outstanding audio quality. While it may not yet be able to topple the likes of Apple and Samsung from their positions at the top of the market, it’s clear that Sony is taking several steps in the right direction. The Xperia 1 V should be on the radar of those looking for a high-quality alternative to more mainstream options.

How to Clean Shoes in the Washer Without Ruining Them

Introduction:

Cleaning shoes can be a tedious chore, especially when they are covered in dirt, mud, or stains. Many people wonder if it is possible to clean their shoes in the washer without causing any damage. The answer is yes! With a few simple steps and precautions, you can safely clean your shoes in the washing machine and make them look brand new. In this article, we will guide you through the process of cleaning shoes in the washer without ruining them.

Step 1: Check the Shoe Material

First and foremost, you need to make sure your shoes are suitable for machine washing. Check the shoe label or manufacturer’s instructions for any specific cleaning recommendations. Generally, canvas, knit fabrics, and synthetic materials such as nylon or polyester can be washed safely in a washing machine. Avoid washing leather shoes or those with fragile ornamentations as they may be damaged in the washer.

Step 2: Prepare Your Shoes for Washing

Before tossing your shoes in the washer, remove any excess dirt or mud by gently brushing them with a dry cloth or soft-bristled brush. Then, take out the shoelaces and insoles if possible. Washing these items separately prevents tangling and ensures better cleaning results.

Step 3: Use a Mesh Laundry Bag

To protect your shoes from banging around inside the washer and minimize potential damage, place them inside a mesh laundry bag or pillowcase before washing. This also helps prevent any dye from bleeding onto other clothes. Don’t forget to put the shoelaces and insoles into separate mesh bags as well.

Step 4: Select the Gentle Cycle

Set your washer on a gentle cycle with cold water to ensure a delicate wash for your shoes. Avoid using hot water, as it may cause some materials to shrink or become discolored.

Step 5: Add Mild Detergent

When adding detergent, choose a mild, bleach-free option specifically formulated for delicate garments. Avoid using any fabric softener or bleach, as these substances can be harmful to your shoes’ material.

Step 6: Balance the Load

Balance the washing machine load by adding a couple of old towels or similarly colored clothes alongside your shoes. This reduces wear and tear on both the shoes and the washer by providing cushioning during the wash cycle.

Step 7: Air Dry

After the wash cycle is complete, remove your shoes from the mesh bag and let them air dry in a well-ventilated area away from direct sunlight. To speed up drying and help maintain their shape, stuff your shoes with paper towels or old newspapers. Remember to avoid using a dryer or direct heat sources, as they may cause damage or shrinkage.

Conclusion:

Cleaning your shoes in the washer is a convenient way to keep them fresh and looking their best. By following these simple steps, you can safely wash your shoes without causing any damage. Keep in mind that it’s essential to check the shoe’s material and manufacturer’s instructions beforehand. With proper care and attention, your shoes will last longer and remain in excellent condition.

How to Stream from Android to Airplay: A Comprehensive Guide

Introduction:

Streaming content from your Android device to an Airplay speaker system or Apple TV is incredibly useful and seamlessly integrates your favorite multimedia content in your home entertainment setup. However, native support for Airplay streaming on Android devices is limited. But with the help of a few nifty apps and tweaks, you can bridge the gap between the two worlds and enjoy seamless multimedia streaming. In this article, we will guide you through the process of streaming from Android devices to Apple’s Airplay.

Step 1: Download a Compatible App

To start, download a compatible app that allows Android-Airplay streaming. Some popular choices include:

1. AllConnect

2. AirSync

3. DoubleTwist

These apps come with various features and differing levels of compatibility. Choose one that works best for you by reading reviews and trying out free versions before committing to a purchase.

Step 2: Connect Your Android Device and Airplay Receiver

Ensure both your Android device and the Airplay receiver (Apple TV or compatible speaker system) are on the same Wi-Fi network. This step is critical to ensure seamless streaming between the devices.

Step 3: Configure Your App

Once both devices are connected to the same Wi-Fi network, open the downloaded app on your Android device and configure your preferences. Most apps will have clear instructions on how to
set them up for first-time use.

Step 4: Choose Your Content

Now, open the app on your Android device and choose your preferred multimedia content that you want to stream via Airplay. This could include music, videos, photos, or any other supported media files.

Step 5: Select Your Destination (Airplay Receiver)

Using the app’s user interface, pick your desired destination for streaming. The list should display available Airplay receivers such as Apple TV or compatible speaker systems in range.

Step 6: Start Streaming

Once you’ve selected the Airplay receiver, press the play button or other relevant controls within the app to begin streaming your content. If everything goes smoothly, you should now be successfully streaming from your Android device to your Airplay-enabled speakers or Apple TV.

Conclusion:

By following these simple steps and utilizing one of the many available apps, you can bypass Android’s lack of native Airplay support and effortlessly stream your multimedia content to your Airplay-enabled devices. Embrace seamless cross-platform streaming and enjoy your favorite multimedia content in whichever way you’d like.