Tech Advice

How to Find the Manufacture Date on a Dell LaptopIntroduction: Dell laptops are renowned for their quality and durability, making them a popular choice among tech enthusiasts and professionals worldwide. Knowing the manufacture date of your Dell laptop can help you better understand its warranty status or provide a useful reference when purchasing second-hand machines. So, how does one find the manufacture date? Luckily, finding this information is relatively simple. This article explores how you can find your Dell laptop’s manufacture date with just a few steps. Step 1: Locate the Service Tag or Express Service Code To find the manufacture date of your Dell laptop, you must first find the Service Tag or Express Service Code. These are unique identification codes assigned to each Dell device and can typically be found on a sticker located on the bottom or back of your laptop. Alternatively, you could check the laptop’s packaging or invoice for these numbers. Step 2: Visit Dell’s Support Website Once you have acquired your service tag or express service code, navigate to Dell’s support website which is designed to help customers get comprehensive details about their devices. While there are multiple ways to access warranty information and laptop details, using these codes will bring up precise results for your specific device. Step 3: Enter Your Service Tag/Express Service Code On the Dell support website, locate an entry field where you can input your service tag or express service code (generally found at the bottom of the screen). After entering either number, click on “Submit” or a similarly labeled button. Step 4:Access Device Details Upon submission, you will be directed to a page containing comprehensive information about your Dell laptop. If prompted to verify your laptop’s specific model number, do so by clicking on it. In most cases, necessary details should be displayed automatically after entering your codes. Step 5: Find the Manufacture Date Finally, once you have accessed your device information, look for the section titled “Ship Date,” “Manufacture Date,” or similar variations. The date specified here will be the exact day your Dell laptop was manufactured. Conclusion: Knowing the manufacture date of your Dell laptop might be necessary in certain scenarios, and by following this step-by-step guide, you can retrieve this information with ease. This process makes it simpler to manage warranty claims, understand model-specific features, or make informed decisions when purchasing third-party used laptops.

Introduction:

Dell laptops are renowned for their quality and durability, making them a popular choice among tech enthusiasts and professionals worldwide. Knowing the manufacture date of your Dell laptop can help you better understand its warranty status or provide a useful reference when purchasing second-hand machines. So, how does one find the manufacture date? Luckily, finding this information is relatively simple. This article explores how you can find your Dell laptop’s manufacture date with just a few steps.

Step 1: Locate the Service Tag or Express Service Code

To find the manufacture date of your Dell laptop, you must first find the Service Tag or Express Service Code. These are unique identification codes assigned to each Dell device and can typically be found on a sticker located on the bottom or back of your laptop. Alternatively, you could check the laptop’s packaging or invoice for these numbers.

Step 2: Visit Dell’s Support Website

Once you have acquired your service tag or express service code, navigate to Dell’s support website which is designed to help customers get comprehensive details about their devices. While there are multiple ways to access warranty information and laptop details, using these codes will bring up precise results for your specific device.

Step 3: Enter Your Service Tag/Express Service Code

On the Dell support website, locate an entry field where you can input your service tag or express service code (generally found at the bottom of the screen). After entering either number, click on “Submit” or a similarly labeled button.

Step 4:Access Device Details

Upon submission, you will be directed to a page containing comprehensive information about your Dell laptop. If prompted to verify your laptop’s specific model number, do so by clicking on
it. In most cases, necessary details should be displayed automatically after entering your codes.

Step 5: Find the Manufacture Date

Finally, once you have accessed your device information, look for the section titled “Ship Date,” “Manufacture Date,” or similar variations. The date specified here will be the exact day your Dell laptop was manufactured.

Conclusion:

Knowing the manufacture date of your Dell laptop might be necessary in certain scenarios, and by following this step-by-step guide, you can retrieve this information with ease. This process makes it simpler to manage warranty claims, understand model-specific features, or make informed decisions when purchasing third-party used laptops.
Different Ways to See Deleted Reddit Posts

Introduction:

Reddit, one of the most popular online platforms for discussions, news, and social networking, offers a diverse range of topics from technology and science to entertainment and politics. However, content on Reddit is constantly changing, and it’s not uncommon for users to delete their posts or comments. Fortunately, there are various methods to view these deleted posts. This article will explore different ways to see deleted Reddit posts.

1. Ceddit

Ceddit is an unofficial Reddit client designed to display deleted content alongside active ones. By replacing the “www” in the URL with “c”, users can view an alternative version of Reddit that includes previously removed or deleted posts and comments.

For example:

Original Reddit link – https://www.reddit.com/r/techdiscussion/comments/abc123
Ceddit link – https://www.ceddit.com/r/techdiscussion/comments/abc123

2. Removeddit

Similar to Ceddit but using another approach, Removeddit enables users to view deleted posts and comments by replacing “reddit” with “removeddit” in the URL.

For example:

Original Reddit link – https://www.reddit.com/r/technology/comments/xyz789
Removeddit link – https://www.removeddit.com/r/technology/comments/xyz789

3. ReSavr

ReSavr is a unique tool that collects and archives deleted comments on Reddit. Although it won’t display the entire post, users have access to all deleted comments from the platform. Simply visit
ReSavr’s website (https://www.resavr.com/) and use the search function or browse by date.

4. Wayback Machine

The Internet Archive’s Wayback Machine is a digital archive that stores snapshots of web pages over time. By inputting a specific Reddit URL into the Wayback Machine (https://archive.org/web/), users can access previous versions of the page. This tool is especially helpful for viewing older deleted posts, as it takes snapshots at various times throughout the site’s history.

5. Unreddit

Unreddit is a browser extension that automatically displays deleted comments on any Reddit thread. Available for Google Chrome and Firefox, the Unreddit extension allows users to quickly see deleted content by displaying removed comments in red text.

Conclusion:

Deleted content on Reddit can be frustrating, but there are multiple tools available to help users view these lost posts and comments. By using Ceddit, Removeddit, ReSavr, Wayback Machine, or Unreddit, you can rediscover the treasure trove of discussions and ideas that once filled the pages of your favorite threads.

How to Attach a Laptop with a Broken Screen to a Monitor

Introduction:

A broken laptop screen can be extremely frustrating, but it doesn’t necessarily mean you have to shell out for a brand new laptop. Many broken screen issues can be easily fixed by connecting the laptop to an external monitor. In this article, we will discuss the steps you need to follow to attach a laptop with a broken screen to a monitor.

1. Gather Your Equipment

Before getting started, gather the necessary equipment:

– An external monitor

– A video cable (HDMI, VGA, or DVI) that is compatible with both your laptop and monitor

– A power cable for the monitor

– Mouse and keyboard (optional)

2. Identify Video Output Port On Your Laptop

First, identify the video output port on your laptop. This can vary depending on the make and model of your device, but most laptops have either an HDMI, VGA, or DVI port. If you are unsure about which port your laptop has, refer to your user manual or look for it online.

3. Turn Off Your Laptop

Before connecting the video cable to your laptop and monitor, turn off your laptop. This will help ensure there are no accidental electrical surges during setup that could damage your devices.

4. Connect The Video Cable To Your Laptop And Monitor

Plug one end of the video cable into the corresponding port on your laptop and the other end into your monitor’s input socket. Make sure the connections are tight and secure so as not to disrupt transmission during use.

5. Connect The Monitor Power Cable To A Power Source

Connect the power cable from your monitor to an electrical outlet or surge protector.

6. Turn On Both Devices

Turn on your monitor first followed by powering on your laptop.

7.Set Your Monitor As The Primary Display (Optional: If You Can See Enough Of Laptop Screen)

If you can see enough of your broken laptop screen to navigate, right-click on the desktop background, and go to “Display settings” or “Screen resolution.” Look for the section that shows multiple monitor display settings, and set your external monitor as your primary display.

8. Adjust Display Settings If Necessary

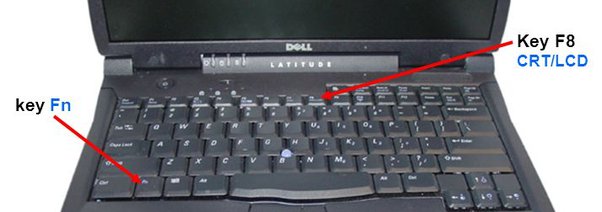
If your laptop doesn’t automatically detect the external monitor or adjust resolution, press the “Windows” key together with the “P” key (hold both keys down simultaneously) on your keyboard to open the project menu. Choose “Extend” for a dual display setup or “Second screen only” if you want to use only the external monitor.

Conclusion:

Connecting a laptop with a broken screen to an external monitor is an efficient way to troubleshoot and continue using your device without incurring additional expenses. Following these steps will allow you to quickly and easily extend or replace your laptop’s broken screen with an external monitor, giving new life to an otherwise unusable device.

Critical Political Debate Topics Impacting Education

Introduction:

With political debates becoming more popular and significant in shaping our society, it is crucial to discuss essential topics impacting education. Education serves as the backbone for a brighter future and empowers individuals to make informed decisions. The following article presents some essential political debate topics related to education that need earnest attention from policymakers and stakeholders.

1. School Funding:

One of the most critical political issues in education is school funding, especially concerning public schools. Policymakers often struggle with distributing resources equitably among districts, leading to imbalances in infrastructure, materials, teacher salaries, and other aspects of a quality education. The debate surrounding school funding revolves around various propositions, such as reformation of property tax systems or increased allocations at local and national levels.

2. Standardized Testing:

The role of standardized tests in evaluating students’ learning capabilities is a contentious topic. Advocates believe that standardized testing helps in providing comparable data to evaluate schools’ performance efficiently. However, critics argue that these tests stifle creativity and encourage the culture of “teaching to the test” instead of fostering well-rounded education. This debate has implications for accountability systems, teacher evaluations, and student achievement measurements.

3. Teacher Compensation:

Teacher compensation remains a constant issue in political debates related to education. It mainly focuses on the correlation between educators’ salaries and their performance at work. While some support higher wages for teachers with more experience and notable results, others believe it would incentivize quality teaching across all experience levels.

4. School Choice & Charter Schools:

School choice has become an essential policy due to the increasing variety of educational institutions available today. This topic revolves around whether parents should have the freedom to select an appropriate school setting for their children or entrust this responsibility to the government. With numerous Charter Schools emerging globally, this debate also addresses issues like private school vouchers and access to quality education for all socioeconomic scenarios.

5. Inclusion & Special Education:

Political debates often include the needs and opportunities for students with disabilities or special requirements. The discussion focuses on the degree of inclusion that mainstream schools should facilitate, ensuring access to quality education for everyone is balanced with individualized attention to diverse learning styles.

6. Curriculum Standards & Academic Freedom:

Curriculum standards have perpetually generated political debates ranging from national policies to teacher autonomy in shaping classroom content. The central issue revolves around striking the optimal balance between national standards outlining fundamental knowledge and allowing educators to tailor their approaches based on individual student needs and interests.

Conclusion:

As society evolves, the political debate topics impacting education become more varied and nuanced. These six subjects represent just a fraction of the necessary discussions that will influence educational policies on local, regional, and national levels. Engaging in informed conversations about these vital educational issues paves the way towards creating a robust system focused on nurturing well-rounded individuals prepared for future challenges.

Top 6 Ways to Fix Location Services Not Working on Android

Introduction:

Location services have become an essential part of our daily lives. From shopping to navigation, our Android devices rely on it in many ways. However, there are times when you might experience problems with location services not working on your Android device. This can be a frustrating issue, but fret not! In this article, we will discuss the top 6 ways to fix location services issues on your Android device.

1. Check Location Permissions:

The first thing you should do is ensure that all necessary permissions have been granted for the apps using location services. Go to Settings > Privacy > Permission Manager > Location, and make sure that permission is given to the apps that need it. It’s also crucial to select “Allow all the time” for essential apps that require constant access to location data.

2. Enable High Accuracy Mode:

To have the best possible experience with location services, it’s vital to enable High Accuracy mode on your device. To do this, go to Settings > Location > Mode and select “High accuracy.” This mode uses GPS, Wi-Fi, and mobile networks simultaneously to provide the most accurate location data.

3. Update Google Maps and Google Play Services:

Outdated versions of Google Maps and Google Play Services can cause issues with location services on your Android device. Make sure both these apps are updated to their latest versions by visiting the Google Play Store.

4. Clear Cache of Problematic Apps:

Sometimes, accumulated cache files can cause problems with location services in specific apps. Navigate to Settings > Apps & notifications > [Problematic App] > Storage & cache and tap on “Clear cache.” Restart your Android device after clearing the cache.

5. Reset Network Settings:

Problems with network settings can also be a reason for location services not functioning correctly. To reset network settings, go to Settings > System > Advanced > Reset options > Reset Wi-Fi, mobile & Bluetooth. Keep in mind that this will erase all your saved Wi-Fi networks, Bluetooth pairings, and mobile data settings.

6. Perform a Factory Reset:

If you’ve tried all the previous steps and are still facing issues with location services, a factory reset can help you resolve the problem. Before doing a factory reset, create a backup of your essential data. To perform a factory reset, go to Settings > System > Advanced > Reset options > Erase all data (factory reset). Follow the on-screen instructions to complete the process.

Conclusion:

Experience issues with location services on your Android device can be frustrating and hinder many daily tasks. By following these six steps mentioned above, you should be able to fix any issues you may encounter with location services on your Android device quickly. Remember to take necessary precautions before performing any reset options to avoid losing valuable data.

Discover Your Doppelgänger: A Guide to Online Tools

Introduction

What if you could find someone that looks eerily like you – a doppelgänger lurking around the world, unbeknownst to you? Exciting, isn’t it? To find your long-lost lookalike, we have compiled a list of online tools designed to help you in your quest. Intrigued? Keep reading!

1. Twin Strangers

Twin Strangers is an online platform that connects people with strikingly similar appearances. Users can search the extensive database by uploading a clear photo of their face and setting various search parameters, such as gender and age. It leverages facial feature recognition technology to identify close matches from around the globe.

2. Google Arts & Culture App

Famous for its viral museum selfie feature, the Google Arts & Culture app also provides an exciting way to find your doppelgänger. By uploading a selfie, the app uses facial recognition software to compare your features with historic art pieces stored in their database. You might be surprised at how much you resemble a figure painted hundreds of years ago!

3. Betaface API

Betaface API is a facial recognition service that allows users to upload photos and compare them against an extensive database of celebrities, models, and public figures. This platform can help you discover whether you have an uncanny resemblance to a famous person or popular personalities.

4. Face++Find Look-alike

Face++ is another facial recognition software company that provides an online feature called Find Look-alike. Users can upload their photos and receive percentage-based matching results with others who closely resemble their facial features.

5. Facebook Doppelgänger Week

Though it is not a specific tool or app, Facebook Doppelgänger Week is an event where users change their profile pictures to images of their celebrity lookalikes or revealed doppelgängers in celebration. It’s an entertaining way to see how your friends perceive their own likeness with famous people and maybe even discover your own!

Conclusion

These online tools harness the power of facial recognition technology to help you uncover your doppelgänger or even a celebrity lookalike. Whether it’s for entertainment or simple curiosity, exploring these platforms can offer a unique glimpse into the world of astonishing resemblances! So, start uploading those selfies and let the hunt for your doppelgänger begin!

TP-Link Archer AX21 Review: A Budget-Friendly Wi-Fi 6 Router for Your Home

In today’s increasingly connected world, having a powerful and stable internet connection at home is more important than ever before. As demands for bandwidth and speed continue to grow, consumers need a router that can keep up without breaking the bank. Enter the TP-Link Archer AX21, a budget-friendly Wi-Fi 6 router designed for the modern home user.

Wi-Fi 6 technology offers several performance enhancements over its predecessor, Wi-Fi 5. These include faster speeds, improved coverage, better device handling, and more efficient power usage. The TP-Link Archer AX21 brings these benefits to your home at an affordable price.

Design

The Archer AX21 features a sleek and compact design that easily blends in with its surroundings. With four adjustable antennas covering all angles, this router ensures strong and reliable Wi-Fi signal throughout your home.
Performance

The Archer AX21 operates with dual-band technology, offering up to 1.8 Gbps of total bandwidth – 1.2 Gbps on the 5 GHz band and 574 Mbps on the 2.4 GHz band. This provides ample speed for streaming video in 4K resolution, online gaming, and connecting multiple devices simultaneously.

Installation and Setup

Setting up the Archer AX21 is simple thanks to the intuitive Tether app (available for both iOS and Android devices). The app guides users through the installation process step by step, making it easy to configure your new router with minimal effort. Additionally, you can manage your network settings directly from the app itself.

Advanced Features

The Archer AX21 comes equipped with several advanced features to improve your Wi-Fi experience:

1. OFDMA (Orthogonal Frequency-Division Multiple Access): This feature allows multiple devices to be served simultaneously by a single channel, reducing latency and increasing efficiency.

2. Target Wake Time: This technology helps minimize power consumption by allowing devices to wake up at scheduled times, making it an ideal addition for IoT devices.

3. Parental Controls: The Archer AX21 allows you to set up profiles for different users and manage their internet access rights, including time limits and content filters.

4. Guest Network: You can set up a separate network for visitors that provides internet access without sharing your main Wi-Fi password.

Conclusion

The TP-Link Archer AX21 is an excellent choice for consumers looking for a budget-friendly Wi-Fi 6 router. Its combination of design, performance, ease of use, and advanced features make it an ideal upgrade for those in need of a more robust and reliable home internet connection.

Best Ways to Fix a Computer Stuck on Restarting

Introduction:

A computer stuck on restarting can be a frustrating experience. Whether it’s due to software update issues, hardware problems, or just a system glitch, this situation can leave users feeling helpless and annoyed. Fortunately, there are several ways to tackle this problem and restore your computer to proper functionality. In this article, we’ll explore some of the best methods for fixing a computer that’s stuck on restarting.

1. Perform a Hard Reboot:

If your computer is unresponsive and seems to be stuck in an endless loop of restarting, you can perform a hard reboot by physically pressing and holding the power button for approximately 10 seconds until the computer shuts down completely. Once powered off, wait for 30 seconds and then restart your computer normally.

2. Enter Safe Mode:

Starting your computer in Safe Mode allows you to run diagnostics and troubleshoot potential issues without loading unnecessary drivers and software. To enter Safe Mode, restart your computer and repeatedly press the F8 key (or Shift + F8) as it boots up. Choose “Safe Mode” from the list of options that appear. Once in Safe Mode, check for any recently installed software or updates that may be causing the problem and remove them if possible.

3. Use System Restore:

System Restore is a helpful feature that allows you to return your computer to an earlier point in time when it was functioning correctly. To launch System Restore, enter Safe Mode as described above, then navigate to Control Panel > System and Security > System > System Protection > System Restore. Follow the on-screen instructions to choose a restore point before the issue began.

4. Run Windows Troubleshooter:

The Windows Troubleshooter tool is designed to detect and fix common issues with your system automatically. In Safe Mode or regular mode, search for “Troubleshoot settings” in the Start menu or search bar and select it. From there, follow the on-screen prompts to run the appropriate troubleshooter for your situation.

5. Update Your Device Drivers:

Sometimes, outdated or corrupted drivers can cause your computer to get stuck in a restarting loop. In Safe Mode, go to Device Manager (accessible through the Control Panel or by right-clicking the Start button) and check for any devices with a yellow exclamation point next to them. Right-click these devices and choose “Update Driver Software” to ensure you’re using the latest drivers available.

6. Check Your Hardware:

It’s possible that faulty hardware could be causing your computer to be stuck on restarting. Inspect your computer for signs of damage, such as swollen capacitors or loose cables. If you’re not comfortable working with hardware, it’s best to consult a professional technician.

7. Reinstall Windows:

If all else fails and you’re still experiencing issues with your computer constantly restarting, you may need to reinstall Windows from scratch. This method should only be used as a last resort, as it will delete all files and settings from your computer, requiring you to start over from scratch.

Conclusion:

A computer stuck on restarting can be an incredibly frustrating issue, but with some patience and understanding of potential causes, it’s generally fixable using the methods listed in this article. By attempting these solutions in order of simplicity and severity, most users should be able to get their system up and running again without too much trouble.

The Complete Guide to Watching 90 Day Fiancé in Order

introduction:

90 Day Fiancé is a popular reality television series that has captured the hearts of millions of viewers worldwide. Following the lives of international couples as they navigate the complexities of long-distance relationships, cultural differences, and the K-1 visa process, this show has garnered a massive fan base. Since its inception in 2013, the franchise has produced multiple spin-offs, making it challenging for first-time viewers to determine where to begin and how to watch the series in order. If you’re wondering about how to enjoy this thrilling reality show from scratch, look no further – we’ve got you covered!
How to Watch 90 Day Fiancé in Order:

1. 90 Day Fiancé: Start with the original series that began it all. Currently spanning eight seasons, this show documents fiancés applying or receiving their K-1 visa and moving to the US. Each couple then has 90 days to wed before the visa expires. Catch all the drama as these relationships unfold.

2. 90 Day Fiancé: Happily Ever After?: Following couples from the original series as they adjust to married life, this spin-off has aired five seasons so far. Watch them tackle new challenges such as spouse partnerships and parenthood.

3. 90 Day Fiancé: Before the 90 Days: Delve into pre-K-1 visa stage relationships by watching this spin-off – some fan-favorite couples even make appearances! With four seasons under its belt, you’ll see extra insight into couples’ lives before applying for their K-1 visas.

4. 90 Day Fiancé: What Now?: This digital series is available on TLC Go and follows former cast members post-show. With four seasons available, viewers can see what becomes of their favorite couples after their television debuts.

5. The Other Way: This unique spin-off showcases Americans moving abroad to be with their loved ones, flipping the original premise on its head. With two seasons aired, follow the journey of people leaving their lives behind as they embark on new adventures.

6. The Family Chantel: Fans of Pedro and Chantel’s tumultuous romance from the original series will love this spin-off. Watch as these two navigate life with their families in tow over two captivating seasons.

7. B90 Strikes Back!: Cast commentary takes center stage here as couples from 90 Day Fiancé: Before the 90 Days give their two cents about their experiences on the show. With one season to watch, hear what your favorite participants have to say.

8. 90 Day Journey: As a compilation series that highlights some of the franchise’s most-loved couples from various seasons, you can catch your favorite cast members’ storylines condensed into standalone episodes in this series.

Conclusion:

With a proper plan, you can watch 90 Day Fiancé and its numerous spin-offs without confusion or frustration. Start with the foundational series and follow this guide to tackle each show in order for a comprehensive, engaging viewing experience. So grab your popcorn and immerse yourself in the intriguing world of international love stories!

Top 6 Ways to Fix Depth Effect Wallpaper Not Working on iPhone

The depth effect wallpaper feature on iPhones can create stunning visuals that accentuate the user interface. However, some users may encounter issues with the depth effect not working as expected. In such instances, here are the top six ways to fix this issue and enjoy a dynamic and compelling background on your iPhone.

1. Restart Your iPhone

Sometimes, a simple restart can resolve many issues, including the depth effect wallpaper not working. To restart your iPhone, press and hold the power button (or the side button and volume up button) until the slider appears. Drag it to turn off the device, wait for a few seconds, and then turn it back on.

2. Check for iOS Updates

Apple frequently releases updates for its operating system that can fix various issues, including those related to wallpapers. To check and install any available updates:

– Go to Settings > General > Software Update

– If an update is available, tap on ‘Download and Install’

3. Set a New Wallpaper

There might be a glitch with the specific wallpaper that prevents it from displaying correctly. In this case, try setting another depth effect wallpaper or any other dynamic or still wallpaper to see if it resolves the issue.

4. Disable Low Power Mode

Low Power Mode aims to save energy by disabling certain features on your iPhone. This mode may interfere with depth effect wallpapers as part of its energy-saving strategy. To disable Low Power Mode:

– Go to Settings > Battery

– Toggle off ‘Low Power Mode’

5. Reset All Settings

If the above methods do not work, try resetting all settings on your iPhone. Keep in mind that this option will not erase your data, but it will revert all settings back to their defaults.

– Go to Settings > General > Reset

– Select ‘Reset All Settings’ and confirm

6. Contact Apple Support

If none of these solutions fix the issue, it may be a hardware or software problem that requires further troubleshooting. In such cases, it is best to contact Apple Support directly for more in-depth assistance.

In conclusion, there are multiple ways to troubleshoot and potentially resolve issues with depth effect wallpaper not working on your iPhone. By following these steps, you can enjoy an attractive and immersive interface that adds character to your device.