Pedagogue Blog

Teacher Aides | How to Use Their Time Effectively

Teacher aides play a vital role in the educational environment, supporting teachers and students alike. Often referred to as teacher assistants or paraprofessionals, they are instrumental in creating a conducive learning atmosphere. However, managing their time effectively is crucial to maximize their contribution to the classroom. Here are proven strategies for teacher aides to use their time efficiently.

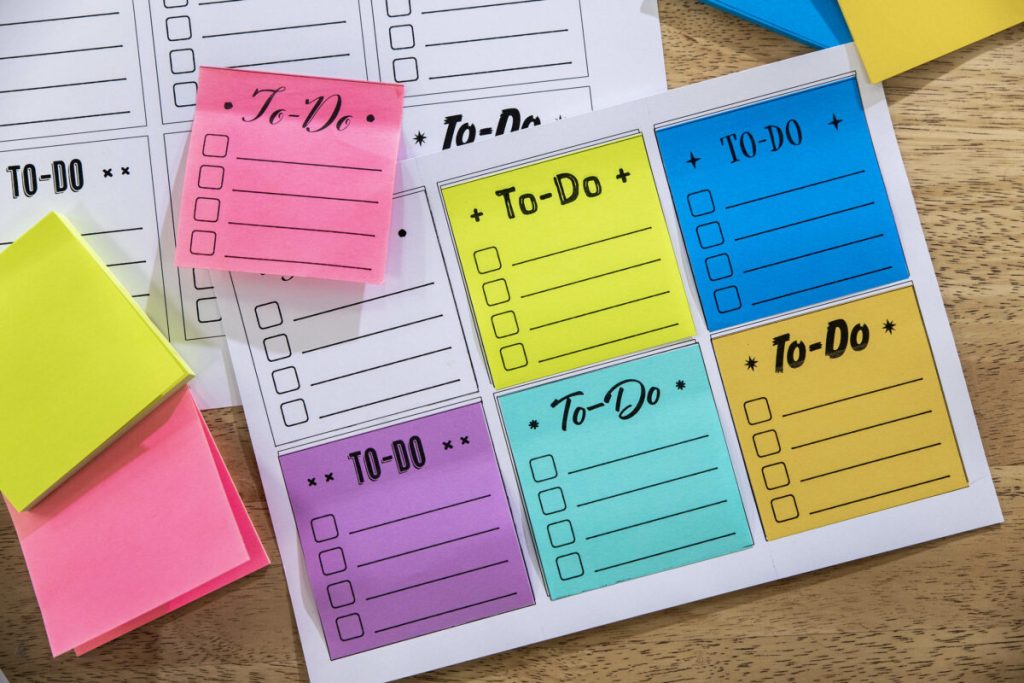
1. Prioritize and Plan: Teacher aides should begin by understanding the priorities for each day. Creating a daily plan can help them tackle tasks systematically. They should consult with the teacher to identify the most critical tasks and map out a schedule that aligns with the classroom’s needs.

2. Understand Individual Student Needs: To be effective, teacher aides must be familiar with each student’s learning requirements and challenges. This knowledge can help them tailor their assistance and divide their time in ways that provide optimal support where it’s needed most.

3. Collaborate with Teachers: Communication is key to using time effectively. Regular dialogues with teachers can ensure that aides are aware of any changes in lesson plans or student needs, allowing them to adapt quickly and remain focused on relevant tasks.

4. Utilize Downtime Wisely: There may be periods during the school day when direct instruction or assistance isn’t required. Teacher aides can use this time to prepare materials for upcoming lessons, organize resources, or attend to clerical work that supports classroom activities.

5. Professional Development: It’s important for teacher aides to continue developing their skills. They should invest time in attending workshops, training sessions, or online courses that can improve their effectiveness and efficiency.

6. Focus on Non-Academic Support: Teacher aides can greatly assist by providing non-academic support such as supervising lunchtimes, facilitating transitions between activities, and maintaining a clean and organized classroom environment.

7. Manage Group Activities: When working with groups, effective management is essential to keep all students engaged while providing individualized attention as needed. Optimizing group work also allows teacher assistants to observe student interactions and identify any social or learning issues that may require further attention.

8. Be Proactive with Behavioral Issues: Addressing behavioral issues promptly can save time in the long run by maintaining a peaceful learning environment conducive to education for all students.

9. Reflect on Practices: At the end of each day or week, teacher aides should reflect on what worked well and what did not regarding time management. This reflection will allow them to adjust their practices as necessary.

10. Delegate: Sometimes delegating tasks where possible can also be an efficient time management strategy, especially when working with older students who can handle some responsibility under supervision.

By implementing these strategies, teacher aides can significantly enhance their productivity and efficacy in supporting teachers and nurturing students’ educational journeys.

Guided Reading Folder Templates and Checklists

Guided reading sessions are an instrumental part of literacy instruction in many classrooms. These sessions help teachers tailor instruction to meet the individual needs of each student, monitoring progress and facilitating growth in reading skills. To conduct organized and effective guided reading sessions, educators often use folder templates and checklists to stay organized and track the progress of each student. In this article, we will explore what guided reading folder templates and checklists typically include, and how they can be used to maximize the benefits of guided reading sessions.

A guided reading folder template is typically a pre-arranged document or a set of documents where information about the guided reading session is recorded. This can include a variety of components depending on the teacher’s preferences and the needs of the students. Common elements found in guided reading folder templates include:

1. Student Information: This section includes details such as the student’s name, level, strengths, challenges, and goals.

2. Group Information: For teachers who organize their students into reading groups based on skill level or needs, this area lists group assignments and allows for changes to be made as students progress.

3. Reading Logs: Records of each book read by the student in the guided setting along with dates and notes on student performance or observations during the read.

4. Anecdotal Notes: Space for making informal observations about a student’s reading behaviors, comprehension, fluency, or any other notable aspects during the session.

5. Assessment Records: This part holds formal records from running records or other assessment tools used to measure students’ progress over time.

6. Session Plans: Outlines for each guided reading session noting objectives, book titles, vocabulary focus, comprehension questions, and follow-up activities.

7. Strategy Checklist: A list of reading strategies that students are learning to employ. Teachers can note when a student successfully uses a strategy during their reading.

8. Follow-up Task List: Assignments or activities for students to complete after their guided session that reiterate or extend learning from the book or passage they read.

9. Communication Logs: Notes on communication with parents regarding their child’s progress or areas where additional support at home can be beneficial.

Checklists are an invaluable tool within these templates as they allow educators to quickly reference what areas they need to address with each student. They can track whether certain books or materials have been used with a child, if a specific instructional focus has been covered, or if there has been communication with parents regarding progress.

Integrating these tools into daily classroom routines helps create consistency in instructional methods while also providing clear records that demonstrate how instruction is tailored to individual student needs. Guided reading folders enable a focused approach during small-group instruction times while also fostering a collaborative environment where students can receive personalized support based on ongoing assessments documented within these folders.

Educators looking for effective ways to implement guided reading sessions should consider creating their own folder templates or look for customizable options online that can fit their specific classroomdynamics. Similarly designed checklists should accompany these templates to ensure completeness in documenting all necessary aspects of the guided reading process.

By utilizing structured folder templates and comprehensive checklists throughout their guided reading program, teachers can enhance their literacy instruction and foster greater success among their students as readers.

15 Valentine’s Day Craft Ideas for the Classroom With an Educational Twist

Valentine’s Day is a perfect opportunity to blend creativity with learning in the classroom. These 15 craft ideas offer an educational twist, ensuring that students not only enjoy the festivities but also enrich their knowledge and skills.

1. Heart-Shaped Word Puzzles: Students can create heart-shaped puzzles with words and definitions they’ve been learning in class. This is a great way to reinforce vocabulary.

2. Love-Themed Science Experiments: Incorporate simple science experiments that explore concepts like density by creating love potion layers using various liquids in different shades of pink and red.

3. Math Pattern Hearts: Cut out a series of hearts and use them to teach patterns and sequencing. Older students can tackle more complex patterns or use the hearts for graphing exercises.

4. Historical Valentines: Students can craft Valentine’s cards inspired by historical figures, write messages as if they were that person, encouraging research skills and creativity.

5. Literary Love Quotes: Have students pick quotes from their favorite books or poems about love and friendship, then design a card around the quote, promoting reading comprehension and design skills.

6. Valentine’s Day Around the World Posters: Students can create posters depicting how Valentine’s Day is celebrated in different cultures, incorporating social studies into the crafting session.

7. Origami Heart Bookmarks: Teach students the art of origami by making heart bookmarks while integrating geometry concepts.

8. Friendship Bracelets with Beaded Patterns: Students can practice pattern-making and fine motor skills by designing friendship bracelets.

9. Heart-Shaped Secret Code Messages: Introduce basic cryptography by having students write secret admirer notes in a simple coded language they devise.

10. Symmetry Art: Use Valentine’s-themed imagery like hearts or Cupid’s arrow to teach symmetry through painting or drawing exercises.

11. Botanical Valentines: Combine science with art by pressing flowers for Valentine’s cards, discussing plant biology along the way.

12. Exploring Emotions Collage: Encourage emotional intelligence by having students create a collage of images and phrases that represent love and kindness from magazines or printed materials.

13. Geographical Heart Maps: Students make heart-shaped maps showing places they love or regions that celebrate Valentine’s Day, reinforcing geography knowledge.

14. Biographical Hearts: Each student picks a significant person in history and writes interesting facts inside a heart-shaped booklet, blending history with craftwork.

15. Chemical Reaction Cards: Make homemade pH indicator paper with cabbage juice, then paint on heart-shaped paper to see color change reactions as an engaging chemistry lesson.

Incorporating these crafts into your classroom celebration not only sparks creativity but also reinforces academic concepts across various subjects, making learning festive and fun!

Maths Warm-up Ideas for the Classroom (Easy to Set Up)

Math in education serves as both a critical skill and a challenging subject for many students. To help ease learners into math lessons and get their minds focused on numbers and problem-solving, warm-ups are an ideal solution. These activities not only prepare students for the day’s math content but can also build their confidence and skills over time. Here, we cover several easy-to-set-up maths warm-up ideas suitable for a classroom setting.

1. Number of the Day:

Each day, feature a “Number of the Day” where students engage with that number through various mathematical operations like addition, multiplication, or determining factors and multiples. This can be adjusted daily according to the class level.

2. Quickfire Maths Challenges:

Set a timer for one or two minutes and ask rapid-fire questions on basic arithmetic — addition, subtraction, multiplication, division — tailored to the ability level of your class.

3. Problem of the Day:

Write a new problem on the board each day before class begins. When students enter, they start by trying to solve it. The problems can range in complexity depending on what the class is currently learning.

4. Math Puzzles:

Introduce puzzles that require math to solve – such as Sudoku or logic puzzles that involve numericalreasoning. Puzzles can stimulate critical thinking and engagement with mathematical concepts.

5. Equation Bingo:

Create Bingo cards with mathematical equations or problems where the answers correspond to numbers on the Bingo grid. This could involve simple operations or more complex equations based on student levels.

6. Estimate and Measure:

Ask students to estimate the length, height, or volume of objects in the classroom before measuring them to check their accuracy. This combines math with practical application and can lead into units about measurement.

7. Pattern Recognition:

Draw a sequence on the board with a missing number or shape and ask students what comes next. Recognizing patterns is fundamental in understanding higher-level math concepts.

8. Silent Solution Boards:

Have students use whiteboards or tablets to solve a problem silently before showing their answers simultaneously. This encourages independent thought and reduces peer pressure while facilitating quick checks of understanding.

Incorporating these maths warm-ups daily or weekly not only primes students’ brains for learning but also promotes enjoyment and lessens anxiety around math. Choose activities that resonate with your class dynamics and curriculum needs, ensuring that math becomes an anticipated part of your student’s school day.

An Easy No-Sew Teaching Apron

Teachers are often in need of a handy tool to keep their supplies accessible while keeping their hands free for demonstrations and assisting students. That’s where a teaching apron becomes a valuable asset. Not everyone has the time or sewing skills to create their own apron, but fear not, for there is a simple solution: the no-sew teaching apron.

Creating a no-sew teaching apron is straightforward and budget-friendly. Here’s how to make your own using simple materials like fabric glue, scissors, and a pre-made canvas apron.

Materials:

– Pre-made canvas apron

– Fabric glue

– Patches or fabric for pockets (optional)

– Scissors

– Decorative elements like ribbons, buttons, or iron-on patches (optional)

Instructions:

1. Begin by laying your pre-made canvas apron flat on your work surface. Ensure it’s clean and smooth out any wrinkles.

2. Decide where you would like to add additional pockets. These can be crafted from coordinating or contrasting fabric patches. If you have existing pockets, you can skip this step or add more for extra space.

3. Cut the fabric patches into your desired pocket shapes and sizes. Remember that you’ll need a small flap to fold under for a clean edge, which will also be where you apply the fabric glue.

4. Fold under the edges of your fabric patches to create a hemline for a polished look. Apply fabric glue along these edges.

5. Position your new pockets onto the apron wherever you find them most practical. Press firmly to adhere them to the base apron material, then allow them ample time to dry.

6. (Optional) Personalize your teaching apron with decorative elements like ribbons around the edges, buttons on pocket flaps, or iron-on patches that reflect subjects you teach or personal interests.

7. Allow any added decorations and pockets to dry completely before using the apron.

And there you have it: an easy-to-make, no-sew teaching apron that will keep all of your essential teaching tools right at hand! Whether it’s markers, stickers, notes, or anything else you require quick access to during classroom activities, your newly fashioned accessory will help you keep it all together—no sewing required!

Video Backgrounds for Teachers (FREE Download)

Teaching in the digital age has evolved significantly, with teachers continually seeking innovative ways to captivate and engage their students. One such tool that has become increasingly popular in educational settings is video backgrounds. These visual aids can transform a mundane lecture into an immersive experience, helping to illustrate points more vividly and maintain students’ attention.

What Are Video Backgrounds?

Video backgrounds are looped video clips or animated graphics that play behind the main content during a presentation or a virtual class session. They can range from subtle motion, like gentle waves or a serene landscape, to thematic illustrations related to the lesson’s content. The right background video can accentuate the teaching material without distracting from it.

Why Use Video Backgrounds for Teaching?

The use of video backgrounds in teaching can serve several purposes:

1. Visual Stimulation: Students today are accustomed to multimedia experiences. Video backgrounds provide visual stimulation that could keep them engaged during online classes or while watching pre-recorded lessons.

2. Contextualization: For example, while teaching about marine life, a video background displaying an aquatic environment can help set the scene and provide context for the discussion.

3. Emotional Connection: The right visuals can evoke emotions and set the tone for a topic, aiding in memory retention and making lessons more memorable.

4. Branding: Teachers who produce their own content might use consistent video backgrounds as part of their branding strategy, making their educational videos instantly recognizable.

Free Video Background Resources for Teachers

1. Pixabay – Offers a wide array of free stock video clips that are ideal for use as video backgrounds.

   Website: https://www.pixabay.com

2. Pexels – Another great source for high-quality, free stock videos which could be used as teaching aids.

   Website: https://www.pexels.com

3. Videezy – Provides free HD stock footage and motion graphics that could enhance any lesson plan.

   Website: https://www.videezy.com

4. Coverr – Perfect for finding unique and engaging background videos without any licensing hassles.

   Website: https://www.coverr.co

5. Life of Vids – A curated collection of free-to-use videos with no attribution required; ideal for educational settings.

   Website: https://www.lifeofvids.com

Utilizing these resources, teachers can now integrate captivating video backgrounds into their classes without worrying about costs. Their free download feature also makes it accessible to all educators aiming to enrich their students’ learning experience through modern technology.

To ensure effectiveness when using video backgrounds in a classroom setting, teachers should be mindful of a few best practices:

– Choose backgrounds that support the lesson’s content rather than distract from it.

– Opt for subtle motion to avoid drawing attention away from the primary material.

– Test your chosen video background before the lesson to ensure it works seamlessly with your teaching platform.

– Pay attention to the length of the clip; seamless loops are preferable so as not to disturb continuity.

– Always credit creators when required by the license; it’s important both legally and ethically.

In conclusion, video backgrounds have the potential to greatly enhance educational experiences for students by providing dynamic visual contexts that standard still images cannot match. With resources freely available, teachers can easily incorporate this tool into their digital classrooms, creating stimulating and effective learning environments tailored to twenty-first-century learners.

Teachers: TED Talks You’ll Want to Watch!

Education is one of the most powerful tools we have for personal and societal growth. Teachers, the individuals at the forefront of this educational journey, play a crucial role in shaping the minds and futures of their students. To celebrate their incredible contributions, here’s a curated list of TED Talks that every educator, student, and enthusiast should watch.

1. “Every Kid Needs a Champion” by Rita Pierson

In this heartwarming talk, veteran educator Rita Pierson calls on teachers to build relationships with their students, which she believes is key to learning. Pierson’s powerful message about the importance of human connection in education will leave you inspired.

2. “What We’re Learning From Online Education” by Daphne Koller

Daphne Koller, co-founder of Coursera, takes you through her journey in developing one of the largest online learning platforms in the world. She explains how technology has the power to transform education by providing access to all.

3. “The Danger of a Single Story” by Chimamanda Ngozi Adichie

Celebrated author Chimamanda Ngozi Adichie discusses the implications of understanding only a single narrative about another person or country. This impactful talk is essential for teachers aiming to foster critical thinking and empathy in their students.

4. “Do Schools Kill Creativity?” by Sir Ken Robinson

One of the most popular TED Talks ever, Sir Ken Robinson makes an entertaining and profoundly moving case for creating an education system that nurtures (rather than undermines) creativity.

5. “Teach Teachers How to Create Magic” by Christopher Emdin

Christopher Emdin talks passionately about how teachers can learn from what he calls ‘pentecostal pedagogy’ to make alive classroom experiences that will resonate with students from all backgrounds.

6. “Let’s Teach For Mastery — Not Test Scores” by Sal Khan

Sal Khan, the founder of Khan Academy, argues for mastery-based learning where students can learn at their own pace till they grasp each concept fully instead of being pushed forward with grade-level benchmarks.

7. “My Story From Gangland Daughter To Star Teacher” by Pearl Arredondo

Pearl Arredondo shares her personal journey from growing up with a gang-affiliated father to becoming a teacher who works with students facing similar challenges. Her story is a testament to the transformative power of teachers who care.

8. “How To Escape Education’s Death Valley” by Sir Ken Robinson

Another profound talk from Sir Ken Robinson explores the three principles that human life flourishes under and how current education practices are at odds with them. This thought-provoking session encourages teachers to think differently about curriculum design and engagement.

Each of these talks delivers powerful insights into the world of education and what it means to be a teacher in today’s rapidly changing landscape. They not only celebrate educators but also challenge them to look critically at their own practices and innovate for greater impact on their students’ lives. Whether you are an educator or someone passionate about learning, these talks will equip you with new perspectives around teaching and learning.

Classroom Management Teaching Resources

Classroom management is an essential skill that every teacher must effectively develop to create an environment conducive to learning. Various resources are available to aid educators in mastering this skill, ensuring that they can maintain a positive atmosphere, manage behavior, and keep students engaged. In this article, we’ll explore some useful classroom management teaching resources that can be easily integrated into any educational setting.

1. Books and Guides:

There are several books dedicated to the topic of classroom management for teachers at all levels of experience. “The First Days of School” by Harry K. Wong and Rosemary T. Wong provides comprehensive strategies for setting up a successful school year, while “Teach Like a Champion” by Doug Lemov offers practical techniques for classroom discipline and student engagement. These books are treasure troves of actionable advice.

2. Educational Websites and Blogs:

Educational websites such as Edutopia, TeachThought, and Smart Classroom Management offer an array of articles, blog posts, and downloadable materials covering classroom management tips and real-life examples of best practices in action.

3. Professional Development Workshops:

Many educational consultants and organizations offer workshops and seminars on classroom management. Attending these can provide educators with an opportunity to learn from experts in the field, participate in discussions with peers, and practice new strategies.

4. Online Forums and Social Media Groups:

Online communities like the Classroom Management group on Teachers Pay Teachers or TeachersOnTwitter provide platforms where educators can share experiences, seek advice, and trade resources related to managing classrooms effectively.

5. Classroom Management Software:

Technology can be leveraged to handle certain aspects of classroom management. Tools such as ClassDojo or Google Classroom help teachers track behavior, streamline communication with students and parents, and organize class materials digitally.

6. Visual Aids and Charts:

Implementing visual aids like posters that outline rules or charts that track student progress can serve as constant reminders for students about behavioral expectations and achievements.

7. Behavior Management Systems:

Systems such as PBIS (Positive Behavioral Interventions & Supports) focus on establishing a school-wide approach to managing student behavior positively while creating a supportive school climate.

8. Videos and Webinars:

Educational platforms like YouTube have numerous channels devoted to teaching strategies including classroom management hacks. The Teaching Channel offers videos demonstrating effective classroom management techniques in action.

9. Peer Observation:

Collaborating with colleagues through peer observation can lead to insights into different management styles and techniques that could be adapted to one’s own teaching practice.

10. Role-Playing Scenarios:

Creating mock situations where teachers can practice managing difficult scenarios can help prepare them for real-life challenges within the classroom environment.

Each of these resources plays a significant role in equipping teachers with the knowledge, skills, and confidence they need to manage their classrooms effectively. Utilizing a combination of these tools can help create a structured learning environment where students feel safe, respected, and motivated to learn.

Sticky Notes Template – To-Do Lists

In the hustle and bustle of everyday life, staying organized can often seem like a daunting task. With endless tasks, appointments, and deadlines, it’s easy to feel overwhelmed. Enter the humble sticky note – a surprisingly powerful tool that can help you bring order to the chaos of daily life when used effectively in a to-do list format.

The to-do list is a tried and tested method for productivity but employing sticky notes offers unique advantages. They are visible reminders that can be placed anywhere, from your computer monitor to your fridge door, ensuring that your tasks are always in sight. Moreover, their flexibility allows you to reorganize priorities effortlessly as your day evolves.

Here’s how you can create an effective sticky notes template for your daily to-do lists:

1. Color Coding: Use different colors for various categories of tasks. For instance, blue could be work-related tasks, yellow for personal errands, and pink for health-related activities like workouts or doctor appointments.

2. Prioritization: Each sticky note should represent a single task. Arrange them in order of priority from top to bottom or left to right, based on your preference. As you complete tasks, simply remove the notes corresponding to accomplished jobs.

3. Deadlines: If a task has a deadline, make sure to write down the date prominently at the top or bottom of the sticky note. This way, deadlines won’t sneak up on you unexpectedly.

4. Limit Your List: Avoid overcrowding your workspace with too many sticky notes. Aim for a focused list of achievable tasks for the day – somewhere between 5 to 10 is usually manageable.

5. Clarity: Write each task as clearly as possible — ambiguous notes can lead to confusion later on. Use action words that give you a clear directive: ‘Call the dentist’, ‘Submit monthly report’, ‘Buy birthday gift for Alex’.

6. Versatility: Don’t be afraid to have different templates for different types of days – one template might be for your regular weekday, another for weekend chores, and yet another dedicated solely to project milestones.

By incorporating this simple but effective organizational tool into your day-to-day life, you can enhance productivity and reduce stress. A well-maintained sticky note to-do list ensures that you stay on track with your responsibilities while also allowing you the satisfaction of physically removing a completed task from your line of sight – a small but significant reward that can keep motivation high.

So why wait? Grab a stack of colorful sticky notes and start plotting out your day with this highly visual and flexible system! Whether it’s managing household tasks, tackling important work projects, or simply keeping track of appointments and important dates, sticky notes used in this manner could revolutionize the way you approach everyday organization and productivity.

Funky Easter Egg Craft Template

Easter is a time for family, fun, and, of course, egg decorating! While traditional methods of dying and painting eggs are timeless, sometimes it’s exciting to add a funky twist to tradition. If you’re looking to spritz up your Easter with some unique craftiness, this Funky Easter Egg Craft Template is just the ticket.

Materials:

– Hard-boiled eggs or foam egg substitutes

– Acrylic paints in various bright colors

– Small paintbrushes

– Fine-tip markers or pens

– Assortment of washi tape

– Stickers or adhesive gems

– Glitter glue

– Googly eyes

– Feathers, sequins, and any other funky craft supplies

Instructions:

1. Begin by choosing your base color for the egg. Apply acrylic paint smoothly over the entire surface. You may need to use a couple of coats to get a bright, even coverage. Let it dry completely.

2. Once the base coat is dry, it’s time to get funky! Use washi tape to create geometric patterns or stripes on the egg. Alternatively, draw freehand designs with markers or pens for that personal touch.

3. Add some texture by sticking on feathers, sequins, or adhesive gems. You can make patterns or simply apply them randomly for that funky look.

4. For a sparkly effect, carefully apply glitter glue in lines or dots across the egg surface. Let this dry thoroughly before handling further.

5. Attach googly eyes to give your egg character—a pair for a quirky personification or multiple eyes for an alien vibe.

6. Finish off by using fine-tip pens or markers to add any details such as facial features (if you’re making a character), outlines of washi tape patterns, or additional doodles that bring your funky design together.

7. Once everything is dry and set, place your eggs in a decorative basket or display them proudly on your Easter table.

Remember, there’s no right or wrong way to create Funky Easter Eggs—embrace the quirks and imperfections that make each one unique! So gather your supplies and let creativity lead the way this Easter season.

DIY Board Games for the Classroom

Incorporating do-it-yourself (DIY) board games into a classroom setting is not just an excellent way to infuse fun into learning, but it’s also a fantastic avenue for stimulating students’ creativity and problem-solving skills. Here’s how you can create engaging and educational DIY board games for your students.

Step 1: Identify Learning Objectives

Start by pinpointing the educational goals of the game. Is it to enhance vocabulary, improve math skills, or perhaps to delve into historical events? This will form the foundation of your game’s design.

Step 2: Design the Game Mechanics

Deciding on game mechanics is crucial because it determines how players will interact with the game. Will they draw cards, roll dice, or move pieces along a path? Make sure the mechanics align with the learning objectives.

Step 3: Create the Board and Pieces

Use cardboard or any large paper to design your board. You can then either draw on spaces or create a path, depending on your chosen mechanics. For game pieces, anything from coins to custom-made tokens works—as long as they’re distinct for each player.

Step 4: Develop Content Integration

Integrate subject matter within your game’s context—for instance, questions in Science or English that must be answered to advance spaces. Tailor these to suit the class’s current curriculum.

Step 5: Incorporate Rules

Your game must have clear and simple rules to ensure smooth playtime—nothing that complicates understanding or detracts from the learning experience. It helps if rules are somehow related to the subject at hand (e.g., use historical facts as guidelines on what paths a player can take).

Step 6: Test and Tweak

Nothing’s perfect on the first try. Playtest with a small group of students and refine based on feedback. This process helps iron out complexities and improve educational value.

Remember, DIY board games in the classroom should be more than just playful; they should provoke thought and encourage collaborative problem-solving Which is why it’s significant to balance enjoyment with education when crafting your own classroom board game. Happy gaming!

Fun Easter Bunny Craft Idea

Easter isn’t just about the egg hunts and candy; it’s also a perfect time for engaging in fun crafts with family. One delightful way to liven up the holiday is by creating your own Easter bunny decorations. This can be a festive activity for children of all ages, and it adds a personalized touch to your Easter decor. Bring out the markers, glue, and creativity—it’s time for a fun Easter bunny craft idea!

Materials Needed:

– White, pink, and black construction paper

– Cotton balls

– Scissors

– Glue

– Marker

Instructions:

1. Body: To start with the body of the Easter bunny, use the white construction paper to cut out an oval shape.

2. Head: Cut out a smaller oval shape from the same white paper for the head.

3. Ears: For the ears, cut two long ear shapes from the white paper and two smaller ear shapes from the pink paper to fit inside the white ears.

4. Feet: From the white paper, cut out two large oval shapes for the feet.

5. Facial features: With the black construction paper, cut out two small circles for eyes and a tiny triangle for the nose.

6. Assembly: Glue the head oval onto one end of the body oval.

7. Once you’ve got your body parts arranged, take those cotton balls and pull them apart slightly to give them some fluff. Glue them onto the center of your bunny’s body for a cute fuzzy texture!

8. Ears: Attach the pink parts onto the white ears using glue and fasten them on top of your bunny’s head.

9. Feet: Glue on the feet ovals at the bottom of your body oval.

10. For your bunny’s face, stick on the eye circles and nose triangle you cut out earlier using glue onto its head. With a marker, draw on whiskers and a mouth connecting to its cute little nose.

11. Tail: No bunny would be complete without its adorable tail! Take one last cotton ball and glue it on as its tail at back of its body oval.

12. If you’re feeling extra creative, feel free to add additional details like bow ties or vests cut out from colored paper, or even stickers to give your craft character!

Your Easter Bunny is now ready! This fun project not only allows kids to explore their creativity but also helps with fine motor skills as they cut, pinch, and stick together their festive creation. Display these bunnies around your home or use them as placeholders for Easter dinner—your guests are sure to be charmed!

Latest Posts