Art Education

Bunting Flags for Teachers

Bunting flags, often associated with outdoor festivities and grand celebrations, have fluttered their way into the realm of education, becoming a visual staple in many classroom environments. For teachers, these vibrant, triangular pieces of fabric or paper offer an inventive method to create an engaging and welcoming atmosphere for students.

Characterized by their vivid colors and various patterns, bunting flags have transcended their decorative purpose, transforming into educational tools and symbols of learning community. They serve as not just ornaments but also as functional classroom accessories that contribute to the creation of a positive learning space.

Teachers are harnessing the allure of bunting flags to encapsulate themes such as literacy by displaying letters or vocabulary words across their cheerful pennants. Mathematics educators use them to string up numbers or geometric shapes, enabling visual learners to absorb fundamental concepts at a glance.

The versatility of bunting flags is evident in the way teachers can customize them for any subject area. Science teachers may adorn their rooms with flags featuring scientific symbols or elements from the periodic table, while history educators can create timelines of significant events stretching across classroom walls like colorful chapters of the past.

More than mere decoration, these flags have found purpose in celebrating student achievements too. Custom-made bunting that showcases student artwork, essays, or project highlights can turn classroom walls into galleries of student expression and accomplishment.

Seasonal and special event buntings help mark occasions such as holidays, sports events, or school anniversaries. Adorned with pumpkins or snowflakes for Halloween and Christmas or tailored to school colors for spirit days, they foster a sense of belonging and school pride among students.

Furthermore, the use of bunting flags aids in establishing clear zones within classrooms. By assigning different colors or patterns to reading corners, science labs or group work areas, teachers help direct student activity and maintain organized spaces conducive to learning.

The psychological impact of a well-decorated room should not be underestimated either. Bunting flags contribute to a visually stimulating environment that can aid cognitive function and improve morale among students. The playful movement and riot of colors invite curiosity and joy into the daily routine—a subtle but potent reminder that learning can be an enjoyable endeavor.

In conclusion, bunting flags are more than a teacher’s decorative whim; they are dynamic tools for enriching educational environments. Whether strengthening subject comprehension through visual aids, celebrating individuality and achievements, marking seasonal festivities or simply imbuing spaces with mirthfulness—these seemingly simple decorations carry within their folds a power to transform educational spaces fostering enthusiasm and effective learning.

Paper Bag Pirate Puppet Making Activity & Printable Template

Arrrr mateys, it’s time to set sail on a high-seas adventure from the comfort of your own living room! Gather your crew and get ready to craft your very own Paper Bag Pirate Puppet. This engaging activity is perfect for children of all ages to express their creativity and dive into the whimsical world of pirates.

 Why Make a Paper Bag Pirate Puppet?

Creating a Paper Bag Pirate Puppet is not only a fun and imaginative art project, but it also provides several educational benefits:

-Encourages Creativity: Crafting a puppet allows children to let their imaginations run wild as they design their very own seafaring character.

– Develops Fine Motor Skills: Manipulating paper, glue, and scissors helps to strengthen hand-eye coordination and dexterity.

– Promotes Storytelling: With puppets at the ready, kids can invent elaborate stories, enhancing their language skills.

– Facilitates Emotional Expression: Puppets give children an avenue to express emotions and act out scenarios in a safe environment.

 Materials

Here’s what you’ll need to create your paper rogue:

– Brown paper bag

– Our printable pirate template (features pirate hats, eyes, mouths, and more!)

– Scissors

– Glue or double-sided tape

– Markers or crayons

– Optional extras: yarn for hair, fabric scraps for clothes, glitter, stickers

 Instructions

1. Print the Template: Begin by printing the pirate template provided. This sheet has various pirate-themed accessories you’ll use to bring your puppet to life.

2. Cut Out the Pieces: Carefully cut out each template piece with scissors. If you’re making this with young buccaneers, adult supervision is recommended.

3. Color Your Pirate Features: Use markers or crayons to color in your cut-out pieces. Get creative! Does your pirate have a scar? A bushy black beard? Striped leggings? The details are up to you!

4. Attach the Features: Align the paper bag on its side so that the bottom of the bag faces up – this will serve as your puppet’s face. Glue or tape the features onto the paper bag. Remember that the flappy part of the bag’s bottom will be the mouth – put those snarly lips there!

5. Customize Your Puppet: After you’ve placed the essential features, it’s time to add personal touches! Glue on yarn for hair or a beard, craft an outfit from fabric scraps, or bedazzle with glitter and stickers.

6. Put on a Puppet Show: Once complete, slip your hand into the bag – fingers in the flap and thumb beneath – bringing your swashbuckling marionette to life!

 Conclusion

Congratulations! You’ve just crafted a one-of-a-kind Paper Bag Pirate Puppet ready for imaginary adventures on stormy seas! Rally your friends and family for an impromptu puppet show filled with treasure hunts and daring escapades. Don’t forget to share pictures of your creations; we’d love to see what fantastic pirates set sail from your living room! Happy crafting!

(Please note: This article does not include an actual printable template but describes an activity that involves one.)

Kids Art Ideas Chalk Line Drawing

Encouraging children to unleash their creativity is a vital aspect of their development and one exciting way to do so is through chalk line drawing. This simple yet captivating artistic endeavor allows kids to explore their innate talents, learn about geometry, and enjoy the whimsical nature of art-making.

Chalk line drawing essentially involves creating designs with the aid of chalk lines on various surfaces. It’s a form of art that has seen a resurgence in popularity as educators and parents look for accessible and fun ways to engage children with art.

One of the most appealing facets of chalk line drawing is its versatility. You can work with it on paper, pavements, or blackboards, providing an array of canvases for children to express themselves. Moreover, it’s not just about making random lines – kids can craft intricate patterns, shapes, or even landscapes. The beauty lies in its simplicity and the ability for the artist to be as detailed or abstract as they desire.

This activity can also be highly educational. As children draw straight lines or curves to intersect and create shapes, they unwittingly delve into practical lessons in geometry. They experiment with angle creation and the relationships between lines, which could spark an interest in mathematical concepts they’d typically encounter later in academic settings.

Beyond the educational benefits, chalk line drawing is just plain fun! It’s often conducted outdoors where kids can benefit from fresh air and physical space for larger projects. Collaborative projects can also be encouraged as children work together on a sidewalk masterpiece, fostering teamwork and social interaction.

Whether used as a tool for learning or simply an afternoon distraction, chalk line drawing provides a wealthairy canvas where kids can explore their abstract thoughts and make them tangible. It’s hands-on learning married perfectly with joyful expression—a valuable asset for any child’s development journey in creativity.

If you’re looking for straightforward art activities that require minimal materials while offering maximum creative freedom, look no further than this delightful artistic expression. Chalk line drawing might just be the perfect intersection between fun and education that you’ve been searching for to brighten up your child’s creative world!

10 Simple (but Amazing!) Ideas for Classroom Wall Displays

Decorating classroom walls doesn’t just brighten up the space — it can inspire, motivate, and educate students. Here are 10 simple yet amazing ideas for classroom wall displays that educators can implement:

1.World Map Murals: Cover an entire wall with a large map of the world. This not only serves as a reference for geography lessons but also encourages discussions about cultures and global connections.

2.Historical Timeline: Create a linear timeline across one wall to mark significant events in history. Allow students to add pictures, quotes, or artifacts as they learn about new historical moments.

3.Word Wall: Dedicate a section of the wall to new vocabulary. Update the display regularly with words related to current lessons and encourage students to use these words in their work.

4.Student Work Showcase: Implement a “Wall of Fame” where exemplary student work is displayed. Rotate featured items weekly or monthly to give all students an opportunity to shine.

5.Mathematical Formulas and Concepts: Visual aids for math can be very helpful. Display formulas, graphs, and diagrams that students need to remember, making them constantly visible for reinforcement.

6.Science Corner: Turn a portion of your wall into a science discovery zone with posters of the scientific method, images of famous scientists, and key scientific principles relevant to your curriculum.

7.Reading Nook Decorations: If there’s a reading area, make it cozy with literary-themed posters, author biographies, and covers of classic novels or student-recommended books.

8.Art Gallery: Designate space for student art projects. This encourages creativity and provides a regularly updated and visually stimulating gallery for everyone to enjoy.

9.Interactive Boards: Mount boards or use chalkboard/whiteboard paint to create surfaces where students can write responses to prompts, solve problems, or vote on questions posted by the teacher.

10.Inspirational Quotes Walls: Feature motivational quotes from historical figures, authors, scientists, and even current students. Change them periodically to keep inspiration fresh and relevant.

Using these classroom display ideas can create an engaging learning environment that stimulates curiosity and supports educational objectives while adding aesthetic appeal to your teaching space.

Totally Awesome 4th of July Crafts for Kids

With the 4th of July just around the corner, it’s the perfect time to dive into some patriotic crafts that not only celebrate this important American holiday but also help kids unleash their creativity. Engaging in 4th of July crafts allows children to learn more about the significance of Independence Day in a fun and interactive way. Here are some totally awesome craft ideas from Teach Starter that kids will love creating in celebration of America’s birthday!

1. Patriotic Handprint Flag – This craft is a personal and fun way for kids to make their mark on the holiday. Simply have them paint their hands with red, white, and blue paint to create their unique version of the American flag.

2. Firework Salt Painting – Kids can make fireworks come to life with just some salt, glue, and watercolors. It creates a beautiful crystallized effect that looks just like sparklers against the night sky.

3. Bald Eagle Paper Plate – Pay homage to America’s national bird by transforming a simple paper plate into a majestic bald eagle with feathers and all.

4. Star-Spangled Slime – Mix a bit of science with your crafting by making star-spangled slime! Add glitter and star confetti into your homemade slime for a squishy and sparkly experience.

5. Uncle Sam Hat – A bit of construction paper, glue, and cotton balls are all you need for kids to craft their very own Uncle Sam hat.

6. Liberty Bell Paper Cup – Learn about the iconic symbol while fashioning a Liberty Bell out of a paper cup and pipe cleaner for the clapper.

These projects are not only entertaining but also help kids improve their fine motor skills, follow directions, and express themselves artistically. Crafting for the 4th of July offers an excellent opportunity for family bonding time as well as provides entertaining ways to decorate for any Independence Day celebration. So gather your materials and get ready to have a blast making these patriotic crafts with your children!

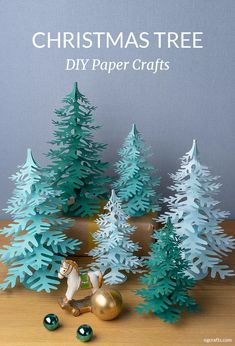
4 Paper Christmas Tree Topper Templates

Creating a unique Christmas tree topper out of paper can be a fun DIY project to add a personal touch to your holiday decor. Below, find four distinct paper templates that you can use to craft your very own Christmas tree topper.

1.Classic Star Tree Topper Template:

A classic star should never be underestimated. It’s the quintessential symbol of the Christmas holiday and looks great atop any tree. To create it:

– Cut out a five-pointed star shape from a sturdy piece of card stock.

– Decorate with glitter, metallic paint, or wrapping paper for extra shine.

– Use a cone-shaped attachment at the base or simply make a slit in one point to sit it comfortably on the highest branch.

2.Angel Tree Topper Template:

Angels are another traditional tree topper choice that brings a sense of peace and divinity to your Christmas setup.

– Print or draw an angel silhouette on heavy paper.

– Add design details like wings and a halo using gold foil or markers.

– You can give your angel more dimension by crafting a three-dimensional skirt or gown from pleated paper underneath the silhouette.

3.Snowflake Tree Topper Template:

For those dreaming of a white Christmas, a snowflake design can capture the essence of winter’s beauty.

– Start with a six-pointed snowflake design printed on translucent paper for elegance.

– Accentuate the intricate cuts and lines with glitter or sequins to mimic the sparkle of real snow.

– Ensure the center is reinforced so it will perch gracefully at the top of your tree without wilting.

4.Bow Tree Topper Template:

If you’re aiming for something less traditional and more playful, consider topping your tree with a huge festive bow.

– Use sturdy gift wrap or construction paper for this particular design.

– Purposeful folds and well-placed tape will help create full loops and tails that have some volume.

– Fasten it securely atop your tree, ensuring it’s snug but not so tight that it creases or tears the paper.

Each template provides room for creativity, allowing you to tweak colors, sizes, and embellishments to match your personal style and overall Christmas theme. With these templates as your starting point, making your home merry and bright with handmade décor is easier than ever.

21 Light Box Inserts to Brighten Up Your Classroom!

Light box inserts have become a popular and fun way to add personalized touches to classrooms, creating an engaging and inviting environment for students. Not only do they brighten up the room, but they also can be an excellent tool for educational purposes, such as showcasing student work, highlighting important dates, or presenting inspiring quotes. Below are 21 creative light box insert ideas that can help make any classroom more vibrant and motivating for both teachers and students.

1.Seasonal Themes – From fall leaves to spring flowers, changing your light box inserts with the seasons keeps your classroom decor fresh and exciting.

2.Inspirational Quotes – Encouraging words can set a positive tone for the day. Choose quotes from historical figures, authors, or even your students.

3.Educational Concepts – Display key vocabulary, math formulas, or scientific diagrams as visual reminders for students.

4.Welcome Messages – Greet students every morning with a warm welcome message personalized with their names or a cheerful graphic.

5.Birthday Announcements – Celebrate each student’s special day with a custom birthday insert.

6.Classroom Rules – Presenting class rules on a light box can make them more noticeable and memorable.

7.Daily Schedules – Keep everyone on track with a visual schedule of the day’s activities.

8.Countdowns to Events – Build excitement for upcoming events like holidays, field trips, or tests with a countdown display.

9.Learning Goals – Reinforce weekly or monthly learning objectives in a format that students will see every day.

10.Homework Highlights – Feature exemplary student homework as a way to motivate others and acknowledge great effort.

11.Literacy Corner – Highlight book of the week or display interesting word facts to encourage reading.

12.Number of the Day/Week – A rotating number display which can ties into math lessons or interesting number facts.

13.Language Learning – For language teachers, use light box inserts in different languages to immerse students in new vocabularies.

14.Weather Station – Teach about the weather with icons representing sunshine, rain, clouds, snow etc., and have students guess the forecast.

15.Question of the Day – Pose thought-provoking questions that spur discussion and critical thinking among students.

16.Historical Facts Timeline – Present history in an engaging way by highlighting events on certain dates relevant to what is being taught.

17.Word Wall Updates – Introduce new vocabulary regularly through eye-catching word wall inserts tailored for current lessons.

18.Achievement Board – Showcase achievements not just in academics but also in sports, arts and other extracurricular activities.

19.Mystery Image Challenge – Put up partial images related to recent lessons and have students guess what they are throughout the week.

20.Classroom Jokes – A little humor goes a long way; engage your class with funny (and educational) jokes or riddles daily or weekly.

21.Student Suggestions Box – Involve students by having them suggest what should go on the light box next.

By rotating through these ideas regularly, you not only keep the classroom atmosphere dynamic but also provide continual opportunities for learning and engagement beyond traditional methods. With these 21 light box insert ideas to choose from, you’re all set to create an inspired learning space that shines bright all year round!

Be the Coolest Teacher Around (Bitmoji in the Classroom)

In the educational landscape, standing out as an educator can be quite a challenge, but integrating technology into the classroom has become one of the surefire ways to engage with students and earn that “coolest teacher” title. One way teachers are connecting with their tech-savvy students is through the use of personalized Bitmoji classrooms.

Bitmoji, an app by the creators of Snapchat, allows users to create a personalized cartoon avatar. Forward-thinking teachers are taking their Bitmoji avatars and using them in virtual classrooms to add a touch of personality and fun to their teaching material. It’s like becoming the star of your own educational comic strip.

Using Bitmoji in the classroom can take many forms – from adding the avatar to slide presentations or using it as a digital sticker to give feedback on assignments. Teachers can reveal their creativity by designing a virtual classroom complete with interactive links on objects in the chosen background – clicking on a bookshelf could take students to recommended reading or class assignments.

For instance, when explaining complex subjects like photosynthesis or the water cycle, an animated Bitmoji could act out various stages, making abstract concepts more tangible. History lessons could be amped up by creating scenes where historical figures interact with the teacher’s avatar – imagine a Bitmoji Mr. Smith discussing civil rights with an animated Martin Luther King Jr.

For younger students, these cool cartoons can make daily check-ins and attendance more exciting. A simple ‘drag and drop your Bitmoji once you’ve completed your work’ creates an interactive experience that also enables quick visual tracking of student progress.

The beauty of this approach lies in its flexibility; it can be adapted for various subjects and grade levels. Additionally, using a fun and familiar medium helps bridge the gap between students’ social media world and academic growth. It brings laughter into learning while still maintaining educational value.

Using Bitmojis does not only resonate with students; it also encourages educators to consider how aesthetics and user interface contribute to engagement in digital learning environments.

In conclusion, incorporating personal avatars like Bitmojis into classroom settings has established new horizons for creative teaching strategies. By harnessing this engaging tool, teachers can not only spice up their lesson plans but also become that cool teacher who combines learning with fun, resonating well with their digital-native students.

The BEST Printable Wonder Wall Classroom Display

The Wonder Wall concept in classrooms has gained popularity as an educational tool that encourages curiosity and active learning among students. A Wonder Wall is typically a bulletin board or a dedicated wall space where students can post questions, ideas, thoughts, and artifacts related to what they are learning or what piques their curiosity.

When creating the BEST Printable Wonder Wall Classroom Display, there are several key elements that should be considered to make it both visually appealing and educationally effective.

1.Engaging Questions: The foundation of a great Wonder Wall is the set of questions that provoke thought and interest. These questions can be related to the curriculum, current events, or students’ personal interests. Teachers can start by posting a few broad questions to guide students, and as time goes on, students can add their own.

2.Visual Appeal: The display should be colorful and eye-catching. Use bright borders and backgrounds that make the information pop without overwhelming the content. Including images or graphics related to the questions can also help stimulate engagement.

3.Interactivity: This is crucial for a Wonder Wall. Make sure there are materials available for students to easily post their wonderings. This could include sticky notes, index cards, or printable question slips designed with fun graphics.

4.Accessibility: All students should be able to reach the wall, so consider different heights and accessible methods for adding content.

5.Organization: The Wonder Wall should be organized in a way that makes sense for your classroom. Perhaps categorize by subjects, themes, or types of questions (e.g., “What if…?”, “How does…”, “Why is…”).

6.Reflection Area: Dedicate a section of your Wonder Wall where students can post discoveries or answers they’ve found to previous questions they or their classmates have posed.

7 Tips for Implementing Your Printable Wonder Wall Classroom:

1.Start small by introducing the wall with a few prompt questions.

2.Schedule regular times for students to interact with the wall.

3.Encourage all forms of questions; there are no “bad” wonderings.

4.Model how to use the wall by adding your own questions as a teacher.

5.Make contributing to the wall part of class assignments or activities.

6.Regularly refresh the wall’s content to keep it dynamic and engaging.

Have “wonder sessions” where students pick out questions from the wall to explore further either as a class project or an individual task.

By using printable materials like question slips, headers for different categories, decorative borders, and image cutouts related to various themes or subjects covered in your classroom curriculum, you can create an interactive display that captures the attention and imagination of your students while staying organized and in tune with educational goals. The BEST Printable Wonder Wall Classroom Display inspires awe and wonder while promoting inquisitive learning—the hallmark of any effective educational tool.

Enter and Win — Teacher Giveaway for Cricut Maker 3+

Teachers play a crucial role in shaping the minds of future generations. As a token of appreciation for their hard work and dedication, an exciting giveaway has been organized, offering educators a chance to win the highly coveted Cricut Maker 3+.

The Cricut Maker 3+ is the latest iteration of the popular Cricut cutting machine series, which has revolutionized crafting and DIY projects. With its enhanced cutting speed and power, teachers can bring their classroom creativity to new heights. From designing educational materials and custom classroom decorations to assisting with school project prototypes, the possibilities are truly endless with this innovative tool.

To enter the giveaway, teachers must follow a few simple steps. First, they need to fill out an online entry form on the giveaway’s official website, providing their contact information and a brief explanation of how they would use the Cricut Maker 3+ in their teaching. Additionally, entrants are encouraged to share their participation on social media using a specific hashtag to spread the word among fellow educators.

Submissions will be accepted until a specified deadline, after which a panel of judges will review all entries based on creativity, impactfulness, and need. The winners will be announced via email and on social media platforms shortly after the judging process concludes.

Not only is this giveaway an amazing opportunity for teachers to win a valuable resource for their classrooms, but it also serves as a platform for educators to share inspiring ideas on integrating arts and crafts into education. This initiative recognizes and celebrates the immense contributions teachers make daily while providing them with the tools to enhance their teaching methods even further.

With such offerings as the Teacher Giveaway for Cricut Maker 3+, it’s evident that supporting educators goes beyond words of thanks — it’s about providing them with opportunities to grow and innovate in their noble profession. Good luck to all teachers entering the giveaway!