Art Education

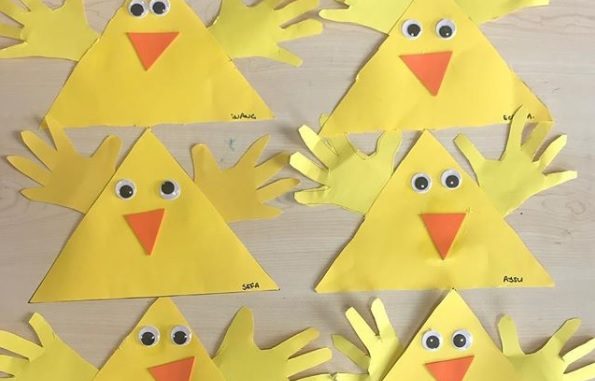
14 Triangle Shape Crafts & Activities

Triangles are versatile shapes that can be adapted to create a variety of fun crafts and engaging activities. In this article, we will explore 14 triangle shape crafts and activities that are perfect for promoting creativity, developing fine motor skills, and encouraging learning. These projects are perfect for children and adults alike, making them great options for family bonding time.

1. Triangle Collage

Gather different types and sizes of triangles cut from colored paper or magazines. Have children sort the triangles based on size, color, or theme. Then, use glue to create a unique collage.

2. String Art Triangle

Using a wooden surface, nails, and colored string, create a stunning triangle string art pattern. This can double as an attractive decoration in your home.

3. Triangle Quilt

Design a cozy quilt using triangle fabric pieces in various patterns and colors. Sew them together to create an eye-catching design that is functional as well.

4. Triangle Bunting Banner

Create a simple yet lovely bunting banner by cutting out colorful triangles from fabric or paper, attaching them to string or ribbon, and hanging them as party decorations.

5. Geometric Puzzle

Create a puzzle game by cutting out differently sized triangles from cardboard or foam sheets. Mix the pieces up and challenge your child to recreate specific shapes or pictures using just triangles.

6. Triangular Origami Box

Learn the art of origami by creating a customized triangular storage box made from paper. This useful craft can be used for organizing small items like coins or jewelry.

7. Stained Glass Window Art

Design a stained glass-inspired artwork using black paper to outline triangle sections on clear contact paper or wax paper. Fill in the spaces with colorful tissue paper pieces, creating an abstract masterpiece fit for any window.

8.Vertical Garden Planter

Control the arrangement of planters in your vertical garden by constructing triangular wooden shelves. This creative design can accommodate various pot sizes while adding a unique touch to your gardening space.

9. Geometric Painted Vase

Upgrade a plain vase by painting different sized triangles in various colors for a more modern and distinctive look.

10. Triangle Mobile

Combine art, science, and engineering by creating a balanced triangle-based mobile using twigs and painted cardboard triangles. Hang it from the ceiling for an engaging piece of decor.

11. Dreamcatcher

Create a triangular dreamcatcher using wooden dowels, string, and an assortment of beads and feathers for a stylish twist on this traditional craft.

12. Triangle Wall Art

Design a minimalistic yet striking piece of wall art by gluing painted wooden triangles onto a canvas or picture frame.

13. Geometric Clay Trinket Dish

Sculpt a small triangle-shaped clay dish perfect for holding small jewelry or other keepsakes. Paint geometric patterns on the dish once it dries to add an artistic finish.

14. 3D Paper Pyramid

Try your hand at paper crafting by constructing 3D paper pyramids with cardstock in various sizes and colors. Display them as tabletop decorations or use them as box containers.

These 14 triangle shape crafts and activities are fantastic avenues to boost creativity, enhance fine motor skills, and provide an enjoyable experience for all ages. Grab your supplies, gather family members or friends, and have fun exploring the fascinating world of triangles!

24 Fun Heart Coloring Activities The Kids Will Love

Introduction:

Heart coloring activities are a creative and engaging way for kids to express their artistic talents and have fun. Not only that, but these activities help improve fine motor skills, color recognition, and encourage bonding with friends and family. In this article, we present 24 fun heart coloring activities that the kids will love, suitable for various age groups and occasions.

1. Simple Heart Outline:

Begin with the basics by providing the kids with a simple heart outline to color in using their favorite colors.

2. Heart Patterns:

Encourage creativity by allowing the children to create unique patterns within the heart shapes.

3. Hearts Within a Heart:

Introduce complexity by filling a large heart shape with multiple smaller hearts to create a captivating design.

4. Heart-Shaped Animals:

Entertain kids by transforming heart shapes into adorable animals like butterflies, elephants, or owls.

5. Heart Mandalas:

Offer varying difficulty levels with intricate heart-shaped mandalas, perfect for older children and advanced colorers.

6. 3D Hearts:

Incorporate crafting in the activity by teaching kids how to make 3D paper hearts that they can color and assemble.

7. Heart Puzzles:

Combine fun and challenge by creating heart-shaped puzzles that kids can color before piecing them together.

8. Personalized Name Hearts:

Teach them about personalization by adding their names in fancy letters within heart shapes.

9. Glittery Hearts:

Include glitter into the mix to make their artwork sparkle and shine.

10. Abstract Heart Art:

Promote abstract thinking by encouraging random doodling using free-form lines inside heart outlines.

11. Multi-Textured Hearts:

Experiment with crayons, colored pencils, markers, and paints to create multi-textured effects within heart shapes.

12. Quilted Hearts:

Get inspired by quilt-making techniques to create patchwork heart designs that children can color.

13. Heart Collages:

Encourage recycling by using old magazine and newspaper cutouts to create heart-themed collages.

14. Heart Mosaics:

Explore the mosaic style of art by using small paper squares to create stunning heart patterns.

15. Glowing Hearts:

Amaze kids with glow-in-the-dark paints that will illuminate their heart artwork in the dark.

16. Bead and Wire Hearts:

Add an artistic touch to their creations using colorful beads and wire to form stunning heart shapes.

17. Heart Gardens:

Teach kids about gardening by incorporating flower elements into their heart designs.

18. Alphabet Hearts:

Improve children’s literacy skills by integrating the alphabet into their heart artwork.

19. World Flags Hearts:

Educate them about geography through painting flags from different countries within heart shapes.

20. Stained Glass Heart Art:

Recreate the stained glass effect on paper using vibrant colors to produce stunning hearts.

21. Heart Family Portraits:

Engage in family bonding activities by drawing family members as cute stick figures inside a large heart shape.

22. Emoji Hearts:

Express emotions through cute emoji-styled hearts featuring a variety of faces and expressions.

23. Inspirational Quotes Hearts:

Motivate children by having them color in hearts that feature motivational quotes or messages.

24. Seasonal Heart Art:

Celebrate different seasons with themed hearts, such as winter snowflakes, spring blossoms, summer beach scenes, and autumn leaves.

Conclusion:

With these 24 fun heart coloring activities, your children will be happily engaged while exploring their creativity and learning new skills. Make sure you join them too, as spending quality time together while getting artistic is a fantastic way to bond as a family!

25 Amazing Robot Books For Kids

Introducing children to the world of robotics through literature is an excellent way to spark their imaginations and ignite their curiosity. This article highlights 25 amazing robot books for kids that combine colorful illustrations, engaging stories, and age-appropriate explanations about technology. These books are perfect for parents and teachers looking to introduce young readers to the fascinating world of robots.

1. “Robots, Robots Everywhere!” by Sue Fliess

2. “Boy + Bot” by Ame Dyckman

3. “Beep! Beep! Go To Sleep!” by Todd Tarpley

4. “The Wild Robot” by Peter Brown

5. “Clink” by Kelly DiPucchio

6. “Rex Wrecks It!” by Ben Clanton

7. “Little Robot” by Ben Hatke

8. “Doug Unplugged” by Dan Yaccarino

9. “Power Up” by Seth Fishman

10. “Robo-Sauce” by Adam Rubin

11. “Harry and the Hot Lava” by Chris Robertson

12. “My First Book of Robots and AI” by Joe Fullman

13. “Interrupting Chicken and the Elephant of Surprise” by David Ezra Stein

14. “The Robot Book” by Heather Brown

15. “Buddy and Earl Go Exploring” by Maureen Fergus

16. “The Three Little Aliens and the Big Bad Robot” by Margaret McNamara

17. “Mars Needs Moms!” by Berkeley Breathed

18. “Frank Einstein and the Antimatter Motor” by Jon Scieszka

19. “Rusty the Squeaky Robot” by Neil Clark

20. “Rosie Revere, Engineer” by Andrea Beaty

21. “Robot Zot!” by Jon Scieszka

22. “If I Built a Robot” by Chris Van Dusen

23. “Charlotte the Scientist Is Squished” by Camille Andros

24. “House of Robots” by James Patterson and Chris Grabenstein

25. “The Robot Lived in the House Next Door” by Mike Thaler

By exposing kids to these delightful robot-themed books, you can help them develop a deeper understanding of technology, encourage critical thinking, and foster creativity in their daily lives. As young minds immerse themselves in these captivating stories, they’ll begin to see robots as more than just machines but rather as extraordinary characters with unique abilities and experiences. By providing age-appropriate insight into the world of robotics, these books have the power to inspire a new generation of innovators and dreamers.

23 Fun Things To Do With Silly Putty

Introduction:

Silly Putty has entertained generations with its unique texture, stretchability, and endless possibilities. Whether you’re looking for boredom busters or creative ways to spend your leisure time, Silly Putty offers a wealth of engaging activities. In this article, we’ve compiled 23 fun things you can do with this versatile material.

1. Make Impressions: Press the putty onto newspapers, coins, or any textured surface to create an imprint.

2. Bounce It: Silly Putty is surprisingly bouncy; try throwing it against a wall or the floor and watch it bounce.

3. Stretch It: See how far you can stretch this elastic material without breaking it.

4. Snap It: Quickly pull the putty apart to create a satisfying snapping sound.

5. Create Art: Use markers or food coloring to color your putty and mold it into fun shapes and designs.

6. Sculpture Contest: Challenge friends or family members to create something unusual within a given time limit.

7. Window Decorations: Flatten the putty into colorful shapes and press them onto windows for temporary decorations.

8. Custom Eraser: Mold the putty into an eraser to make rubbing out mistakes more fun.

9. Stress Reliever: Knead and squeeze the putty to help relieve stress and anxiety.

10. Science Experiment: Investigate how freezing or heating the putty affects its properties.

11. Sensory Play: Incorporate Silly Putty into sensory play activities for added tactile engagement.

12. Stop-motion Animation: Create characters with the putty and animate them in a stop-motion video.

13. Two-Tone Swirls: Mix two differently colored putties together to form fascinating swirl patterns.

14. Build Structures: Construct small bridges, towers, or other challenges using Silly Putty as a building material.

15. Balloon Stuffer: Stretch the putty thin and use it to shape balloons into fun, unique configurations.

16. Marbled Paper: Flatten the putty and press it onto colored paper for a marbled effect.

17. Jewelry Making: Shape Silly Putty into beads and string them together to make necklaces, bracelets, or earrings.

18. Homemade Slime: Add contact solution and baking soda to your putty to transform it into slime.

19. Board Game Playdough: Substitute traditional playdough with Silly Putty when playing games that require molding or sculpting.

20. Hidden Object Game: Hide small items, such as coins or toys, inside blobs of Silly Putty for a hands-on treasure hunt.

21. Learning Tool: Use Silly Putty to teach children fine motor skills by molding letters, numbers, or shapes.

22. Puzzle Solutions: Utilize the putty to hold puzzle pieces in place while working on complex puzzles.

23. DIY Fidget Toy: Roll the putty into a ball or other shape for use as a discreet and tactile fidget toy.

Conclusion:

Silly Putty is not only entertaining but also educational and versatile in more ways than one might expect. These 23 ideas will keep you busy for hours on end, providing endless opportunities for creativity, relaxation, and learning experiences with this simple yet magical substance.

23 Exciting Planet Earth Crafts For Various Ages

Teaching children about our incredible planet is essential for fostering the love and understanding of the environment. Earth crafts can spark creativity and curiosity in children while also educating them about the importance of taking care of our home. Here are 23 exciting planet Earth crafts suitable for various ages.

1. Paper Mâché Earth – Use newspaper, glue, and paint to create a colorful and textured globe model.

2. Coffee Filter Earths – Create unique artwork by coloring coffee filters with markers and spraying them with water to blend the colors.

3. Earth Day Collages – Collect nature-themed pictures and create collages resembling our beautiful planet Earth.

4. Salt Dough Earth Ornaments – Make fun, painted ornaments using salt dough that can be hung as decorations or given as gifts.

5. Puffy Paint Earth – Create a vibrant earth painting using puffy paint to give it an eye-catching texture.

6. Yarn Wrapped Globe – Craft an elegant yarn-wrapped globe with a foam ball or balloon and different shades of green and blue yarn.

7. Crystal Growing Earth – Learn about growing crystals while creating a dazzling crystal-covered Earth model with simple science techniques.

8. Clay Marble Planet – Inspire creativity by designing intricate clay marbles similar to our own planet’s appearance.

9. Handprint Earth Painting – Capture the uniqueness of each child’s handprint as they paint their version of Mother Earth.

10. Candle Holder Globes – Illuminate rooms in an eco-friendly way by creating globe-shaped candle holders from recycled glass jars.

11. Recycled Plastic Bottle Planter – Turn old plastic bottles into adorable planters that display green foliage for an earth-themed DIY project.

12. Globe Toss Game – Make a fun globe toss game from leftover paper plates that can entertain kids indoors or outdoors.

13. Planet Earth Stained Glass Window Art – Create beautiful representations of our planet by crafting stained glass window art using tissue paper and contact paper.

14. Earth Day Playdough – Custom-make earth-themed playdough using blue and green food coloring for a fun sensory activity.

15. Painted Rock Earth – Encourage artistic expression by painting rocks with images inspired by our beautiful planet.

16. Earth Day Seed Bombs – Combine seeds, soil, and clay to create eco-friendly seed bombs that can be given as gifts or planted in the garden.

17. Globe-in-a-Bottle – Engage children in an interactive crafting activity making miniature globes inside empty bottles.

18. Eggshell Mosaics – Reuse eggshells to create stunning mosaics depicting planet Earth and its diverse landscapes.

19. Upcycled Bottlecap Art – Collect bottlecaps and repurpose them into intriguing art pieces that represent our planet.

20. Earth Handprint Aprons – Decorate aprons with Earth-inspired handprints to create useful kitchen wear that supports environmental awareness.

21. Paper Plate Weavings – Practice traditional weaving techniques while designing vibrant paper plate weavings resembling Earth’s landscapes.

22. Felt Globe Softies – Craft plush felt globes that can be used as toys for young ones or stress-relievers for grown-ups.

23. Edible Planet Earth Desserts – Dive into food art by making delicious edible representations of Planet Earth, like cookies, cakes, or Jell-O dishes inspired by the world’s colors and shapes.

Regardless of age, these 23 planet Earth crafts offer exciting ways to engage young minds in learning about our incredible world and the need to protect it. Encourage communication, critical thinking, artistic expression, and environmental awareness through colorful, hands-on projects that everyone will enjoy.

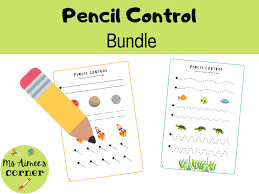
Developing Pencil Control and Mark-Making

Introduction

Developing pencil control and mark-making is an essential skill for children as they begin their journey in learning how to write. This article will discuss the importance of pencil control, techniques to improve mark-making, and tips for parents and teachers to help children develop these fine motor skills.

The Importance of Pencil Control

Pencil control is the ability to manipulate a pencil with precision and accuracy. It is crucial for a number of reasons:

1. It forms the foundation for efficient handwriting and drawing skills.

2. It helps build fine motor skills, which are necessary for everyday tasks such as buttoning clothes, using utensils, and tying shoes.

3. Developing pencil control strengthens hand-eye coordination, leading to improved overall dexterity.

Techniques to Improve Mark-Making

Here are some practical methods that can be employed to enhance pencil control and mark-making capabilities:

1. Start with basic shapes: Practicing drawing lines, curves, circles, and other simple shapes can be beneficial for building basic motor movements. Gradually increase complexity as the child gains confidence.

2. Use adapted tools: Specialized pencils or grips can increase comfort during writing exercises. Slant boards can also provide additional wrist support.

3. Engage in pre-writing activities: Strengthen fine motor skills through activities like playdough manipulation or threading beads onto strings before transitioning into more formal mark-making exercises.

4. Practice tracing exercises: Encourage children to trace over lines, curves, letters, or numbers using a finger or transparent sheet placed over the original design.

5. Reinforce proper grip technique: Ensure that the child holds the pencil correctly using a tripod grip – pinching the pencil between the thumb and index finger while resting it on the middle finger.

6. Be patient: Developing pencil control takes time, so remember to provide ample opportunities for practice without excessive pressure.

Tips for Parents and Teachers

As caretakers and instructors, there are numerous ways to support a child’s development of pencil control and mark-making skills:

1. Create a fun and engaging environment: Use colorful paper, scented markers, or multi-sensory materials to make the activities more appealing.

2. Encourage creativity: Allow children to experiment with various writing tools and mediums like chalk, brushes, or even their fingers to foster an appreciation for mark-making.

3. Break down tasks into small steps: By simplifying complex activities into manageable components, children will feel a sense of accomplishment as they progress.

4. Provide appropriate support: Be mindful of individual abilities and offer guidance or adapt exercises accordingly when needed.

5. Celebrate achievements: Praise effort and progress, no matter how small, to boost a child’s self-confidence and motivation.

Conclusion

Developing pencil control and mark-making is vital in boosting fine motor skills, hand-eye coordination, and academic success. By exercising patience, offering engaging activities, and providing ample opportunities for practice, parents and teachers play a crucial role in nurturing these essential skills in children.

How to Make a Gingerbread House

Introduction

As the holidays approach, one of the best ways to engage in the festive spirit with students is through hands-on activities. One such activity, beloved by many, is making a gingerbread house. This creative and fun project not only helps students bond and relax but also teaches them valuable skills like teamwork, planning, and basic construction principles. In this article, we’ll walk you through the steps to create your own gingerbread house with your students.

Materials Needed

1. Gingerbread dough

2. Cookie cutters or templates (house walls, roof, doors, and windows)

3. Rolling pin

4. Baking sheets

5. Cooling racks

6. Royal icing

7. Piping bags and decorating tips

8. Candies for decorations

9. A large board or tray as the base of your gingerbread house

Step 1: Preparing the Gingerbread Dough

Start by making a gingerbread dough using your favorite recipe or purchasing a pre-made mix from the store. For a simple homemade recipe, mix flour, sugar, spices (ginger and cinnamon), butter, eggs, and molasses until it forms a smooth dough.

Step 2: Rolling Out and Cutting the Dough

Once the dough is ready, roll it out evenly on a sheet of parchment paper to make it easier to lift later on. Use cookie cutters or templates to cut out the shapes for walls, roof panels, doors, and windows of your gingerbread house.

Step 3: Baking Your Gingerbread Pieces

Preheat your oven according to the instructions in your gingerbread recipe (usually around 350°F). Transfer the cut-out shapes onto baking sheets lined with parchment paper or silicone baking mats and bake until they are firm to touch. Be sure to keep an eye on them during baking to prevent burning.

Step 4: Allow Your Pieces to Cool

Once the gingerbread pieces are baked, remove them from the oven and place them on cooling racks to cool down completely. This step is crucial, as warm gingerbread pieces can crack or break while assembling.

Step 5: Preparing Royal Icing

Royal icing is the “glue” that holds your gingerbread house together. You can make your own royal icing by beating together powdered sugar, egg whites, and cream of tartar until it reaches a thick consistency. Adding food coloring can give a touch of festivity to your icing.

Step 6: Assembling the Gingerbread House

Now comes the fun part – assembling your gingerbread house! Fill a piping bag with the royal icing and start by attaching the side walls to the base of your house. Hold the walls in place for a few moments so that they can secure themselves. Then, attach the front and back walls similarly. Allow some drying time before you move on to attaching the roof panels.

Step 7: Decorating Your Gingerbread House

Once your gingerbread house has been assembled and is stable, let your students unleash their creativity with candies and decorations. Encourage teamwork by assigning students to decorate different areas or themes.

Conclusion

Building a gingerbread house is an exciting and entertaining way to celebrate the holiday season with students. Just follow these simple steps, and you’ll have a beautiful centerpiece that showcases group efforts and stimulates creativity during this festive time of year. Enjoy!

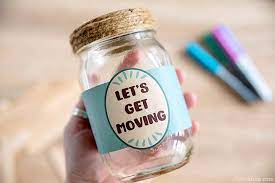
21 Fun and Engaging Activity Jar Ideas for Kids

Keeping kids entertained and engaged can sometimes be a challenge, but with a little creativity and some simple materials, you can create an activity jar to hold their attention and spark their imagination. Here are 21 fun and engaging activity jar ideas for kids of all ages.

1. Nature Scavenger Hunt: Fill the jar with a list of natural items for kids to find in the backyard or park, such as leaves, stones, flower petals, or pinecones.

2. Kindness Acts: Write down different acts of kindness for children to perform each day, like helping with chores, making a card for a friend, or complimenting someone.

3. Science Experiment Recipes: Fill the jar with instructions for easy science experiments that kids can do at home with adult supervision.

4. Drawing Prompts: Include random objects or themes that kids can use as inspiration for their drawings.

5. Puzzle Pieces Activity: Place puzzle pieces in the jar, and when all the pieces have been found and assembled, reward the kids with a small treat or prize.

6. Story Starters: Write down creative story starter prompts on strips of paper to inspire young writers.

7. Fitness Challenge: Include different exercises or fitness activities that are age-appropriate for children to complete throughout the week.

8. Craft Ideas: Fill the jar with a variety of craft project instructions that use materials commonly found around the house.

9. Family Game Night Ideas: Add slips of paper with various family-friendly games or activities to do together on game night.

10. Chore Helpers: Write down age-appropriate chores that children can complete individually or together as a team.

11. LEGO Challenge: Include prompts for creative LEGO-building challenges that encourage imaginative play.

12. Silly Jokes or Riddles: Laugh together by filling your jar with age-appropriate jokes or riddles that the whole family can enjoy.

13. Create Your Own Board Game: Add items or game pieces that kids can use to create their touchscreen devices.

14. Recipe Box: Include kid-friendly recipes and let the child pick one to prepare together as a family.

15. Charades Ideas: Add age-appropriate movie titles, animals, book characters or phrases to act out during a game of charades.

16. Language Adventures: Teach simple words or phrases from different languages and allow your child to draw one each day.

17. Sensory Play Ideas: Put together sensory play ideas such as making homemade playdough or slime, creating textured collages, or exploring new textures in nature.

18. Healthy Snack Ideas: Write down healthy snack ideas for kids to choose from when they’re hungry between meals.

19. Memory Box Pieces: Collect different tokens from memorable family events and include them in the activity jar for kids to explore and reminisce.

20. DIY Musical Instruments: Add instructions for creating simple, homemade musical instruments using everyday household items.

21. Positive Affirmations: Fill the jar with uplifting quotes, compliments, and affirmations that children can read aloud to boost their confidence and self-esteem.

With these 21 engaging activity jar ideas at your disposal, your child will be entertained, educated, and empowered in no time. Customize the contents of the jar according to your child’s interests, age, and abilities for endless fun and learning opportunities!

15 Creative Scarf Activity Ideas to Liven Up Your Lessons

Introduction:

Teaching has never been more challenging, especially with the rise of digital distractions. However, incorporating fun and interactive activities can liven up your lessons and enhance student engagement. One simple yet effective tool to accomplish this is using scarves. Here are 15 creative scarf activity ideas to try in your classroom.

1. Scarf Juggling:

Introduce your students to the art of juggling by utilizing scarves. Since they are lightweight and float in the air, they provide an excellent means for beginners to practice their coordination skills.

2. Color Identification Game:

Spread scarves of different colors on the floor and ask children to identify and pick up specific colors when called out by the teacher. This will help improve their color recognition skills.

3. Alphabet Hunt:

Write letters of the alphabet on scarves and hide them around the room. Encourage students to find them and arrange them in the correct order.

4. Storytelling Aid:

Use colorful scarves to illustrate stories or characters while storytelling, engaging children’s imaginations and encouraging their creativity.

5. Dance Prop:

Incorporate scarves as props for children to use during dance lessons or creative movement exercises, allowing them to express themselves freely while developing motor skills.

6. Group Parachute Game:

Children hold a large scarf taut between them and raise it above their heads, creating a parachute-like structure. They can take turns running underneath it or gently toss lightweight objects like cotton balls into it for added excitement.

7. Relay Races:

Use scarves as batons during relay races, providing a soft and safe alternative for competitive games.

8. Blindfold Game:

Use scarves as blindfolds while children participate in sensory activities or games that require teamwork and communication.

9. Silent Musical Chairs:

Place a scarf on each seat before playing musical chairs. Instead of removing a chair, remove a scarf. The students will need to be observant to determine the availability of chairs.

10. Human Knot:

Divide your class into groups and use scarves to create a human knot. They have to untangle themselves using communication and problem-solving skills without releasing the scarfs.

11. Scarf Puppets:

Have students create their puppets using scarves as body or clothing parts. They can then write and perform short plays with their new characters.

12. Craft Project:

Use scarves for various craft projects like making decorative wall hangings, fabric flowers, or pillow covers. Students can also learn basic sewing skills with the soft material.

13. Guided Meditation:

Incorporate scarf-based activities during relaxation sessions or guided meditations, using them to cover children’s eyes gently to block out light or as a calming tactile support.

14. Geography Game:

Place country names on scarves and have students locate and match them with their corresponding countries on a labeled world map.

15. Cleaning Crew:

Promote cleanliness by encouraging children to use scarves to dust off surfaces in the classroom while also designing cleaning-related games that teach responsibility.

Conclusion:

Scarves are versatile tools that can easily liven up lessons and boost student engagement. Use these 15 creative scarf activity ideas to add an element of surprise and excitement to your classroom, making learning fun for your students. Happy teaching!

Teaching Enterprise or Enterprising Teachers?

Introduction

The world of education is constantly evolving, and the role of teachers within this dynamic landscape is transforming as well. In today’s globalized society, educators are no longer just teachers – they have become enterprising leaders who are shaping the future of their students and the entire education system. But what does it mean to be an enterprising teacher, and how can traditional teaching methods incorporate enterprise concepts? In this article, we will explore the concept of teaching enterprise, as well as the role of enterprising teachers in shaping a new approach to education.

Teaching Enterprise: Integrating Business Concepts into Education

The concept of teaching enterprise revolves around the idea of integrating entrepreneurial and business concepts into traditional educational settings. This can involve various approaches, such as incorporating real-world practical experiences, promoting innovation and creativity among students, or fostering a sense of ownership in their own learning journeys. By introducing business-related themes in the curriculum, educators can help prepare students for future workplace challenges while simultaneously enhancing their overall academic experience.

Enterprising Teachers: The Key to Success

While teaching enterprise focuses on the content being delivered in the classroom, it is enterprising teachers who make this approach successful. These innovative educators are constantly seeking new ways to inspire students and create engaging learning environments. Some characteristics of enterprising teachers include:

1.Flexibility: Enterprising teachers adapt their lesson plans to accommodate different learning styles and embrace emerging technologies that can promote active engagement among students.

2.Collaboration: They encourage collaboration both within and outside the school system by partnering with local businesses or organizations for hands-on experiences.

3.Creativity: These educators look beyond traditional methods to provide students with opportunities for exploration and discovery in all subjects.

4.Entrepreneurial mindset: Enterprising teachers instill entrepreneurial thinking by emphasizing problem-solving skills, leadership development, and adaptability.

5.Continuous professional development: They recognize the importance of staying informed about current trends and emerging educational approaches, and actively seek opportunities for personal growth.

The Impact of Enterprising Teachers on Education

The influence of enterprising teachers goes beyond their individual classrooms. By promoting a culture of innovation, collaboration, and curiosity, these educators contribute to the success of their schools and the larger educational community. The integration of enterprise concepts within traditional teaching methods benefits students by providing them with:

  1. Enhanced critical thinking and problem-solving skills
  2. Increased adaptability in an ever-changing world
  3. Improved communication and teamwork abilities
  4. Greater ownership and responsibility for their own learning
  5. Empowerment to face future academic and professional challenges

Conclusion

Teaching enterprise is an innovative approach that seeks to integrate entrepreneurial and business concepts into the world of education, but its true value lies in the hands of enterprising teachers who bring these ideas to life within their classrooms. By embracing a new mindset towards teaching, educators can better prepare students for future challenges while revolutionizing the way we approach education as a whole. As society continues to evolve, enterprising teachers will remain at the forefront, leading the way towards a brighter future for all learners.