Art Education

20 Eye-Catching Door Decorations for Preschool

Introduction

A well-decorated door can set the tone for a fun and inviting preschool classroom, making children excited to learn and play each day. Door decorations can also be used as an educational tool to promote learning and creativity. Here are 20 eye-catching door decoration ideas that will make a lasting impression and create a thrilling learning environment for your preschoolers.

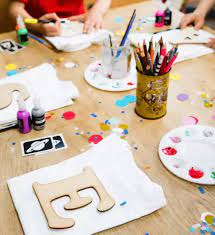
1.Colorful Handprints: Have each student dip their hands in non-toxic paint and press them onto the door, creating a fun and interactive design that promotes self-expression.

2.Classroom Jungle: Turn your door into a jungle scene with cutout trees, vines, and a variety of cute jungle animals.

3.Stars in the Sky: Create a night sky by sticking glow-in-the-dark stars on your door and surrounding it with constellations.

4.Under the Sea: Decorate your door with colorful sea creatures and aquatic plants for an underwater adventure theme.

5.Alphabet Train: Design a train track that runs across your door, with each train car holding a letter of the alphabet to reinforce letter recognition.

6.Race to School: Turn your door into a racetrack complete with cars driven by smiling, cartoon students racing to get to school on time.

7.Seasonal Celebrations: Change your door decor for each season using symbols such as flowers in spring, suns for summer, leaves for fall, and snowflakes in winter.

8.Countdown to Holidays: Develop excitement by displaying a countdown calendar leading up to holidays like Halloween, Christmas, or even special school events.

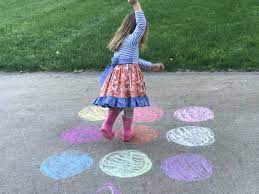
9.Shape City: Cut out buildings from construction paper using different shapes – squares, circles, rectangles etc., making an engaging cityscape while teaching geometric concepts.

10.Reading Rocketship: Encourage reading habits by creating a rocketship with flames made of book covers featuring popular children’s stories.

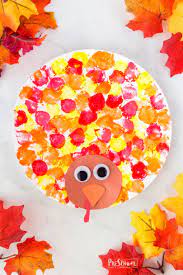
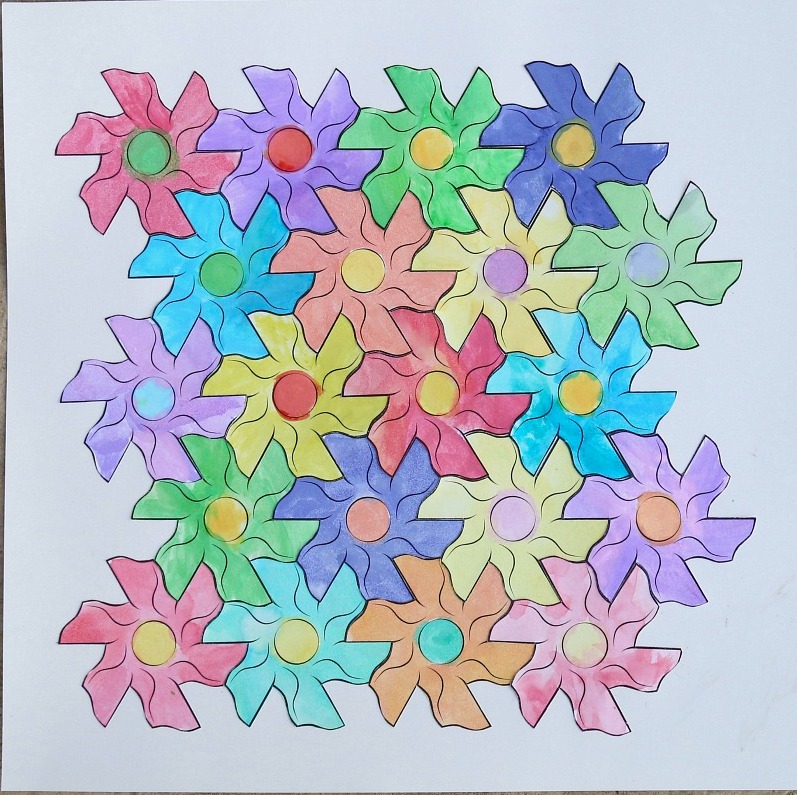
11.Flower Power: Adorn your door with colorful flowers made from paper plates and tissue paper, symbolizing the growth and development of your students.

12.Welcome to Our Hive: Turn your door into a vibrant beehive full of busy bees to show unity in the classroom.

13.Little Scientists: Decorate with lab equipment, formulas, and friendly scientist characters to ignite curiosity about science and experimentation.

14.Travel the World: Create a map on your door featuring flags from different countries, fostering cultural understanding and global awareness.

15.Greetings in Many Languages: Write “Welcome” in multiple languages, celebrating linguistic diversity among students.

16.Construction Zone: Attention little builders! Use construction paper to create bulldozers, cones, and signs for an interactive job site theme.

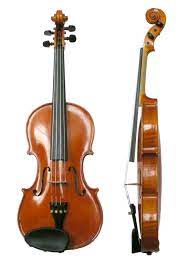
17.Musical Notes: Entertain students musically with a door featuring musical notes on a staff – you may even prompt young Mozarts to whistle a tune!

18.Weather Wonders: Teach students about weather by turning your door into a beautiful weather station with paper clouds, suns, and raindrops.

19.Famous Artists’ Gallery: Showcase iconic art pieces recreated by your students or introduce famous artists like Picasso or Van Gogh through fitting door decorations.

20.Superheroes to the Rescue: Display student-created superheroes promising to protect and support each other throughout the school year.

Conclusion

These 20 eye-catching door decoration ideas will help create a fun and engaging learning environment for preschoolers while promoting their creativity and academic skills at the same time. A well-decorated classroom door is more than just an aesthetic choice – it’s an invitation for students to enter an imaginative world where they can excel in learning.


18 Super Simple Shield Activities for Students

Introduction:

Shield activities are an engaging and creative way for students to learn about history, art, and various cultural practices. These simple activities also serve to boost their creativity and teamwork skills. Here, we present 18 super simple shield activities that can be enjoyed by students of all ages.

1.Cardboard Shield Making: Give each student a piece of cardboard to cut into their desired shield shape. Provide them with colored markers, paints, or other decorative materials to customize their shields.

2.Personal Coat of Arms: Encourage students to design their coat of arms, reflecting personal interests or family heritage. They can then paint it on their shields or draw it on paper.

3.Medieval Tournament: Divide the class into teams and hold a tournament using foam swords and their handmade shields.

4.Round Table Discussion: Organize a classroom discussion where students sit in a circle with their shields displayed. Each student shares the story behind their shield design.

5.Shield Gallery Walk: Host an exhibit where students showcase their completed shields and share the inspiration for their designs with classmates.

6.Shield Decorating Competition: Let students vote for the most creative, artistic, or unique shield designs in the class.

7.Create-Your-Own Shield Puzzle: Students draw their shield design on large pieces of paper and then cut them into puzzle pieces for classmates to put together.

8.Recreating Historical Shields: Research historical shields and have students recreate them using available materials in the classroom.

9.Spartan Hoplite Relay Race: Organize a relay race where students wear their shield on their left arm and use it to protect themselves from soft projectiles thrown by classmates as they complete an obstacle course.

10.Roman Testudo Formation: Teach students about the Roman testudo formation in which soldiers would overlap their shields to create a nearly impenetrable barrier. Have them practice this formation using their handmade shields.

11.African Shield Making: Explore different tribal shield designs from Africa, such as the Zulu or Massai. Students can then create their own versions of these shields.

12.Viking Shield Wall: Learn about Norse warriors and how they used their shields to create a defensive wall. Students can practice this formation in groups.

13.Heraldry Study: Introduce students to the study of heraldry, discussing common symbols, colors, and patterns found on medieval shields.

14.Aztec Shield Art: Explore Aztec shield designs and motifs, encouraging students to create their own interpretations of these patterns.

15.Gladiator Training: Teach students about Roman gladiators and have them participate in light sparring activities using foam swords and their handmade shields.

16.DIY Captain America Shield: Inspire superhero fans by guiding them through making a Captain America-inspired shield using cardboard and paint.

17.Fencing Basics: Give students an introduction to fencing techniques and have them practice basic movements with foam swords and their shields.

18.Reflecting on Lessons Learned: Encourage students to write reflective essays or journal entries about their experiences creating and using their shields, and what they’ve learned about history, culture, or themselves during the process.

Conclusion:

Shield activities offer numerous opportunities for fun and interactive learning experiences. They serve as creative outlets for self-expression while simultaneously teaching historical facts, fostering cultural understanding, and promoting teamwork among peers. By trying some of these 18 super simple shield activities in your classroom, you’ll spark students’ imaginations and create lasting memories.

16 I Love You to Pieces Crafts & Activities

Are you looking for a heartfelt way to express your love and appreciation to someone special? These 16 I Love You To Pieces crafts and activities are perfect for showing how much you care. These activities are ideal for children, parents, couples, and friends who want to have some fun while creating memorable keepsakes.

1. Puzzle Piece Heart Frame: Create a lovely photo frame using puzzle pieces painted in different shades of red and pink. Glue them together to form a heart shape around your favorite photo.

2. I Love You To Pieces Card: Create a simple card with the words “I love you to pieces” written on it. Attach tiny puzzle pieces within the heart outline as a cute visual representation of your love.

3. Message In A Puzzle: Write a secret message on blank puzzle pieces, mix them up, and let the receiver put it together to reveal the surprise!

4. Puzzle Piece Keychain: Create a personalized keychain by painting your initials on separate puzzle pieces and attaching a key ring.

5. Puzzle Piece Magnets: Design colorful puzzle piece magnets using acrylic paints and use them as fridge decorations to constantly remind your loved one of your feelings.

6. Melting Bead Puzzle Heart Craft: Arrange melting beads in a heart-shaped mold and follow the package instructions to fuse them together into vibrant puzzle-like mosaics.

7. Custom Jigsaw Puzzle: Convert a photo or drawing of you and your loved one into a custom jigsaw puzzle they’ll enjoy piecing together.

8. Puzzle Piece Friendship Necklaces: Paint two connecting puzzle pieces with different colors and wear them as friendship necklaces with your best friend or partner.

9. Confetti-Filled Balloons: Write sweet messages on tiny puzzle pieces and insert them into transparent balloons before inflating them up – pop the balloons together for an avalanche of heartfelt wishes!

10. Puzzle Piece Tree Art: Paint puzzle pieces in different hues of green and arrange them into the shape of a tree on a canvas.

11. I Love You To Pieces Pillow: Sew puzzle piece-shaped patches onto a plain pillow, with each piece representing reasons why you love the person or shared memories.

12. Chocolate Puzzle Pieces: Melt chocolate, fill puzzle-shaped molds, and let it cool for a unique and delicious gift.

13. Puzzle Piece Bookmarks: Decorate puzzle pieces with colorful patterns or quotes and attach them to a ribbon to create fun bookmarks.

14. DIY Puzzle Piece Soaps: Make soaps in the shape of puzzle pieces using silicone molds and gift them to your loved ones as a thoughtful handmade present.

15. Mini Puzzle Piece Wreath: Paint mini puzzle pieces in various shades of red, pink, and purple, glue them together in the shape of a wreath, and use it as décor or give as a gift.

16. Connecting Puzzle Pieces Painting: Collaborate with your loved one to create a connecting painting where each person paints half a heart on separate puzzle pieces which match together as one piece when finished.

These 16 I Love You To Pieces crafts and activities provide creative ways to bring joy and show your love to the special people in your life. Assemble these puzzles with your loved ones and create memories that will last a lifetime.

22 Terrific Table Crafts & Activities For Active Hands

Are you looking for fun and engaging ways to keep your child’s hands busy? These 22 terrific table crafts and activities are perfect for keeping active hands entertained while enhancing their creativity, motor skills, and cognitive development.

1. DIY Playdough: A homemade playdough recipe can provide hours of sculpting and molding fun, enhancing fine motor skills in the process.

2. Paper Plate Masks: Encourage imaginative play with this simple yet effective craft. Provide kids with paper plates, markers, and yarn to create their own masks.

3. Painted Rocks: Let children’s creativity run wild by painting rocks in various colors, patterns, and designs.

4. Collage Creations: Gather old magazines, newspapers, and construction paper to create unique collages – an excellent way to introduce recycling as well!

5. String Art: Using nails, string, and a wooden board or canvas, kids can create intricate geometric designs that exercise their spatial reasoning.

6. Tissue Paper Flowers: Teach children about different flower types by crafting delicate tissue paper flowers together.

7. Pipe Cleaner Sculptures: Pipe cleaners become masterpieces in the hands of young artists! Bend them into unique shapes and stick together to form imaginative creations.

8. Beaded Jewelry: Develop fine motor skills by threading colorful beads onto string or wire to create necklaces, bracelets, or even keychains!

9. Cupcake Liner Flowers: Transform cupcake liners into beautiful blossoms – simply flatten the liners, layer them together, attach a pipe cleaner stem, and voilà!

10. Fingerprint Artwork: Make art personal using fingerprints as the medium! Turn these one-of-a-kind prints into animals or scenic landscapes on small canvases.

11. Bottle Cap Magnets: Customize bottle caps with stickers or paint before securing a magnet inside to create functional fridge decorations.

12. Popsicle Stick Puzzles: After drawing a simple picture on popsicle sticks, mix them up and challenge kids to reassemble the “puzzle.”

13. Origami: Folding paper into intriguing shapes and animals not only captivates active hands but also introduces basic geometry skills.

14. Sponge Painting: An unconventional painting tool, sponges allow kids to experiment with various textures and patterns.

15. Nature Weaving: Collect twigs, leaves, flowers, and pinecones during a walk and then weave them together on a small loom or repurposed frame.

16. Salt Painting: Make raised salt paint designs on thick paper by mixing equal parts water, salt, and glue – once it dries, paint over it to watercolor masterpieces.

17. Marbled Paper Art: Create beautiful one-of-a-kind marbled paper using shaving cream and food coloring.

18. No-Sew Sock Puppets: An old sock becomes a new animated friend in this easy activity that encourages storytelling and imaginative play.

19. Perler Bead Creations: Create pixel art masterpieces by arranging perler beads on a pegboard before melting them together with an iron.

20. Stamping Fun: Use foam stamps or even fruits and vegetables to create patterns and unique designs on paper or fabric.

21. Handprint Keepsake Art: Children’s handprints make wonderful keepsakes for their growth journey! Capture them either in plaster or in paint on canvas.

22. Coffee Filter Butterflies: Use markers for vibrant coloring on coffee filters, then attach a pipe cleaner to form beautiful butterflies perfect for displaying around the home.

These 22 table crafts and activities will stimulate young imaginations while keeping little hands busy—an excellent way to nurture creativity and enhance developmental skills through play!

20 Inventive And Festive Turkey Plate Activities

Thanksgiving is a time for creativity, fun, and togetherness. Why not celebrate with 20 inventive and festive turkey plate activities? They’re perfect for enjoying with your friends and family during this special holiday.

1. Handprint Turkey Plate: Trace your handprint on a paper plate and turn it into a cool turkey with added details like colorful felt feathers, pipe-cleaner legs, google eyes, and more!

2. Thanksgiving Table Runner Decoration: Create a festive table runner by cutting turkey-shaped plates from a template and decorating them with colorful markers or paint.

3. Turkey Frisbee: Let the kids enjoy some outdoor play by turning their paper plate creations into lightweight frisbees that look like turkeys.

4. “I am Thankful” Corkboard Turkey: Have each guest write down what they’re thankful for on a paper turkey plate and then attach them to a corkboard for all to view.

5. Add-A-Feather Pin-The-Tail Activity: Make an extra-large paper turkey plate and play Pin the Tail by having blindfolded players stick on creative “feathers” made from colored paper and craft supplies.

6. Scratch Art Turkey Plates: Use scratch art techniques to reveal vibrant colors under black paint on thick paper plates shaped like turkeys.

7. Turkey Shaped Napkin Holder: Create festive napkin holders using turkey plate cutouts with slits in the sides, allowing for napkins to slide in easily.

8. DIY Turkey Placeholders: Personalize your Thanksgiving table by creating individual turkey place cards using decorative elements like stickers or glitter glue on miniature turkey plates.

9. Tissue Paper Feather Turkeys: Use colorful tissue paper to make feathers on your plate turkeys, adding texture and a fun look.

10. Colorful Button Turkeys: Glue colorful buttons on the paper plates as feathers for a cute variation on the classic handprint turkey!

11. Turkey Necklace Craft: Make a turkey-shaped charm using mini paper plates and string, adding beads or other small embellishments to create festive necklaces for everyone at the table.

12. Thanksgiving Coloring Contest: Provide plain paper turkey plates and create a coloring contest that encourages creativity in decorating their individual turkeys.

13. Turkey Coasters: Laminate small turkey plate cutouts and use them as coasters to protect your tabletop during the festivities.

14. Turkey Kitchen Décor: Hang your completed turkey plate art around the kitchen for a fun and festive decoration.

15. Turkey Puzzle: Cut out turkey plate shapes and jumble the pieces together for a fun, family-oriented puzzle activity.

16. Thanksgiving Tree Decor: String together a few small-sized turkey plates to make an eye-catching garland, or poke a hole through the top and add ribbon to hang them individually on your Thanksgiving tree.

17. Memory Game: Color matching turkey plates and use those pairs for memory games in which kids need to remember where each color exists on the table.

18. Festive Turkey Bowls: Use regular-sized paper plates, cut in half, paint them to look like turkeys, and shape them into semi-circular bowls perfect for serving snacks or holding trinkets.

19. Turkey Mario Kart-inspired Racers: Construct toy cars from turkey-shaped wooden cutouts or cardstock, add wheels, and host races during family gatherings.

20. Turkey Pinata: Build a pinata using paper feathers covering a round or oblong shape before setting it up for plenty of laughs as kiddos try their luck.

These 20 inventive and festive activities are surefire ways to make lasting memories with friends and family members this Thanksgiving season!

Primary Assembly: Lost and Found – The £2 Million Violin

Introduction:

The topic of today’s primary assembly is an interesting story about a lost and found £2 million violin, showcasing the importance of care and responsibility for one’s belongings.

The £2 Million Violin:

Renowned violinist Min Kym was at a busy railway station in London when she suddenly realized that her violin case was missing. This was no ordinary violin; it was a rare and priceless 1696 Stradivarius, valued at £2 million! The violin held sentimental value in addition to its high monetary worth, as Min had been playing it since she was a young girl. The loss was devastating to her both personally and professionally.

The Search:

Upon realizing her precious instrument was gone, Min Kym immediately reported the incident to the railway staff and the police. The search began, with investigators working diligently to track down the whereabouts of the £2 million treasure. News of the lost violin spread quickly throughout the music community and the public, garnering widespread attention.

The Recovery:

After three long years filled with pain, anxiety, and anticipation, Min Kym received the miraculous news that her beloved Stradivarius violin had been found! Investigators had tracked down the thieves who had taken part in an underground transaction intending to sell it further on. Due to their tireless efforts and cooperation with authorities in other countries, the police were able to intercept this deal and safely recover the priceless instrument.

Restoration and Reunion:

With great delight, Min Kym embraced her long-lost violin after it had undergone a careful restoration process to restore its original beauty and sound. She was finally able to play her favorite instrument once again, creating beautiful music that touched audiences around the world.

Lesson Learned:

This incredible story of loss and recovery teaches us important lessons about responsibility towards our valuable possessions. It is vital that we take proper care of items that are important to us, be they instruments, gadgets, or even sentimental trinkets. Additionally, the power of determination and perseverance in finding something significant can lead to triumphant outcomes.

Conclusion:

As we look back on the story of the lost and found £2 million violin, let us remember to cherish our belongings and be responsible for their protection. Moreover, let us continue to embody resilience and determination when faced with challenges, whether it is finding a lost item or overcoming an obstacle in our lives.

14 Creative Color Wheel Activities

Colors have the magical ability to evoke emotions, stir creativity, and inspire artistic expression. One of the most fundamental building blocks of artwork is the color wheel, which displays a full spectrum of colors neatly arranged in a circular format. By understanding the relationships between colors, you can unlock your creative potential and create visually stunning art projects.

In this article, we’ll look at 14 creative color wheel activities that you can try to elevate your understanding of colors and experiment with new artistic techniques.

1. DIY Color Wheel: Start by crafting your own color wheel from scratch. Paint or color in a circle using primary, secondary, and tertiary colors as reference points for a personalized touch.

2. Color Wheel Collage: Experiment with texture by creating a collage from various materials like magazine cutouts, fabric scraps, and beads in matching shades for each color.

3. Complementary Color Study: Using only complementary colors (opposite on the color wheel), create artwork that showcases the vibrant contrast these hues offer.

4. Analogous Color Exploration: Choose a section of the color wheel featuring three or more adjacent colors and compose an art piece using only these shades, highlighting their harmonious relationship.

5. Monochromatic Magic: Pick your favorite color and explore its variations by composing a piece made solely from tints, shades, and tones of that hue.

6. Color Mixing Challenge: Try to create as many unique colors as you can using only the three primary colors (red, yellow, blue) and devise different methods of blending them.

7. Triadic Harmony Paintings: Simultaneously use three evenly spaced colors in a piece of artwork to create interesting visual effects accentuated by dynamic contrasts.

8. Split-Complementary Studies: Rather than using direct complementary colors, choose two analogous colors neighboring your original choice’s complement for an exciting variation.

9. Color Wheel Spin Game: Create a spinner with the color wheel and randomly select colors for your next masterpiece, challenging your ability to make diverse hues work together.

10. Interactive Color Relationships: Design an interactive puzzle that reveals relationships between colors on the wheel, such as complementary, analogous, and split-complementary combinations.

11. Color Wheel Storytelling: Encourage creativity by weaving a narrative around the journey of a character as they explore different colors and how they influence their actions or emotions.

12. Emotive Color Portraits: Paint or draw a portrait reflecting emotions associated with a specific section of the color wheel – for instance, warm tones evoking happiness or cool tones signifying calmness.

13. Food-based Color Wheel: Express your culinary creativity by arranging fruit, vegetables, or other edibles in the shape of a color wheel as an appetizing display.

14. Fashion and Fundamentals: Experiment with fashion design by creating clothing ensembles or accessories based on color theory principles, such as complementary or analogous pairings.

In conclusion, exploring creative color wheel activities can expand your artistic knowledge and enhance the visual impact of your projects. With these 14 suggestions at your disposal, you’ll never run out of inspiration – let your imagination run wild and experience the limitless possibilities of color.

18 Sidewalk Chalk Activities to Stop Summer Boredom

Summer is here, and with it comes the inevitable challenge of keeping kids entertained and engaged all season long. One tried and true solution to stop summer boredom in its tracks is the classic medium of sidewalk chalk. With a little creativity and imagination, there are countless engaging activities that can be made using this simple, inexpensive, and versatile tool. Here are 18 sidewalk chalk activities to keep your kids busy and having fun this summer:

1. Hopscotch: A timeless classic that you can draw in various designs to keep things interesting.

2. Four Square: Teach your kids this recess favorite and promote teamwork and healthy competition.

3. Sidewalk Twister: Draw colored circles with numbers on them—then call out a color, number, and limb for endless fun.

4. Outdoor Pictionary: Take turns drawing pictures while others guess the word or phrase.

5. Chalk Maze: Create a winding maze for kids to trace with their fingers or follow with their feet.

6. Giant Tic-Tac-Toe: Draw a giant tic-tac-toe board for an oversized challenge.

7. Sidewalk Art Gallery: Let children create chalk masterpieces, then take a stroll through their art exhibits.

8. Shadow Tracing: Trace children’s shadows in different poses throughout the day to show how shadows change as the sun moves across the sky.

9. Obstacle Course: Outline an obstacle course complete with zig-zag lines, circles for jumping, and squares for balancing.

10. Word Hunt: Write words scattered around on the ground that children need to spot and read or spell out loud.

11. Math Race: Write numbers on the ground, then have kids hop to different numbers as you call out math problems to solve.

12. DIY Chessboard: Draw an enormous chessboard with sidewalk chalk and use household items for pieces—a unique way to learn and play chess.

13. Giant Connect Four: Draw a giant grid and use different colored chalk for each player to strategically connect four circles in a row.

14. Target Practice: Draw targets with numbered circles, then toss beanbags or wet sponges to hit the targets and tally up points.

15. Chalk Bullseye: Another target game, draw a large bullseye on the ground and have kids try to land their items as close to the center as possible.

16. Trace Your Friend: Trace the outline of each other’s bodies and fill them in with colorful clothing, accessories, and facial features.

17. Sidewalk Simon Says: Draw various shapes or patterns and have children follow your commands just like in traditional Simon Says.

18. Nature Walk Story Creation: Take a walk with your kids, collecting leaves, sticks, stones, or other found objects. Use these along with sidewalk chalk to create a collaborative story on the pavement.

By engaging in these sidewalk chalk activities, your children will not only have fun but will also develop their problem-solving, critical thinking, and teamwork skills—making for an unforgettable summer experience.

22 Exciting Tessellation Activities For Kids

Introduction

Tessellation refers to the arrangement of shapes, typically polygons, that fit together perfectly without overlaps or gaps. Teaching kids about tessellations can help them understand geometric concepts and improve their spatial reasoning skills. Here are 22 exciting tessellation activities for kids to explore and enjoy:

1. Paper Tile Puzzles: Create paper templates of various polygon shapes and task children with arranging them into a tessellating pattern.

2. M.C. Escher Art Study: Show kids the work of M.C. Escher, who famously employed tessellations in his art, and then encourage them to create their own Escher-inspired pieces.

3. Tessellating Cookies: Use cookie cutters in geometric shapes to make tessellating cookies that invite kids to play with their food.

4. Sidewalk Chalk Tessellations: Children can use sidewalk chalk to draw tessellating patterns on pavement or concrete.

5. Alhambra Tile Investigation: Teach kids about the geometrically intricate tile designs found in the Alhambra palace in Spain and have them attempt to recreate those designs.

6. Tessellation Coloring Pages: Print out coloring pages featuring tessellating patterns and various polygon shapes that children can color in.

7. Tangram Fun: Use tessellation principles alongside traditional tangrams to challenge kids’ spatial skills.

8. Hands-on Tessellation Stations: Create hands-on stations where students can try different types of tessellation activities.

9. Stained Glass Window Designs: Children can design and create their own “stained glass” art using colored tissue paper and geometric shapes.

10. Collaborative Pattern Murals: Groups of children can work together on a large-scale mural, each contributing a tessellating pattern or shape to the project.

11. Foam Bath Tile Play: Allow kids to explore tessellations during bath time with foam cutouts of various shapes.

12. Tessellating Napkin Folding: Teach kids how to fold paper napkins into tessellating patterns to impress at the dinner table.

13. Edible Tessellation Snacks: Use fruit, cheese, or other bite-size snacks to create tessellating patterns as tasty treats.

14. Tessellation Jigsaw Puzzles: Turn tessellating patterns into jigsaw puzzles for a new challenge.

15. Geometric Clay Tiles: Kids can use clay or playdough to create and arrange their own tessellating tiles.

16. Tessellation Origami: Teach children how to fold and intertwine paper to create tessellating origami designs.

17. Tessellation Board Game: Design a board game with a tessellating pattern as the playing surface where spaces fit together perfectly.

18. Nature Walk Tessellations: During nature walks, encourage kids to discover and discuss tessellations found in natural surroundings.

19. Twisted Tessellations: Challenge kids’ creativity by asking them to invent a unique and never-before-seen tessellating shape.

20. Online Tessellation Generators: There are online tools available that generate tessellating patterns; have kids try them and explore the possibilities.

21. Parquetry Play: Children can use precut wooden shapes on adhesive sheets to create their own parquetry designs inspired by European floors.

22. Tessellation Wallpaper Design: Let children design their own tessellation-based wallpaper pattern using digital art software or traditional drawing materials.

Conclusion

Tessellation activities provide endless opportunities for creativity and learning about geometric principles in a fun and engaging way. These 22 activities offer a variety of ways to introduce tessellations to kids while providing hours of exploration, experimentation, and enjoyment.

24 Creative Activities Focused On The Poinsettia

Introduction:

The Poinsettia is a beautiful and festive plant that often symbolizes the Christmas season. It is native to Mexico, but its bright red bracts and green leaves are now cherished in many parts of the world during the holidays. Today, we will explore 24 creative activities that focus on the Poinsettia, perfect for children and adults alike!

1. Poinsettia painting – Use watercolors or acrylics to create a stunning picture of a poinsettia.

2. Handprint Poinsettias – Children can stamp their handprints in red and green paint to form the shape of poinsettias.

3. Poinsettia origami – Learn how to fold paper into beautiful poinsettias.

4. Poinsettia photography – Capture vibrant close-ups with your camera or smartphone.

5. Christmas wreath – Add poinsettias to a festive wreath for your front door.

6. Tissue paper poinsettias – Create lifelike flowers with tissue paper and pipe cleaners.

7. Clay or play dough poinsettias – Sculpt your own flowers with clay or play dough.

8. Story or poem writing – Write a story or poem featuring poinsettias that spreads holiday cheer.

9. Embroidery – Stitch an elegant poinsettia design onto a fabric item such as a tablecloth or pillowcase.

10. Cross-stitching – Create a detailed art piece with cross-stitch patterns modeled after this classic plant.

11. Holiday card drawing – Hand-draw cards featuring beautiful, personalized poinsettias.

12. Button-mosaic poinsettias – Craft stunning displays using various-sized buttons as petals.

13. DIY paper lanterns – Adorn paper lanterns with cut-out leaves and petals for a decorative seasonal glow.

14. Gingerbread house – Attach edible poinsettias to your gingerbread creations for festive charm.

15. Felt ornaments – Sew poinsettia ornaments together from felt, ribbon, and string for your tree.

16. Scrapbooking – Incorporate poinsettia-themed stamps, stickers, or photographs into your seasonal memory book.

17. Popsicle-stick stars – Paint Popsicle sticks red and green to create a poinsettia-shaped star.

18. Needle felting – Create small wool plant sculptures inspired by the Poinsettia.

19. Poinsettia garlands – String together handmade or artificial flowers to create a colorful garland for your home.

20. Poinsettia-inspired potpourri – Combine dried red flower petals, whole cloves, and cinnamon sticks as a fragrant decoration.

21. Coloring pages – Print poinsettia coloring pages for children to enjoy during the holiday season.

22. Quilting – Sew a poinsettia-themed quilt or wall hanging as a cozy seasonal touch.

23. Stained glass painting – Mimic the beauty of this plant with stained glass effect paints on glass or acrylic surfaces.

24. Poinsettia seed planting – Plant seeds from existing poinsettias and watch new life emerge, a great hands-on learning opportunity for children.

Conclusion:

Featuring the Poinsettia in various creative activities is an inspiring way to celebrate its beauty while enjoying family bonding time and preparing your home for the festive season. Whether you choose to paint or sew, write or craft, these 24 suggestions offer numerous possibilities for bringing the vibrant hues of this timeless plant into your holiday projects.