Art Education

How to Make These Crafty Burlap Pencil Classroom Decorations

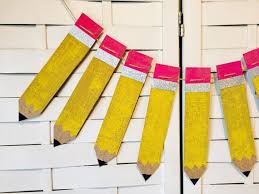
A creative classroom environment is engaging and inspires students to thrive. One simple yet eye-catching way to transform your ordinary classroom is with these crafty burlap pencil decorations. They’re perfect for back-to-school, teacher appreciation, or simply adding a touch of whimsy to your learning space.

In this article, we’ll outline all the steps you need to make these cute burlap pencils yourself. Let’s get started!

Materials Required:

– Burlap fabric (various colors for pencil, eraser, and metal band)

– Scissors

– Fabric glue or hot glue gun

– Ruler or measuring tape

– Pencil or pen for tracing

– Cardboard or heavy cardstock paper

– Twine (optional)

Step 1: Create the Pencil Template

First, draw a pencil template on the cardboard or cardstock paper. The size of your decoration will determine the size of your template. For example, if you want your pencil to be 12 inches long, ensure that you create a template that matches that size.

The shape should consist of three parts: the pencil body (rectangular), eraser (rounded), and metal ring (small rectangle overlapping the eraser). Cut out the template.

Step 2: Trace and Cut the Burlap

Trace your pencil template onto the burlap fabric using a pencil or pen. You will need to trace three pieces for each decoration: one for the main pencil body, one for the eraser, and one for the metal ring.

Cut out each piece of burlap carefully along the lines you’ve drawn. Feel free to cut out multiple pieces at once if you’re making several decorations.

Step 3: Assemble Your Pencil Decoration

Now, it’s time to assemble your crafty burlap pencil. Start by gluing the eraser piece directly onto the top of the pencil body, aligning the edges neatly. Press firmly to ensure the glue adheres.

Next, glue the metal ring piece onto the area where the eraser meets the pencil body. This will create a seamless connection between the two parts.

Step 4: Add Finishing Touches

For added flair, you can use fabric glue to create colored stripes within the burlap pencil body. Simply squeeze the glue onto the fabric, forming straight lines or zigzags to mimic a real wooden pencil. Allow it to dry completely before touching it.

Alternatively, wrap twine around the metal ring section for a rustic look. Secure it with a dab of glue on both ends.

Step 5: Display Your Burlap Pencil Decorations

Hang your finished burlap pencils on your classroom walls or bulletin boards for an attractive and warm aesthetic. They also make fantastic gifts for other teachers or students’ parents as a token of appreciation.

In conclusion, these crafty burlap pencil classroom decorations are a fun and simple way to brighten up any learning environment. With just a few materials and some creativity, you can have these charming decorations ready in no time. Happy crafting!

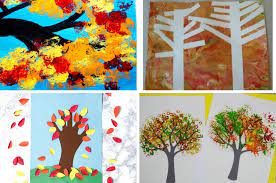
The Best Fun Autumn Art Projects for Teachers

As the seasons change and the leaves begin to turn, it’s the perfect time for teachers to bring some autumn-inspired art projects into their classrooms. These creative and engaging activities can help students explore the beauty of the fall season while developing their artistic skills. Here are some of the best fun autumn art projects for teachers to inspire creativity in their students.

1. Leaf Rubbings

One of the most classic autumn art activities, leaf rubbings allows students to capture the intricate patterns and shapes of fallen leaves. To get started, have students collect various leaves from around the school or their homes. Place a leaf under a sheet of thin paper, and let them gently rub over it using the side of a crayon or colored pencil. The resulting image will reveal the unique texture and veins of the leaf.

2. Paper Mosaic Fall Trees

For this activity, students will create beautiful silhouette trees against an autumnal mosaic sky using colored paper or magazine pages. Begin by having each student cut out a tree silhouette from black construction paper and glue it to a piece of white cardstock. Next, let them choose warm-colored paper or magazine pages to rip into small pieces and create a mosaic background representing the vibrant fall foliage.

3. Watercolor Pumpkins

Using watercolors, students can create whimsical pumpkin paintings that capture the essence of fall harvests. Have them sketch a simple pumpkin shape onto watercolor paper and then encourage them to experiment with different colors, techniques, and brush strokes to create a unique pumpkin painting.

4. Autumn Handprints Wreath

A perfect project for smaller children, this autumn handprint wreath is both fun and easy to make! Trace each student’s hand on various colors of construction paper (think reds, oranges, yellows) several times and have them cut out their handprints. Next, arrange these handprints in a wreath formation, overlapping them to create an eye-catching display. Add a bow made of ribbon to complete the festive look.

5. Thankful Tree

The Thankful Tree project encourages students to think about what they’re grateful for while creating beautiful artwork. On a large poster board or butcher paper, draw a tree trunk with many branches spreading out. Have your students write down things they’re thankful for on colorful leaves cut from construction paper. Finally, have them attach their leaves to the tree branches to create a full and abundant visual representation of gratitude.

By incorporating these fun and engaging autumn art projects into your lesson plans, you’ll help your students connect with the natural world around them while sparking their creativity and artistic expression. Happy crafting!

“Discovering the World of Free Music Resources for Teachers from Carnegie Hall”

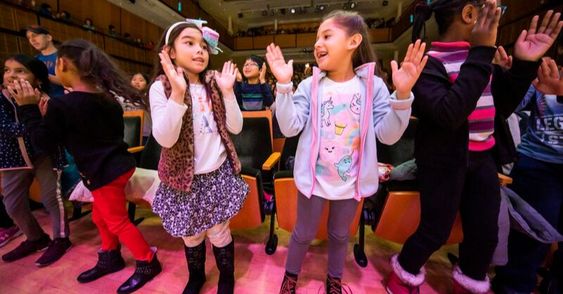
As the world evolves, so does the way we teach and learn. Music is no exception, and in our digital age, free resources for musical education are more accessible than ever. Among these valuable tools lie the hidden gems offered by Carnegie Hall, a world-renowned concert hall located in New York City. With a mission to make music education accessible to all, they’ve created a wealth of online resources specifically designed for educators. In this article, you’ll learn about some of the top free music resources for teachers available from Carnegie Hall.

1. The Musical Explorers Program

Musical Explorers is a comprehensive curriculum for kindergarten to second-grade students designed to help teachers incorporate singing and culturally diverse music into their classrooms. The program brings artists from around the globe into your classroom through videos and interactive tools, allowing students to explore different cultures and styles of music. Teachers can access lesson plans, sheet music, lyrics, recordings, and assessment materials completely for free.

2. Link Up

The Link Up program enables third to fifth-grade students to participate in orchestral music-making while engaging in interactive activities. Produced in partnership with orchestras worldwide, Link Up encourages hands-on participation while developing strong musical connections for students. Throughout the course of the program, teachers have access to detailed guides filled with lesson plans and multimedia resources.

3. Carnegie Hall Playlists

Carnegie Hall offers various curated playlists on platforms such as Spotify and YouTube that provide instant access to varied musical genres and styles representing classical music’s rich history. These playlists serve as an excellent introduction for students who are just beginning their journey into understanding classical music.

4. Online Workshops

In addition to program-specific materials, Carnegie Hall offers workshops aimed at helping music educators improve their skills outside of typical classroom settings. These workshops give educators access to informative presentations led by industry professionals on topics such as early childhood music development, culturally responsive music pedagogy, and technology in the music classroom.

5. Digital Archives

The extensive Digital Archives of Carnegie Hall offer up a treasure trove of historical documents, photographs, and audio recordings, providing a vivid look into the landmark’s storied history. Through these archives, teachers can grant their students a unique perspective on the evolution of music and its interconnected relationships with history and culture.

The free music resources for teachers provided by Carnegie Hall offer an extraordinary opportunity for educators to teach music more effectively while inspiring their students to engage with new cultures and musical genres. Regardless of your background or teaching style, there is no shortage of valuable finds within Carnegie Hall’s digital troves that can enrich your students’ musical education.

Create These DIY Pencil Shoes in Less Than an Hour

Are you looking for a unique way to express your creativity and personalize your footwear? Look no further! In this article, we’ll teach you how to create these amazing DIY pencil shoes in less than an hour. They’re perfect for artists, teachers, students, or anyone who wants to add a pop of color and flair to their outfit.

Materials:

– A pair of plain white canvas shoes (slip-on or lace-up)

– Acrylic paint in various colors (yellow, pink, silver or gray, black)

– Small paintbrushes

– Painter’s tape

– Scissors

– Pencil

Instructions:

1. Prepare your workspace: Lay down some newspaper or a plastic tablecloth to protect the surface you’ll be working on. Gather all of your materials and have them ready.

2. Tape off the areas: Using the painter’s tape, cover the rubber sole and any other parts of the shoe that you don’t want to be painted. This will ensure clean lines and prevent unwanted paint smudges.

3. Paint the base color: Start by painting the entire canvas area of your shoes with the yellow acrylic paint. This will be the main “pencil” color. Make sure to apply an even coat and allow it to dry completely before moving on to the next step.

4. Add the eraser: Using your pink paint, create a horizontal strip at the top of each shoe’s back heel to represent the eraser portion of a pencil. Allow this layer of paint to dry thoroughly as well.

5. Paint the metal band: Next, use your silver or gray paint to create a thin line beneath the pink “eraser” portion on both shoes. This represents the metal band that holds an eraser on a pencil. Give this layer adequate time to dry as well.

6. Create the pencil tip: Now it’s time to add the black paint to the tip of your shoe, shaping it like a pencil point. This will give the illusion that your shoes have a sharp pencil tip.

7. Add the final details: Use a pencil or a very fine paintbrush to sketch some light lines on the yellow section of each shoe. This will mimic the appearance of wooden texture on an actual pencil.

8. Allow everything to dry: Give your shoes ample time to dry, ensuring that all layers of paint have set properly.

9. Remove the tape: Carefully remove all the painter’s tape from your shoes. Clean up any remaining residue or smudges with a damp cloth or Q-tip if necessary.

Voila! You now have a one-of-a-kind pair of pencil shoes that are sure to turn heads and spark conversation. This creative DIY project is not only simple and affordable, but it will also give you an exciting new way to express yourself through your wardrobe. Enjoy your new statement shoes and unleash your inner artist!

12 Scenes from the Movie Elf That Sum Up Teaching Before Break

1. Buddy Discovers the True Meaning of Christmas: This scene is reminiscent of teachers trying to come up with creative ways to keep their students focused and engaged in learning before break. Just like Buddy discovers the true meaning of Christmas, teachers work hard to make sure their students understand the importance of education even during the holiday season.

2. Buddy’s First Day at Work: Much like Buddy getting used to his new job, teachers must adapt and adjust to new routines as the school year progresses. They juggle lesson plans, decorations, and festive activities all while trying to maintain classroom morale before break.

3. The Famous Snowball Fight: Every teacher has experienced that one class where chaos ensues as children get more and more excited about a looming break. This well-known scene from Elf perfectly captures the pandemonium that can ensue when students are cooped up in a classroom too long.

4. Buddy Meets Jovie: With just days left before break, teachers are like Buddy meeting his future partner Jovie – they have already put in so much work but still feel overwhelmed by what still lies ahead.

5. Santa’s Sleigh Engine Problems: As educators rush to prepare final tests, grade papers, and plan activities, they might feel like Santa desperately trying to fix his sleigh engine in time for Christmas Eve. The pressure is on!

6. Back in the North Pole: Reflecting on progress made with tough class situations or student interactions, teachers sometimes wish they could escape back to simpler times – just like Buddy in this heartwarming scene.

7. Buddy Doesn’t Know His Dad Is Angry: Teachers know the struggle of misinterpreting a situation or misunderstanding parental feedback during parent-teacher conferences, much like Buddy not realizing why his dad is upset with him.

8. Snowy Adventures Around New York City: Field trips or school outings before break can create lasting memories and provide educational experiences, much like Buddy’s snowy excursion with Jovie.

9. Reconnecting with Buddy’s Family: Hectic schedules may cause class dynamics to fall apart as the holidays approach. Like Buddy reconnecting with his family, building trust and maintaining relationships are key for teachers.

10. The Elf Interrogation: Teaching students positive behavior before break calls for a sense of authority. This scene is relatable to teachers who have had to lay down the law when disruptions or misbehavior arise right before school is out for the holidays.

11. The Climactic Singalong: Pulling off a successful holiday event – whether it’s a performance or festive classroom activity – often feels like a victory for teachers. In the movie, the singalong scene epitomizes that shared accomplishment feeling.

12. Saving Christmas Together: Teamwork makes the dream work, and seeing students help pull Santa’s sleigh in the film is very reminiscent of how a classroom functions when everyone works together to achieve common goals. Every teacher knows that collaborative effort is needed to power through before vacation.

In conclusion, teaching before break can be a whirlwind of emotions and challenges, full of obstacles that need to be overcome. Through relatable scenes from the movie Elf, we can better understand and appreciate the complexities of being an educator during this time of year.

What Is a Museum School and What Is It Like to Teach at One?

Introduction

Museum schools have been gaining popularity in the field of education as alternative learning environments. These unique institutions offer students and educators alike a hands-on approach to learning and teaching. In this article, we will discuss what a museum school is and provide insights into what it’s like to teach at one.

What is a Museum School?

A museum school is an educational institution that partners with or is based within a museum, allowing students to engage directly with exhibits and artifacts as part of their learning experience. The aim is to create a rich, interactive learning environment beyond the traditional classroom setting. Museum schools can be found at various grade levels, from elementary to high school. Many of these schools also incorporate other learning techniques, such as project-based learning or integrative arts approaches.

Museum schools often focus on subjects related to the content of the partnering museum, which enables students to delve more deeply into specialized topics such as history, art, science, or technology. Moreover, museum schools emphasize experiential learning by giving students access to real-world resources, experts, and immersive experiences that enhance their understanding.

Teaching at a Museum School

Teaching at a museum school provides educators with opportunities for enrichment and professional growth while allowing them to foster students’ passion for discovery and knowledge. Teachers can expect to encounter some unique aspects when working in this non-traditional educational setting:

1. Collaboration: Teachers engage in active collaboration with museum staff members such as curators or experts in their field. This fosters interdisciplinary connections and opens up new teaching perspectives.

2. Innovative curriculum development: Educators have the opportunity to work with museum staff to design innovative curricula that leverage the vast resources available within the museum itself. This also includes incorporating field trips and hands-on experiences into lesson plans.

3. Student-centered learning: Teachers play a pivotal role in encouraging students to think critically and independently, using the museum as their primary tool for exploration. They facilitate discovery, helping students to make connections and apply their knowledge to real-world scenarios.

4. Smaller class sizes: Many museum schools have smaller student populations, which allows teachers to foster closer relationships with their students and invest in personalized learning experiences.

5. Professional development opportunities: Teachers at museum schools often have access to unique professional development opportunities. This can include attending special exhibits, trainings provided by museum professionals, or working with renowned experts in their respective fields.

Conclusion

Museum schools offer a unique learning environment that challenges traditional educational models by providing tangible experiences and fostering critical thinking skills. Teaching at a museum school grants educators the opportunity to collaborate with industry professionals, develop innovative curriculum, and empower students. Teachers who are passionate about experiential learning and eager to explore new avenues in education may find that a museum school is an inspiring and rewarding place to work.

How to Get Started With Zentangle Patterns in the Classroom

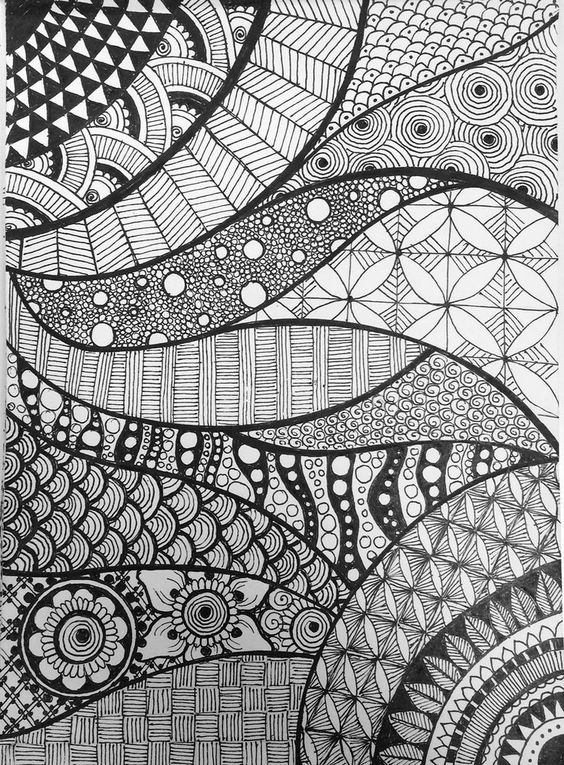
The world of art has many facets, and one unique method that has gained popularity in recent years is Zentangle. This meditative drawing technique uses simple patterns to create intricate, eye-catching designs. In the classroom, introducing Zentangle patterns can benefit students by encouraging their creativity, improving focus, and providing a means of relaxation. This article will guide you through the process of getting started with Zentangle patterns in the classroom.

1. Gather Materials

Zentangle requires only a few basic items:

– High-quality paper or card stock

– Fine tip pens or pencils

– A small straight edge or ruler

2. Introduce the Concept of Zentangle

Begin by explaining what Zentangle is and its benefits. Share examples of different patterns and designs, highlighting how various shapes can come together to form a cohesive piece of art.

3. Teach Basic Techniques

Demonstrate and explain some fundamental techniques used in Zentangle art:

– “Strings” to create sections within the drawing space

– Different patterns using lines, dots, curves, and shading

– The use of repetition and symmetry to build a design

4. Start with Simple Patterns

Have students begin practicing simple patterns by using their drawing tools to create lines, circles, dots, and other shapes. Encourage them to repeat these elements within a designated area on their paper.

5. Model an Example Zentangle

As students become comfortable with basic patterns and techniques, guide them through the process of creating a complete Zentangle design. You could either demonstrate an example for the class or provide step-by-step instructions on how to build a specific pattern.

6. Allow for Individual Exploration

Once they grasp fundamental concepts and techniques, encourage your students to experiment with their own designs and ideas. Provide ample time for practice and individual exploration in class.

7. Showcase Students’ Artwork

Zentangle can lead to impressive finished products that deserve recognition and encouragement. Provide opportunities for students to showcase their artwork on bulletin boards, in the school’s art gallery, or even by creating a classroom Zentangle portfolio.

8. Integrate Zentangle into Other Lessons

Zentangle can enhance lessons in other subject areas with its cross-curricular nature. For example, you can introduce pattern-making in math classes or use Zentangle to illustrate concepts in science or social studies activities.

9. Encourage Continued Practice

Creating a supportive environment for students to explore their artistic talents is essential. Encourage them to continue creating during their free time, and consider offering after-school clubs or workshops for those interested in further developing their Zentangle skills.

In conclusion, incorporating Zentangle patterns into the classroom can provide numerous benefits for students while offering a unique and engaging art activity. By using these tips and suggestions, you can jumpstart your students’ journey into the mesmerizing world of Zentangle art.

17 Adorable Teacher Signs to Hang on Your Classroom Walls

Introduction

Classroom decorations can have a significant impact on students’ learning environment. By adding a touch of creativity and personalization, teachers can create an inviting and engaging space for their students. One way to achieve this is by hanging adorable teacher signs on the classroom walls. Here are 17 incredible ideas for teacher signs that will inspire, brighten, and add charm to any classroom.

1. Growth Mindset Sign

Encourage a growth mindset in your students with a sign that says, “In this classroom, we don’t do easy; we make easy happen through hard work and learning.”

2. “This is a Mistake-Making Zone”

Remind students it’s okay to make mistakes with a sign that encourages learning from errors.

3. Inspiring Quote

Choose a quote from a famous author or motivational speaker to inspire your students daily.

4. “You Are Loved” Sign

Hanging a simple “you are loved” sign can work wonders in creating an inclusive atmosphere where each student feels valued.

5. Classroom Rules

Display your classroom rules on an attractive sign for easy reference and consistent enforcement.

6. Birthday Corner

Hang a cute “Happy Birthday!” sign alongside individual birthday banners to celebrate each student’s special day throughout the year.

7. Positive Affirmations

Create a corner with positive affirmations like, “I am capable,” “I am strong,” and “I am confident” for students to read and recite daily.

8. Personalized Name Sign

Make each student feel special by displaying their names on cute name signs, creating a sense of belonging.

9. Literary Corner

Hang signs featuring literary themes or authors paired with their famous quotes or novels.

10. Teacher Appreciation Wall

Place a decorative wall hang dedicated to notes, drawings, or cards given to you by your students as an ongoing symbol of appreciation.

11. “Be Kind” Message

A sign that promotes kindness can significantly impact students’ behavior and treatment of each other.

12. DIY Canvas Art

Help your students create personalized canvases with handprints, drawings, or quotes, then hang them around the classroom for a unique and collaborative touch.

13. “In Here, We Are Family”

Foster a sense of unity in your classroom with a sign that emphasizes inclusivity and togetherness.

14. “What You Say Matters”

This sign will remind students to be mindful of the power of words, promoting thoughtful conversation and interactions.

15. Go Green!

Hang signs that include eco-friendly tips like recycling, water-saving methods, or energy conservation ideas to teach students about sustainability practices.

16. Classroom Jobs Chart

Display a chart or sign with various classroom jobs assigned to different students each week to promote accountability and teamwork.

17. “Ask Three Before Me”

Encourage student independence by hanging this helpful reminder for students to confer with classmates before seeking help from you for common questions.

Conclusion

With these 17 adorable teacher signs, you can transform your classroom walls into an inspiring backdrop that encourages learning, growth, and camaraderie among your students. Creativity in decorating the classroom fosters an engaging atmosphere that often translates into increased motivation and academic success.

Transform a Cardboard Box into a Recycle Monster

Introduction

Recycling plays a crucial role in preserving our environment. But sometimes, it can become boring and monotonous for both kids and adults. Take your recycling game to the next level by transforming an ordinary cardboard box into a fun and engaging Recycle Monster! This exciting DIY project will not only ignite everyone’s creativity but also encourage family members to make recycling an enjoyable habit. Follow the steps below to create your very own Recycle Monster.

Materials Needed

1. A cardboard box (large size is preferable)

2. Scissors or a utility knife

3. Paint (green or other monster colors)

4. Paintbrushes

5. Gluestick or hot glue gun

6. Construction paper (assorted colors)

7. Googly eyes (various sizes)

8. Marker or pen

9. Trash bags

Step-by-Step guide: Creating Your Recycle Monster

1. Prepare the Cardboard Box:

Choose a large cardboard box that can hold a substantial amount of recyclables. Make sure it’s sturdy and clean for your creative project.

2. Cut Mouth and Eyes:

Use scissors or a utility knife to cut out the mouth of the Recycle Monster in the front of the cardboard box. Ensure that the opening is large enough for easily dropping cans, bottles, and paper items.

Next, cut out two eye holes on the upper part of the box’s front face.

3. Paint Your Monster:

Now, it’s time to bring color to your monster! Using green paint or any other monstrous hue, cover the entire surface of the cardboard box using a paintbrush. Allow it to dry completely.

4. Create Facial Features:

Use construction papers in assorted colors to make eyebrows, teeth, lips, or any other facial features you desire.

First, outline the desired shapes with a marker and then cut them out using scissors. Attach these cut-out shapes to the corresponding areas on the box using a glue stick or hot glue gun.

5. Add Googly Eyes:

Glue googly eyes of various sizes into the eye holes to create funny, monstrous expressions for your Recycle Monster.

6. Label Your Monster:

Don’t forget to add a label that indicates the recycling materials accepted by your Recycle Monster. You can make tongue-shaped signs or banners to stick on the front face of the box, mentioning distinctly about ‘aluminum,’ ‘plastics,’ or ‘paper.’

7. Prepare for Recycling:

Line the inside of your Recycle Monster with a large trash bag, so that it’ll be easy to remove and replace when it’s time to empty out the recyclables.

Conclusion

Congratulations! Your very own DIY Cardboard Recycle Monster is now ready and waiting to devour all those recyclable items. Make sure to place it in a central location where everyone can notice and use it.

This fun and engaging project encourages kids and adults alike to recycle regularly, promoting a greener and cleaner environment. After all, who wouldn’t want to feed a monster with yummy recyclables? Happy recycling!

15 Virtual Teaching Supplies to Make Your Life Easier

Introduction:

In today’s digital age, virtual teaching has become an essential part of education for many teachers and students around the world. With the increasing demand for online learning, it’s crucial for educators to be equipped with the right tools and supplies to make their virtual lessons more effective and engaging. In this article, we will explore 15 virtual teaching supplies that can help make your life as an online teacher easier.

1. High-Quality Webcam

A high-quality webcam is crucial for virtual teaching, allowing you to present yourself clearly and professionally during online classes.

2. Noise-Cancelling Headphones

Investing in a good pair of noise-cancelling headphones can help you focus on your lessons, reducing background noise and providing clear audio quality for your students.

3. Digital Whiteboard

A digital whiteboard allows you to write, draw, and erase just like a physical whiteboard, making explanations and illustrations simpler during your virtual sessions.

4. Interactive Learning Platforms

Utilize interactive learning platforms such as Google Classroom or Blackboard to engage students, create assignments, and track progress.

5. Screen-Share Software

Employ screen-sharing software like Zoom or Microsoft Teams to showcase presentations or demonstrate processes on your computer to students.

6. Virtual Timers & Clocks

Keep your lessons on track and help students manage time effectively with virtual timers and clocks that can be displayed prominently during your sessions.

7. Online Quizzing & Assessment Tools

Make assessments a breeze using online quizzing tools such as Kahoot! or Quizizz that provide engaging ways to test student knowledge while allowing you instant access to results.

8. PDF Annotation Tool

Make use of a PDF annotation tool like Kami or Adobe Acrobat Reader DC so you can easily annotate documents or textbooks during online lessons.

9. Digital Planner

Stay organized with a digital planner app like Trello or Notion to keep track of your lesson plans, assignments, and deadlines.

10. Breakout Room Functionality

Facilitate group work in virtual environments using breakout room features on platforms like Zoom, allowing students to collaborate and discuss in smaller groups.

11. Online Polling Tools

Gather feedback from students in real-time using online polling tools like Mentimeter or Poll Everywhere.

12. Graphic Design Software

Enhance your lessons with visually appealing presentations and materials using graphic design software like Canva or Piktochart.

13. Online File Storage & Sharing

Share documents, images, audio files, and videos efficiently with online storage platforms such as Google Drive or Dropbox.

`14. Virtual Reality (VR) & Augmented Reality (AR) Tools

Integrate immersive learning experiences into your lessons with VR & AR tools like Merge Cube or Google Expeditions.

15. Accessibility Tools

Ensure your online classes are accessible for all learners with accessibility software including text-to-speech applications and closed-captioning services.

Conclusion:

Embracing the right virtual teaching supplies can make your online teaching experience more efficient and enjoyable for both you and your students. By incorporating these 15 essential tools into your virtual classroom, you’re well on your way to providing an engaging and seamless learning environment for everyone involved.