Art Education

10 Online Drawing Games For Young Learners

Introduction:

Online drawing games are a creative and enjoyable way to engage young learners in their early stages of development. These interactive platforms encourage skills such as hand-eye coordination, creativity, problem-solving, and self-expression. Below is a list of 10 excellent and age-appropriate online drawing games for children to enjoy.

1. Sketchpad.io

This easy-to-use free online drawing platform offers various tools and vibrant colors to keep young learners fascinated. The user-friendly interface allows kids to create beautiful illustrations and share them with family, friends, or classmates.

2. Draw Something

This innovative multiplayer game combines artistic ability with puzzle-solving skills. Players take turns drawing images based on given words, while their partner guesses the word before the time runs out!

3. Pinturillo 2

Pinturillo 2 is an entertaining online multiplayer game where players must draw a picture representing the chosen word within an allotted time frame. Other players then have to guess the word by examining the artwork.

4. Tux Paint

Tux Paint is a colorful and exciting open-source drawing program specifically designed for young children between the ages of 3 and 12. This educational software offers various tools, sound effects, and animation capabilities that make the process even more enjoyable.

5. Quick Draw!

Quick Draw! is an AI-powered drawing game from Google that challenges users to create simple sketches within a limited time frame while the AI tries to guess what they’re drawing.

6. Thisissand

This unique platform allows kids to create detailed sand art by selecting various pigmented sand textures and layering them on top of each other. This visual experience develops fine motor skills as well as instills patience in young learners.

7. Coloringcrew.com

Coloringcrew.com has a large collection of digital coloring pages suitable for children of all ages, ranging from simple shapes to more complex illustrations. By offering multiple designs, this platform fuels creativity and helps develop attention to detail.

8. Draw A Stickman

This interactive storytelling game combines drawing with narrative elements, creating an engaging and personalized experience for young learners. As players draw their characters and make choices throughout the game, they become part of their own unique adventure.

9. Paint by BigNumber

This educational game promotes numerical recognition and hand-eye coordination as children paint pictures by associating numbers with specific colors. Paint by BigNumber helps develop fine motor skills while providing a visually appealing end product.

10. Draw In:

An unconventional drawing game, Draw In asks players to measure a line’s length to complete various images accurately. This entertaining platform encourages strategic thinking and spatial awareness in young minds.

Conclusion:

These 10 online drawing games encourage young learners to embrace their creativity and develop essential skills while having fun. Providing children with educational games can help foster cognitive development, problem-solving skills, and self-expression—making learning a captivating experience!


The Spectacle of the Red Arrows

Introduction:

The Red Arrows, formally known as the Royal Air Force Aerobatic Team, has been captivating audiences with their jaw-dropping air displays for over five decades. As one of the world’s premier aerobatic teams, their performances are a powerful symbol of British aviation prowess and an exciting demonstration of the incredible skills and capabilities of the air force. In this article, we will delve into the details of Primary Assembly and its significance in the Red Arrows’ spectacular aerial ballet.

Primary Assembly: The Backbone of a Successful Performance

Primary Assembly is a critical aspect of every Red Arrows performance. It is during this phase that members of the team carry out final checks, ensuring that each aircraft is in perfect condition before taking to the skies. Pilots, ground crew, and support staff work together to guarantee that all systems are functioning optimally while adhering to strict safety standards.

Preparing for Takeoff: The Pre-flight Rituals

Each member of the Red Arrows follows a meticulous pre-flight routine, carrying out tasks with discipline and precision. Beginning with a thorough examination of their Hawk T1 aircraft – which have been specifically designed for aerial displays – pilots inspect every aspect from fuel levels to avionics to ensure optimal performance. At the same time, support staff on the ground refuel aircraft, check tire pressures, and maintain close contact with air traffic control.

Briefing Time: The Last-Minute Coordination

Following these comprehensive checks, the entire team gathers for final briefing sessions. These essential meetings provide pilots with information on weather conditions, potential hazards during their flight path or display area. In addition, any last-minute changes to the planned routine are discussed among team members. These briefings also offer an opportunity for pilots to review tactical formations and manoeuvres designed to emphasize teamwork and harmony.

The Sky’s Limit: A Stunning Display of Teamwork and Precision

Once the aircraft are prepared and all necessary briefings have been conducted, it’s time for the Red Arrows to take to the skies for what is sure to be an awe-inspiring performance. Each member is acutely aware of their part in this breathtaking display – after all, it is teamwork that has made the Red Arrows a renowned aerobatic team.

In Conclusion:

Primary Assembly plays a pivotal role in making each Red Arrows performance a dazzling spectacle for audiences worldwide. The intricate coordination, precise execution, and attention to detail allow the Royal Air Force Aerobatic Team to demonstrate their incredible skill, perfectly illustrating British aviation expertise. Whether you’re a lifelong aviation enthusiast or a first-time spectator, one thing’s for certain – a Red Arrows performance guarantees an unforgettable experience.

20 Spooky Halloween Sensory Bottles Kids Will Love

Introduction:

Halloween is around the corner, and it’s the perfect time to get into the spirit of spookiness! If you’re looking for a fun, creative, and easy-to-do activity for your kids this Halloween season, sensory bottles are the way to go. Here are 20 spooky Halloween sensory bottle ideas that your little ones will absolutely love!

1. Slime Sensory Bottle

Create a gooey, green slime filled sensory bottle with glow in the dark glitter – perfect for a spine-chilling experience!

2. Floating Eyeballs Bottle

Fill a clear bottle with water, add some colored floating eyeballs to create a creepy-looking sensory experience!

3. Ghostly Water Beads Bottle

Combine water beads and ghostly figurines in a bottle filled with water for a ghoulish result.

4. Spider Web Sensory Bottle

Add stretchy spider web material and plastic spiders in an orange-tinted water-filled bottle for an eerie spider web effect.

5. Zombie Brains Sensory Bottle

Fill a bottle with green or red colored cooked spaghetti to imitate slimy zombie brains.

6. Haunted House Silhouette Bottle

Add haunted house silhouette stickers inside a clear bottle, filled with Halloween-colored beads or confetti.

7. Glow-in-the-Dark Lava Lamp Bottle

Combine glow-in-the-dark paint and oil in a water-filled bottle to create this bewitching lava lamp effect.

8. Mini Pumpkin Sensory Bottle

Add mini pumpkins and glitter or sequins into water-filled bottles for an autumnal Halloween feel.

9. Monster Eye Potion Bottle

Use googly eyes of different sizes along with colored liquid inside a clear bottle for a monster eye potion experience.

10. Frankenstein Foam Sensory Bottle

Combine green shaving foam and plastic bolts inside an empty bottle to craft your very own Frankenstein monster sensory bottle.

11. Witch’s Brew Sensory Bottle

Mix purple or green glitter glue, water and spooky witch-themed embellishments to concoct your very own witch’s brew!

12. Vampire Blood Sensory Bottle

Fill a clear bottle with red water beads to give the illusion of vampire blood.

13. Eerie Cemetery Landscape Bottle

Layer black or dark brown sand and cemetery figurines inside a clear bottle for a mini-Halloween landscape.

14. Skeleton Dance Sensory Bottle

Add mini plastic skeletons, water, and glitter into a bottle to mimic dancing skeletons when you shake it.

15. Sinister Fog Bottle

Squirt white paint into a water-filled bottle for a spooky fog effect when you twirl the bottle around.

16. Werewolf Fur Sensory Bottle

Fill an empty container with black and brown shredded fur for a werewolf-theme tactile experience.

17. Mummy Wrap Sensory Bottle

Coil white yarn inside a clear bottle for an enthralling mummy wrap effect.

18. Cauldron Bubbling Sensory Bottle

Layer black glitter, green foam beads, and Halloween-themed confetti in an empty bottle to mimic a murky and mysterious cauldron bubble mixture.

19. Haunted Forest Sensory Bottle

Arrange small black tree figurines along with orange or purple sequins inside a clear container for an enigmatic forest scene.

20. Spellbinding Galaxy Bottle

Create your own magical Halloween galaxy using dark purple or navy blue food color, glitter and cotton balls in an empty container.

Conclusion:

These 20 spooky Halloween sensory bottle ideas will undoubtedly capture the excitement and intrigue of the season for your kids! This entertaining, hands-on activity not only develops fine motor skills but also allows them to explore various textures and materials, making learning fun during this eerie holiday!

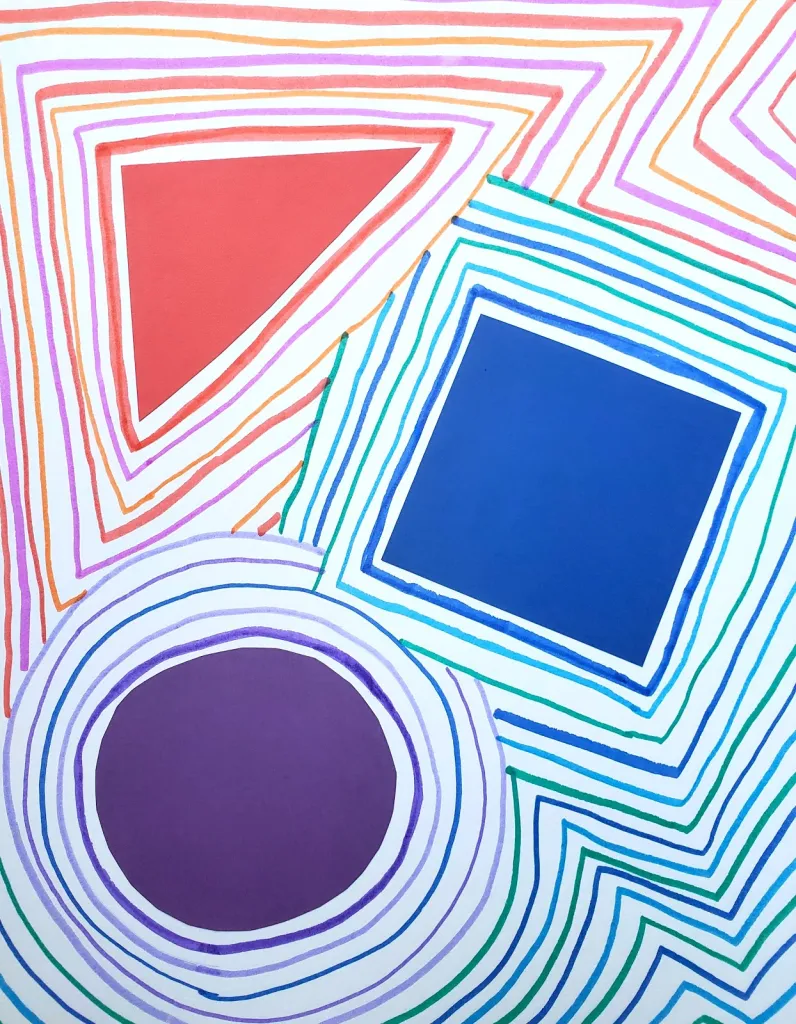
Inspiring Creativity: 24 Line Art Activities for Kids

Encouraging creativity in children provides them with opportunities to explore their imagination, develop cognitive abilities, and foster self-expression. Line art activities are an excellent way to inspire children to tap into their creative sides. Here are 24 engaging and fun line art activities for kids that parents and teachers can try.

1. Connect the Dots: Create a series of dots on a piece of paper, and have your child connect them to form a recognizable shape or figure.

2. Continuous Line Drawing: Challenge your child to draw a picture without lifting their pen or pencil from the paper.

3. String Art: Use nails and string to create geometric patterns or shapes on a wooden board or cardboard.

4. Tracing Shadows: Trace your child’s shadow onto a sidewalk using chalk, and ask them to decorate it with details and colors.

5. Finger Painting: Replace paintbrushes with fingers, allowing your child to explore texture and color freely.

6. Tape Resist Art: Use painter’s tape or masking tape to create patterns or shapes on a canvas. Encourage your child to paint over the tape before removing it to reveal the design.

7. Zentangle Patterns: Teach your child how to draw repetitive patterns within a fixed space, creating intricate designs known as Zentangles.

8. Mirror Drawing: Fold a sheet of paper in half, draw half an image on one side, then challenge your child to complete the mirror image on the other side.

9. Scribble Art: Have your child scribble freely on paper – then, search for recognizable shapes or figures within the random lines.

10. Blind Contour Drawing: Without looking at their paper, ask your child to draw an object by closely observing its outline – this exercise improves focus and observational skills.

11. Etch-A-Sketch Fun: Encourage children to create images using only straight lines on an Etch-A-Sketch toy.

12. Spirograph: Use a spirograph kit to help your child create intricate geometric designs with ease.

13. Leaf Rubbing Art: Place a leaf under a sheet of paper and have your child rub a crayon over it, revealing the leaf’s outline and details.

14. Chalk Drawing: Grab some sidewalk chalk and encourage your child to create an outdoor masterpiece on the pavement or driveway.

15. Coffee Stirrer Art: Use coffee stirrers or toothpicks dipped in paint to create unique line art patterns.

16. Marble Painting: Place marbles dipped in paint into a container and ask your child to roll them around, creating interesting lines and shapes.

17. Straw Blown Painting: Allow your child to create abstract art by blowing paint across paper using straws.

18. Light Painting: In a dark room, give your child a glow stick or flashlight and take long exposure pictures while they draw with light.

19. Raindrop Art: Color on paper with water-soluble markers or crayons, then let raindrops fall onto it, creating unique effects as the colors blend together.

20. Paper Collage: Cut strips of colorful paper and have your child glue them onto another sheet in creative patterns or shapes.

21. Sandpaper Art: Encourage children to draw directly on sandpaper, emphasizing texture exploration.

22. Grid Drawing: Create a grid on a reference image, asking your child to replicate the image square by square – this exercise helps improve observational skills.

23. Origami Creations: Teach children how to fold paper into various shapes using the Japanese art of origami.

24. Geometric Coloring Pages: Print out geometric patterns for your child to color – these designs encourage creativity while also providing relaxation benefits through coloring.

A Step-by-Step Activity Guide to Create a Gratitude Jar

Introduction

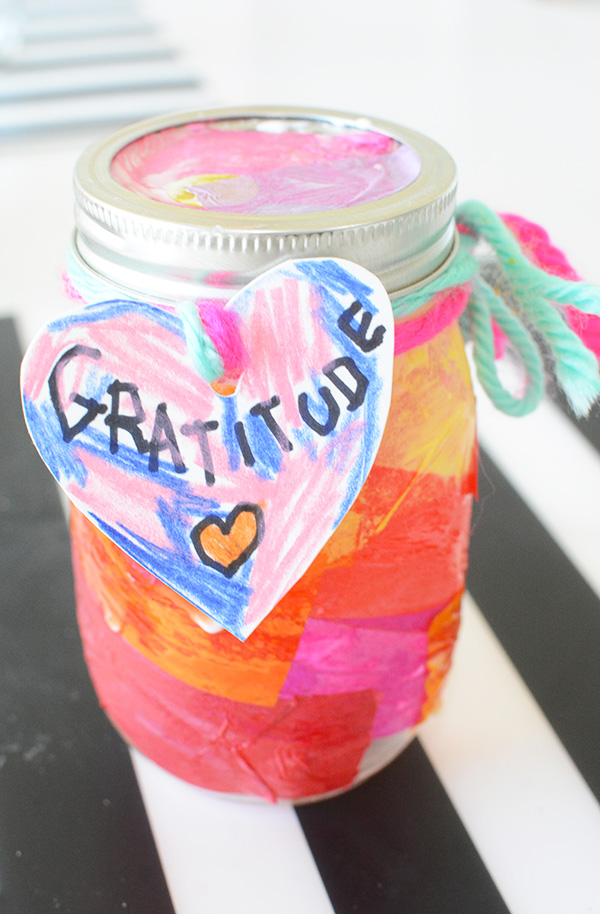
A gratitude jar is a simple and powerful tool to cultivate positivity and mindfulness in our daily lives. It encourages the habit of acknowledging and appreciating the good things we experience, helping us focus on what we have instead of what we lack. In this article, we present a step-by-step activity guide to create your own gratitude jar.

What You’ll Need:

– A jar (any size or material will do)

– Paper

– Pen or pencil

– Colored markers or pens (optional)

– Decorative materials (stickers, ribbons, etc., optional)

Step 1: Choose Your Jar

Find a jar that you’d like to use as your gratitude jar. It can be any size or material – just make sure it has a lid or a way to close it.

Step 2: Decorate Your Jar (Optional)

To make your gratitude jar more personal and inviting, consider decorating it. Use stickers, ribbons, paint, or anything else you’d like to beautify your jar. Decorating it can also serve as a fun creative activity and help set the tone for practicing gratitude.

Step 3: Prepare Note Slips

Cut small pieces of paper into slips that can fit into your jar. These slips will be used for writing the things you’re grateful for. You may want to choose colored paper or use different colors for various categories of gratitude, such as people, experiences, moments, etc.

Step 4: Set Up Your Gratitude Station

Find a spot in your home where you can easily access and see your gratitude jar daily. This can be on your desk, nightstand, kitchen counter – wherever serves as a constant reminder to practice gratitude.

Step 5: Start Writing What You’re Grateful For

Now that your gratitude jar is set up and ready-to-use, take some time each day – or whenever you feel inspired – to write down things you’re grateful for. These can be as simple or profound as you’d like. Remember to date your slips so you can look back and reflect on specific moments of gratitude later.

Step 6: Fill Your Jar

As you continue to acknowledge and appreciate the good things in your life, your gratitude jar will begin to fill up with these wonderful moments and reminders. Watch as it transforms into a visual representation of the abundance in your life.

Step 7: Reflect Periodically

Every so often, take time to reflect on the notes in your gratitude jar. This could be at the end of each month, during challenging times, or whenever you need a little pick-me-up. As you read through your notes, relive those moments of gratitude and recognize the positivity in your life.

Conclusion

Creating a gratitude jar serves as an effective and enjoyable reminder to appreciate the good things in our lives. By actively noticing these moments, we train ourselves to focus more on positivity and develop an attitude of gratitude. Give it a try and experience the powerful impact it can have on your wellbeing and mental health.

20 Colorful Chalk Activities for Elementary School

Chalk is an affordable, versatile, and accessible art supply that can spark creativity in children of all ages. Here are 20 fun and colorful chalk activities that elementary school students can enjoy.

1. Chalk Pictionary: Divide the class into teams and have students take turns drawing images with chalk for their teammates to guess.

2. Chalk Splatter Painting: Fill balloons with watered-down chalk paint and let students throw them at a large sheet of paper to create a colorful splatter effect.

3. Chalk Obstacle Course: Create an outdoor obstacle course using chalk to mark pathways, hopscotch squares, and other challenges.

4. Alphabet Chalk Race: Have students race to write the alphabet with chalk on the sidewalk or playground.

5. Chalk Solar System: Encourage students to research and draw an accurate representation of our solar system on the pavement.

6. Sight Word Hopscotch: Write different sight words on each square of a hopscotch grid, having students read the words as they hop through the game.

7. Living Drawings: Have children lay down on pavement as you trace their bodies with chalk, then let them decorate their “living drawing” with clothes, faces, and other details.

8. DIY Chalk Paint: Teach kids how to make their own chalk paint by mixing cornstarch, water, and food coloring, then unleash their creativity on the sidewalk or paper.

9. Math Equation Relay: Write math equations in chalk on the ground and have students race to solve them in teams.

10. Colorful Mural Collaboration: Have the entire class work together to create a giant chalk mural on the pavement or blacktop.

11. Geometric Shape Hunt: Encourage kids to search for hidden geometric shapes drawn around the schoolyard or playground with chalk.

12. Chalk Nature Walk: Take a nature walk and use chalk to label plants, trees, and other natural elements along the way.

13. Chalk Charades: Play a game of charades, with students drawing their clues on the pavement with chalk instead of acting them out.

14. Chalk Maze: Design a large and intricate chalk maze for students to navigate and explore.

15. Tic-Tac-Toe Tournament: Hold an outdoor tic-tac-toe tournament using chalk to draw the game boards on the pavement.

16. Color Mixing Experiment: Teach students about color theory by having them mix different colors of chalk together on the ground.

17. Chalk Timeline: Create a timeline of historic events using chalk drawings, dates, and descriptions.

18. Symmetrical Chalk Drawings: Challenge students to create symmetrical images using their own designs or replicate simple shapes.

19. Chalk Poetry: Encourage students to write poems on the sidewalk with chalk, then have classmates try to decipher each other’s handwriting.

20. Giant Chalk Board Game: Inspire students to design their own life-sized board game on the playground using chalk for the board and themselves as game pieces.

These 20 colorful chalk activities provide a fun way to engage elementary school students both in and outside of the classroom, fostering creativity, teamwork, and academic skills in an enjoyable way.

Airborne Adventures: How To Make Paper Airplanes

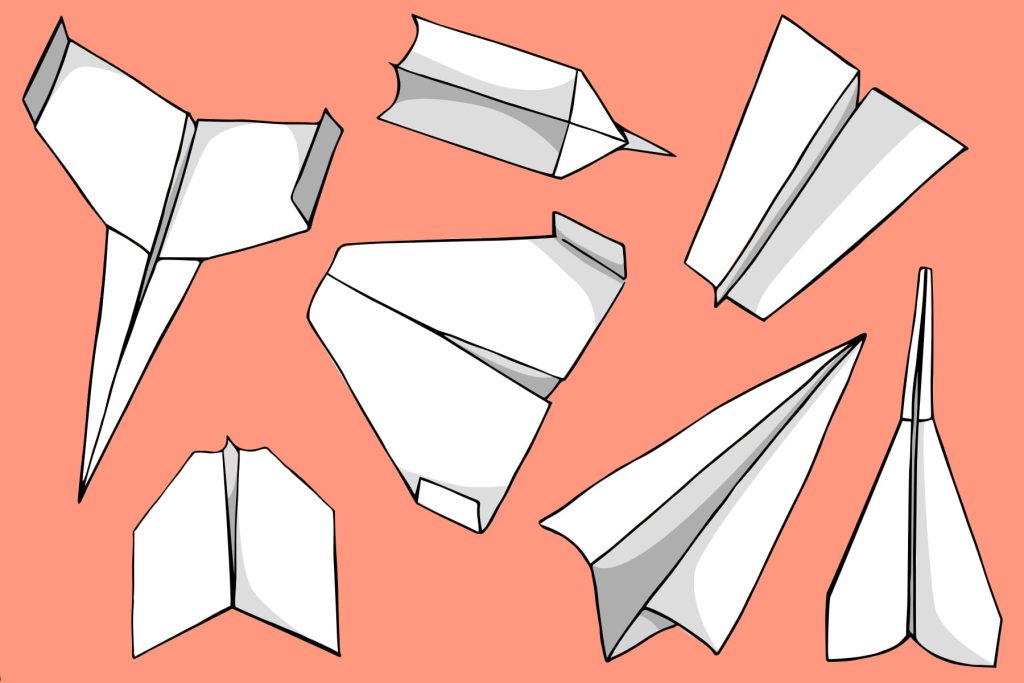
Paper airplanes have been a popular pastime for people of all ages for many years, transforming a simple piece of paper into a gliding wonder. In this article, let’s explore the art of paper airplane-making and learn how to embark on our own airborne adventures.

Step 1: Choose Your Paper

Selecting the right paper is crucial to making a successful paper airplane. Standard letter-size printer paper (8.5″ x 11″) works best. Choose a lightweight and flexible paper, as heavier cardstock can be difficult to fold.

Step 2: Basic Airplane Model – The Dart

The Dart is a classic and straightforward paper airplane design. To create it, follow these steps:

1. Place the paper in front of you in landscape orientation.

2. Fold the paper in half lengthwise and unfold.

3. With your fingers at the top two corners, fold both corners inwards so they meet at the center crease.

4. Fold in the top triangle down so its tip touches the bottom edge of the paper.

5. Fold both top corners inward again, creating diagonal folds that meet at the center crease.

6. Fold your airplane in half along the centerline, with all your folded edges on the outside.

7. Finally, fold both wings downward with parallel outer edges until their ends meet your airline’s base.

Step 3: Advanced Airplane Model – The Stealth

For those looking for a more advanced model, try out The Stealth:

1. Start with your paper in portrait orientation.

2. Fold the top right corner to meet and align with the left edge.

3. Repeat with the top left corner to create an X-shaped crease pattern.

4. Unfold your previous two folds and then fold down the top corner until its tip touches where both diagonal creases intersect.

5. Refold your diagonal folds, tucking them under the top triangle.

6. Fold the two bottom corners up to meet the top triangle’s edges, creating a diamond shape.

7. Fold the bottom tip of the diamond upwards, aligning it with the top tip.

8. Flip your paper over and fold it in half along the centerline, ensuring all folded edges are on the outside.

9. Fold down each wing about an inch from the centerline to create The Stealth’s sleek shape.

Step 4: Customizing Your Airplane

Experiment with various materials, folding techniques, and designs to create personalized airplanes. Get creative by adding patterns, colors, or drawings to your plane!

Step 5: Mastering Your Launch

The key to a successful paper airplane flight is all in the launch. Hold your airplane at its center of gravity (usually just behind the nose) between your thumb and index finger. Aim upwards at a slight angle and throw gently but firmly.

Step 6: Fine-Tuning Your Flight

Your paper airplane may require some adjustments for optimal gliding. Bend the back of each wing slightly upward for better lift, or adjust wing angles to influence direction.

Now that you know how to make paper airplanes embark on your own airborne adventures! Experiment, learn, and explore – let your creativity soar as high as your aircraft!

Top 10 True Colors Activities For Students To Try

Introduction

True Colors is a personality assessment tool that helps individuals understand their own unique strengths, preferences, and styles. This method is often used in classrooms as a fun way for students to learn more about themselves and each other. By incorporating True Colors activities into your curriculum, you can encourage teamwork, communication, self-awareness, and empathy among your students. Here’s a list of the top 10 True Colors activities for students to try.

1. True Colors Personality Test

Begin with a simple True Colors personality test to identify each student’s color spectrum. The test consists of a series of questions that help categorize students into one of four primary colors: blue (relationship-oriented), green (analytical), gold (organized), or orange (spontaneous). Once the students have determined their colors, they can share and discuss their results with the class.

2. Color Collage

Create a color collage for each primary color group by having students search magazines or online images that represent their assigned color’s characteristics. Each group should then present their collage to the class, showcasing how the chosen images depict their color’s traits.

3. Colorful Interviews

Pair students with different colors and have them interview each other about the qualities they possess related to their color groups. This activity allows students to learn how others perceive themselves and helps with understanding different personality types.

4. True Colors Skits

Have students create short skits demonstrating the personality traits of each color group. They can draw on personal experiences or create fictional scenarios. This activity encourages creativity while reinforcing the concept of different personality types.

5. Color Circles Debate

Organize a debate on a specific topic, arranging students in groups based on their primary colors. Each group must argue from the perspective of their color’s strengths and preferences, promoting communication and critical thinking skills centered around their True Colors classification.

6. Colorful Conversations

Students must engage in a small talk conversation with someone in each of the other color groups. This encourages them to make connections, ask questions, and build rapport with classmates who have different True Colors results.

7. Color Team Building

Assign students a team project that requires each member to contribute a specific aspect of their color’s strengths. For example, greens may be responsible for data analysis while blues focus on group dynamics. This highlights the importance of collaboration and embracing diverse skill sets.

8. Color Matchmaker

Students must find a partner in the same primary color category and come up with three goals they have in common. This encourages deeper connections and self-reflection among those with similar personality traits.

9. True Colors Bingo

Create custom bingo cards featuring personality traits from each of the four primary colors. Students will walk around, discussing their traits with classmates, and marking off squares on their bingo card when they find someone representing that trait. This activity enhances social skills and understanding of the different personalities in a fun way.

10. Reflective Journaling

Have students journal about their thoughts, feelings, and experiences after participating in these True Colors activities. Encourage them to consider how this new understanding of themselves and others could benefit them both academically and personally.

Conclusion

True Colors activities offer valuable opportunities for students to explore their own personalities, appreciate their peers’ unique strengths, and foster teamwork in diverse group settings. By implementing these top 10 True Colors activities, you can create an engaging environment where all students feel understood, valued, and part of a vibrant learning community.

20 Primary Coloring Games That Are So Much Fun And Educational!

Introduction:

Coloring games are an excellent way for children to learn and have fun simultaneously. These games help develop their creativity, hand-eye coordination, and cognitive skills. We’ve compiled a list of 20 primary coloring games that are perfect for promoting learning while having a blast!

1. Color By Number: This educational game teaches your child basic number recognition and color matching skills by coloring numbered sections with the corresponding color.

2. Paint Online: Allow your child to explore various brushes, colors, and patterns to build their artistic skills.

3. ABC Coloring Pages: Teach your child the alphabet while they enjoy coloring in letters and associated pictures.

4. Coloring Shapes: Introduce basic shapes and have your child color them in as they learn to recognize and differentiate them.

5. Animal Coloring Pages: Encourage your child’s love for animals while enhancing their color recognition through various animal-themed coloring sheets.

6. Memory Coloring Game: Test your child’s memory and coloring skills by recreating images from memory after only a brief glance.

7. Color Mixing Game: Develop an understanding of color mixing by having your child experiment with different color combinations.

8. Symmetry Coloring Pages: Teach symmetry through artistic expression by having your child fill one side of the paper with colors or patterns that must be mirrored on the other side.

9. Pixel Art Game: Your child can practice precision skills as they create pixelated images using specific colors.

10. Dot-to-Dot Coloring Pages: Develop fine motor control by connecting dots to reveal a picture that can then be colored in.

11. Spot The Difference Coloring Game: Challenge your child’s attention to detail by spotting differences between two almost identical images, then coloring them in to make them match exactly!

12. Color Theory Game: Introduce your child to color wheels, shades, tones, and tints to understand basic principles of color theory.

13. LEGO Coloring Pages: Combine the love for building with the excitement of coloring through LEGO-themed coloring sheets.

14. DIY Coloring Book: Let your child create their own custom coloring book by drawing the outlines and filling them in with colors.

15. Anatomy Coloring Pages: Teach basic anatomy to your child using educational coloring pages that feature different systems and organs within the human body.

16. World Map Coloring Pages: Enhance your child’s knowledge of geography as they color in different countries and continents.

17. Space-themed Coloring Pages: Spark your child’s interest in outer space while they color planets, galaxies, astronauts, and more!

18. 3D Coloring Games: Utilize 3D coloring programs that allow for interactive, virtual reality coloring experiences.

19. Pattern Coloring Pages: Develop spatial awareness and precision by naming patterns as intricate as mandalas or simple geometric designs.

20. Storytelling Coloring Pages: Allow your child to create their own stories by coloring scenes that tell a narrative from beginning to end.

Conclusion:

Integrating these 20 primary coloring games into your child’s playtime not only makes learning fun, but also nurtures artistic and cognitive abilities. Watch as your child masters colors, shapes, numbers, and so much more while enjoying every stroke of their creative process!

22 Spectacular Manga for Kids

Introduction:

Manga, the popular style of comics originating in Japan, has gained worldwide recognition and found a broad readership spanning generations. The captivating illustrations, engaging storylines, and immersive world-building make Manga a fantastic choice for young readers. With a vast array of genres to choose from, there is a Manga series out there that will spark any child’s imagination. In this article, we present 22 spectacular Manga for kids to explore and enjoy.

1. Pokémon Adventures by Hidenori Kusaka

2. Chi’s Sweet Home by Kanata Konami

3. Doraemon by Fujiko F. Fujio

4. Cardcaptor Sakura by CLAMP

5. Yotsuba&! by Kiyohiko Azuma

6. Little Witch Academia by Yoh Yoshinari & TRIGGER

7. Mega Man NT Warrior by Ryo Takamisaki

8. ChocoMimi by Konami Sonoda

9. Splatoon by Sankichi Hinodeya

10. Magical Pokémon Journey by Yumi Tsukirino

11. My Neighbor Seki by Takuma Morishige

12. Dragon Ball Z (Color Edition) by Akira Toriyama

13. Astro Boy Omnibus Volume 1-2-3 set (Limited Edition)  by Osamu Tezuka

14. Beastars 1 (Volumes 1 through 8) by Paru Itagaki

15. The Legend of Zelda: Twilight Princess, Vol 1-6 set (Limited Edition)  by Akira Himekawa

16. Sgt Frog 1-4 (Limited Edition) by Mine Yoshizaki

17. Inuyasha (color version) Volumes 1-30 in Comic Complete Set [Used] [Full Set]   Rumiko Takahashi

18.  FullMetal Alchemist Box Set / Volumes 1-27 (Limited Edition) by Hiromu Arakawa

19.  Attack on Titan (color version) Volumes 1-20 in Comic Complete Set [Used] [Full Set]    Hajime Isayama

20.  Jojo’s Bizarre Adventure: Phantom Blood to 3 Michelin Star Adventure Part (6 volumes)     Hirohiko Araki

21. A Silent Voice Complete Series Box Set by Yoshitoki Oima

22. Your Name by Makoto Shinkai and Ranmaru Kotone

Conclusion:

These 22 spectacular Manga series for kids offer a little something for everyone – from the classic adventures of Pokémon to the fun-filled antics of Chi’s Sweet Home. Introducing your child to Manga can help open up their world to new cultures, unique illustrations, and stories that will captivate their imagination. So why not pick up a series or two from this list and start exploring the wonderful world of Manga together with your child?