Tech Advice

Troubleshooting Putty Network Error: Connection Refused

Introduction:

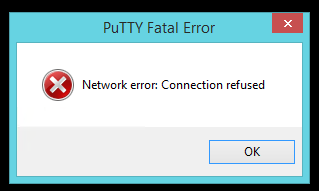
The Putty network error “Connection Refused” is a common issue faced by users when attempting to establish an SSH connection. This article will provide an in-depth analysis of the error, its common causes, and possible solutions to help users resolve this issue.

Causes of Putty Network Error: Connection Refused

1. Incorrect IP address or Hostname: The most common cause of a “Connection Refused” error is an incorrect IP address or hostname being used to establish the connection. Double-check the IP and hostname to ensure they are correct before attempting the connection again.

2. Firewall Restrictions: Firewalls can sometimes block the necessary ports for an SSH connection, leading to a “Connection Refused” error. Verify that your network’s firewall settings allow outbound SSH connections on port 22 (or whichever port you are using for SSH).

3. No SSH Service Running on the Server: Another possible reason for a “Connection Refused” error is that no SSH service is running on the remote system you are trying to connect to. Check if an SSH server is installed and active on the remote system.

4. Incorrect Port Number: If you are using a non-standard port for your SSH connection, it is possible that the port number has been inputted incorrectly. Double-check your port settings and try connecting again with the correct port number.

5. Server Downtime: In some cases, a temporary server downtime may be responsible for a “Connection Refused” error message. In such cases, wait for some time and try connecting again once the server is back online.

Solutions for Putty Network Error: Connection Refused

1. Verify IP Address and Hostname: Ensure that you are entering the correct IP address or hostname when establishing an SSH connection using Putty.

2. Check Firewall Settings: Confirm that your firewall settings allow outbound SSH connections on the necessary ports. You may need to consult your network administrator or refer to your firewall’s documentation for instructions on managing the settings.

3. Confirm SSH Service is Running on the Server: Log into the remote system and confirm that an SSH server is installed and running. Depending on the operating system, you can use commands like “systemctl status sshd” or “service ssh status” to check this.

4. Double-check Port Number: Make sure you are using the correct port number when attempting to establish an SSH connection.

5. Be Patient During Server Downtime: If a server downtime is responsible for a “Connection Refused” error, try connecting again after some time when the server is back online.

Conclusion:

In summary, a Putty network error “Connection Refused” can occur due to various reasons, including incorrect IP addresses, firewall restrictions, and inactive SSH services. By following the troubleshooting steps listed in this article, you should be able to resolve this issue and successfully establish an SSH connection using Putty.

Connecting Your Nintendo Switch Joy-Cons to Your iPad and iPhone

Introduction:

If you’re a fan of gaming on the go, you’re probably well acquainted with the easy-to-use Nintendo Switch console. But what if you could make playing your favorite mobile games on your iPad and iPhone even more fun by using your Nintendo Switch Joy-Cons as controllers? In this article, we’ll explain how you can connect your Nintendo Switch Joy-Cons to your iOS devices for an even better gaming experience.

Required Tools:

To connect your Joy-Cons to an iPhone or iPad, you will need the following tools:

1. A pair of disconnected Nintendo Switch Joy-Con controllers.

2. An iPad or iPhone running iOS 13 or higher.

3. The nControl app from Cydia repository ($9.99) – this allows you to sync your controllers with iOS devices.

Step-by-Step Guide:

Follow these steps to connect your Nintendo Switch Joy-Cons to your iPad or iPhone.

Step 1: Prepare Your iPhone or iPad

Before starting, ensure that your device is running on iOS 13 or higher. You can check this by going to Settings > General > About and look for ‘Software Version.’

Step 2: Install nControl

On your iPad or iPhone, open Safari, search for Cydia repository, and purchase the nControl app ($9.99). This app will enable the communication between your iOS device and the Nintendo Switch Joy-Cons.

3: Connect Your Joy-Cons via Bluetooth

Disconnect both Joy-Con controllers from your Nintendo Switch by pressing the small button on the back of each controller and sliding them out. Then, open the nControl app on your iPad or iPhone.

Step 4: Pair Your Joy-Cons

On your iOS device, go to Settings > Bluetooth, and turn on your Bluetooth if it’s not already enabled. Press and hold the sync button (located between the SL and SR buttons) on each Joy-Con controller to put them in pairing mode. They will appear as ‘Joy-Con (L)’ and ‘Joy-Con (R)’ in your device’s list of available Bluetooth devices.

Step 5: Establish the Connection

Tap on each Joy-Con (L or R) on your iOS device’s Bluetooth menu to connect the controllers. Once connected, both controllers will show up on the nControl app’s home screen.

Step 6: Configure Your Joy-Cons in Your Games

Once you’ve successfully connected both Joy-Cons to your iPad or iPhone, they should now work with any game that supports MFi controllers. Setup may vary depending on the specific apps you use, but generally, you can access controller settings in-game or from the game’s main menu.

Conclusion:

By following these steps, you should be able to connect your Nintendo Switch Joy-Cons to your iPad or iPhone and enjoy a more immersive gaming experience. Whether you’re playing Fortnite, Oceanhorn 2, or any other mobile game that supports MFi controllers, using your Joy-Cons can make all the difference between a casual gaming session and an unforgettable one.

The 13 Best True Crime Podcasts of 2023

Introduction:

As enthusiasts of true crime stories, podcasts have become an essential and gripping source of content for millions of listeners worldwide. With a vast number of shows to choose from, here’s our curated list of the top 13 true crime podcasts for you to indulge in during 2023.

1. Serial: This classic true crime podcast, hosted by Sarah Koenig, delves deep into intriguing criminal cases to uncover hidden truths and question the justice system.

2. My Favorite Murder: Hosts Karen Kilgariff and Georgia Hardstark share gripping true crime stories with a dash of humor. Their unique storytelling style keeps listeners captivated till the end.

3. Casefile: This thrilling podcast features in-depth looks into crimes from around the world, engaging listeners with its thorough research and impeccable narration.

4. Criminal: Phoebe Judge hosts this riveting show that explores diverse crime stories, blending captivating interviews with immersive sound design.

5. Sword and Scale: Hosted by Mike Boudet, this daring podcast delves into the darker side of humanity, engaging audiences through engaging narratives and expert interviews.

6. The Teacher’s Pet: Journalist Hedley Thomas takes a deep dive into a cold case involving a missing wife and mother, leading him on an incredible journey that uncovers shocking secrets.

7. Cold: In this chilling series, reporter Dave Cawley unravels the twisted story behind the disappearance of Susan Powell, leaving no stone unturned in his quest for justice.

8. Accused: Host Amber Hunt investigates unsolved cases in this exciting podcast, searching for answers while spotlighting the flaws within our legal system.

9. Someone Knows Something: Filmmaker David Ridgen dives into cold cases to give families closure while keeping listeners engrossed through his empathetic storytelling approach.

10. Up and Vanished: Documentary filmmaker Payne Lindsey tackles unsolved disappearances in this thrilling podcast, inspiring armchair sleuths and fueling suspenseful storytelling.

11. Bear Brook: Host Jason Moon illuminates the mystery surrounding unidentified bodies discovered in a New Hampshire state park and the journey to uncover their stories.

12. The Clearing: Hosted by investigative journalist, Josh Dean, this gripping series delves into the harrowing tale of April Balascio, who discovered that her father was a prolific serial killer.

13. Dark Air: Terry Carnation, played by Rainn Wilson, examines bizarre true crime tales with a unique blend of humor and intrigue, entertaining audiences with unusual insights into investigations.

Conclusion:

These top 13 true crime podcasts of 2023 provide hours of enthralling stories and investigations for listeners to explore. Whether you’re an avid fan or new to this captivating genre, there’s something intriguing for everyone in this diverse selection of shows.

The Cheapest Fruits and Veggies You Can Buy Right Now

Introduction:

Eating healthy on a budget is not an easy task, especially when most fresh fruits and vegetables come with a hefty price tag. However, it’s possible to add nutrient-packed produce to your diet without breaking the bank. In this article, we’ll explore some of the cheapest fruits and veggies available right now that can help you maintain your health and save money at the same time.

1. Bananas

Bananas are a nutritious choice that can often be found at a low cost per pound. They are rich in potassium, fiber, and vitamin C, making them a healthy addition to your meals or as a quick snack. Their natural sweetness also makes them suitable for smoothies and desserts.

2. Oranges

Oranges are another affordable fruit option that provides vital nutrients like vitamin C and fiber. Eating oranges regularly can aid in boosting your immune system, improving skin health, and promoting heart health.

3. Apples

Apples are not only affordable but also versatile in their use. They can be eaten raw, added to salads, or used in baking recipes like pies and tarts. They offer various health benefits such as providing antioxidants, regulating blood sugar levels, and aiding in digestion.

4. Carrots

Carrots are a nutritious root vegetable that can usually be found at reasonable prices. With their abundance of vitamin A, they promote good vision and skin health. You can eat carrots raw as a snack or incorporate them into recipes for soups, salads, or side dishes.

5. Broccoli

Broccoli is an excellent source of vitamins K and C while being budget-friendly as well. It contains various compounds beneficial for cancer prevention and digestion support. Broccoli can be eaten raw or cooked as part of healthy dishes like stir-fries and pasta dishes.

6. Spinach

Spinach is an affordable leafy green packed with nutrients, including iron, calcium, and vitamins A, C, and K. It can be enjoyed in salads, sautéed as a side dish, or added to recipes like smoothies and omelets.

7. Cabbage

Cabbage is another low-cost vegetable that offers substantial health benefits. It is rich in vitamins C and K and has ample dietary fiber. Cabbage works well in coleslaw or can be used as a wrap for various fillings.

Conclusion:

Incorporating cheap fruits and veggies into your daily meals is an affordable way to maintain a healthy diet without sacrificing taste. By opting for these budget-friendly options, you can improve your overall well-being while keeping your wallet intact.

The 5 Best Airport Simulation Games

Introduction:

Airport simulation games have gained popularity over the years, offering players the chance to manage their own virtual airport and take on challenges that come with running an aviation empire. Each game boasts unique features, engaging gameplay, and realistic simulations that can keep aviation enthusiasts entertained for hours. In this article, we present the five best airport simulation games that you should consider playing.

1. Airport CEO

Airport CEO is a highly detailed game that allows players to build, manage, and maintain their own custom-designed airport. The game presents players with numerous architectural choices and management decisions, from designing the terminal and runway layout to hiring staff members and negotiating contracts with airlines.

Key Features:

– Highly customizable building options

– Complex economic system

– Multiple levels of staff management

– Supports modding community

2. SimAirport

SimAirport is an airline tycoon simulation game that offers a challenging yet accessible experience for gamers of all skill levels. With an intuitive design interface, players can easily create their dream airports by adding runways, taxiways, and gates while managing flights and scheduling airlines.

Key Features:

– Easy-to-use interface

– Expansive research & development tree

– Real-time airport management

– Active developer community for rapid updates and improvements

3. Tower!3D Pro

Tower!3D Pro focuses on the control tower aspect of airport operations. Players assume the role of an air traffic controller responsible for directing incoming planes for take-off or landing. The game demands quick thinking and strategic planning in order to avoid collisions and ensure smooth traffic flow.

Key Features:

– Advanced speech recognition system

– Real-world aircraft models

– Realistic weather effects and changing scenery

– Multiple difficulty levels to cater to different skill levels

4. Sky Haven

Sky Haven is another airport management game that dives deep into the history of aviation. Players start from a small airfield in the early 1900s, gradually upgrading and expanding their airport infrastructure through different eras of aviation history.

Key Features:

– Unique time progression system

– Detailed aircraft and airport equipment from different decades

– Research-oriented gameplay to unlock new technologies

– Dynamic economy that influences gameplay decisions

5. Airport Madness 3D

Airport Madness 3D is an air traffic control game that offers a more casual gameplay experience compared to others on this list. Players must manage flights across various airports, keeping planes at safe distances from one another. Faster reactions are necessary as traffic increases and new challenges arise.

Key Features:

– Simple yet engaging gameplay mechanics

– Multiple camera angles for a more immersive view

– Varied airport layouts for different difficulty levels

– Includes real-life airports from around the world

Conclusion:

Whether you are an aviation enthusiast or someone looking for a challenging and enjoyable gaming experience, these five airport simulation games offer something for everyone. From designing your own terminal to maintaining runways and managing flights, each game brings unique features and gameplay elements that will keep you entertained for hours on end. So, buckle up and get ready to soar through the skies in the comfort of your own digital control tower!

Purple vs. Nectar Mattress Review: Which is Better for Your Sleep Needs?

Introduction

In the search for the perfect mattress, two brands have emerged as strong contenders offering innovative technologies and unique designs to improve sleep quality: Purple and Nectar. Both companies have gained a loyal following, and their respective mattresses are receiving considerable attention. In this comprehensive review, we will compare the Purple and Nectar mattresses’ features; helping you make an informed decision, tailored to your sleep needs.

Materials and Construction

First, let’s discuss the materials and construction of both mattresses. The Purple mattress uses a patented Hyper-Elastic Polymer grid called Smart Comfort Grid as the top layer, combined with dual-layer polyurethane foam base layers beneath it. This technology aims to provide pressure relief, support, and temperature regulation.

The Nectar mattress consists of CertiPUR-US certified foams wrapped in a cooling Tencel cover. The mattress contains a gel memory foam layer that conforms to your body. It also has an Adaptive Hi-Core support foam layer that provides stability and prevents sagging over time.

Firmness

Firmness is crucial for determining comfort when choosing a mattress. The Purple mattress falls within the medium-firm range (6-7 out of 10) on the firmness scale, offering good support for all sleeping positions. The firmness level can be adjusted based on weight distribution due to its unique grid design.

The Nectar mattress offers medium-firm support (6-6.5 out of 10), making it suitable for various sleepers who prefer pressure relief coupled with adequate support.

Motion Transfer

Both mattresses perform well in terms of motion transfer. Purple’s Smart Comfort Grid isolates movement effectively, preventing any disturbance when sharing the bed with a partner or pets. Nectar’s gel memory foam reduces motion transfer by absorbing vibrations ensuring uninterrupted sleep.

Temperature Regulation

Temperature regulation is another essential factor when selecting a mattress. The Purple mattress gains an advantage with its open-grid design allowing for increased airflow and optimal temperature regulation. This feature ensures a cool, comfortable sleep environment throughout the night.

In contrast, the Nectar mattress performs reasonably well as its gel memory foam dissipates heat, but the adaptive support foam tends to retain heat more than Purple’s grid technology.

Price

Pricing might be a crucial factor in deciding between Purple and Nectar mattresses. The Nectar mattress offers a more affordable option without compromising on quality. Nectar also provides a 365-night trial period and a lifetime warranty, showcasing its commitment to customer satisfaction. The Purple mattress comes with a 100-night trial and a 10-year warranty. While slightly pricier than Nectar, Purple still offers reasonable value considering its unique designs and innovative technology.

Conclusion

The choice between the Purple and Nectar mattresses ultimately depends on personal preferences and specific sleep needs. If you prioritize pressure relief, advanced temperature regulation, and innovative design, then the Purple mattress might be your ideal pick. On the other hand, if you prefer affordability without sacrificing comfort, support, and durability, give the Nectar mattress a shot.

Remember that both companies offer sleep trials to experience their products risk-free before making a long-term commitment. So don’t hesitate to try either—or both—of these fantastic options and discover which one is the best fit for your perfect night’s sleep!

How to Make Bubble Letters in Microsoft Word

Introduction:

Bubble letters, also known as balloon letters, are a fun and creative way to add pizzazz to various documents, presentations or graphic designs. In this article, we will guide you through the steps to create bubble letters in Microsoft Word using various methods.

Method 1: Using WordArt

1. Open Microsoft Word and start a new document or open an existing one where you want to insert bubble letters.

2. Click on the “Insert” tab in the top menu.

3. Find the “WordArt” option and click on it.

4. Browse through the different WordArt styles to find one that looks like bubble letters.

5. Click on the style you prefer. A text box with sample text will be inserted into your document.

6. Edit the text within the text box by selecting it and typing your desired content.

7. Adjust the size, font, and color for your preference using the corresponding options on the ribbon menu.

Method 2: Exploring Different Fonts

1. Open Microsoft Word and start a new document or open an existing one where you want to insert bubble letters.

2. Click on the “Insert” tab in the top menu.

3. Select “Text Box” from the options and click on “Draw Text Box.” Click and drag to create a text box on your document.

4. Type your desired content within the text box.

5. Highlight your text and navigate to the “Home” tab at the top of your screen.

6. Browse through various fonts available within Microsoft Word, such as “Segoe Print,” “Chiller,” or “Verdana Ref.”

7. Try out different fonts until you are satisfied with one that closely resembles bubble letters.

Method 3: Using Online Resources and Importing Custom Fonts

1. Visit websites with free fonts such as DaFont.com, FontSpace.com, or other reputable font repositories.

2. Search for “bubble letters” or similar keywords to find fonts you like.

3. Download the font files in TTF (TrueType Font) or OTF (OpenType Font) format.

4. Install the new font on your computer by following the installation instructions provided on the website or by double-clicking the font file and pressing “Install.”

5. Restart Microsoft Word if it’s already open. The newly installed font should now be available in Word’s “Font” dropdown menu under the “Home” tab.

6. Use the same steps outlined in Method 2 to create a text box, type your content, and change the font to your newly downloaded bubble letter font.

Conclusion:

Creating bubble letters in Microsoft Word doesn’t require any advanced design skills, thanks to its built-in WordArt feature, a vast array of different fonts, and the ability to import custom fonts from online sources. By following these methods, you will be able to transform plain text into creative and eye-catching bubble letters for use in various projects.

How to Use Nintendo Switch with a Keyboard and Mouse

Introduction

The Nintendo Switch, since its release, has significantly impacted the gaming world with its innovative design, top-notch gaming titles, and flexible gaming options. For many gamers, the default controllers provide an excellent and enjoyable gaming experience. However, PC gamers might prefer a more familiar setup of using a keyboard and mouse. In this article, we will explore how you can use a keyboard and mouse with your Nintendo Switch for an enhanced gaming experience.

Step 1: Acquire a compatible keyboard and mouse

To connect a keyboard and mouse to your Nintendo Switch, you need to ensure that they are compatible. Most USB wired keyboards and mice can be used on the console. Wireless options require them to have either a USB dongle or Bluetooth support. It’s important to note that not all Bluetooth keyboards or mice work with the Nintendo Switch.

Step 2: Connect the peripherals

For wired USB keyboards and mice, simply plug them into two available USB ports on the docking station. If using wireless peripherals with a USB dongle, insert the dongle into one of the USB ports on the dock.

If using Bluetooth peripherals:

– Go to Settings > Controllers & Sensors on your Nintendo Switch.

– Scroll down to “Find & Connect Controllers” and click “Change Grip/Order.”

– Put your Bluetooth keyboard or mouse in pairing mode (consult the device’s manual if you’re unsure how).

– The Nintendo Switch should display your device as “Pro Controller” or similar.

– Click on it to pair.

Step 3: Customize controls for games

While some games may automatically recognize your keyboard and mouse setup, others may require you to remap controls manually in the game settings. Explore these settings in each game to optimize performance according to your preferences.

Step 4: Using a third-party adapter (optional)

For further customization and better compatibility with some games, you can use a third-party adapter like the GameSir VX AimSwitch.

These devices allow you to map buttons to specific keys or mouse movements, ensuring a seamless gaming experience.

To use the GameSir VX AimSwitch:

– Connect the USB dongle to your Nintendo Switch dock.

– Connect the keyboard and mouse to the adapter.

– Follow the manufacturer’s instructions for assigning buttons and sensitivity adjustments.

Conclusion

In summary, using a keyboard and mouse with your Nintendo Switch can take your gaming experience to new heights, making it even more enjoyable and comfortable for PC gamers. By following these steps, you can easily connect and customize your preferred peripherals to your console and tackle your favorite games with ease. Happy gaming!

Understanding BTUs: The Key to Choosing the Right Air Conditioner

We all want to be comfortable in our homes, especially during the hot summer days. However, choosing the right air conditioner for your space can be confusing with so many options available in the market. It is essential to understand the concept of BTUs (British Thermal Units) before buying an air conditioner, as it plays a crucial role in determining the capacity and efficiency of your cooling system.

What are BTUs?

In simple terms, a British Thermal Unit (BTU) is a measurement of energy. It signifies the amount of heat necessary to raise the temperature of one pound of water by one degree Fahrenheit. When it comes to air conditioners, BTUs are used to measure the cooling capacity of the unit – how much heat can be removed from the room per hour.

Why are BTUs important when buying an air conditioner?

Knowing your room’s square footage and considering factors like insulation quality, sun exposure, and number of occupants is crucial for selecting an appropriately-sized air conditioner. A correctly-sized unit will remove heat and humidity from your space at an optimal level without overworking or wasting energy.

Determining the right number of BTUs

A general guideline when determining what size air conditioner you need is to match the BTUs needed with your room’s square footage:

1. 100-150 square feet: 5,000-6,000 BTUs

2. 150-250 square feet: 7,000-8,000 BTUs

3. 250-300 square feet: 9,000-10,000 BTUs

4. 300-400 square feet: 10,000-12,000 BTUs

Keep in mind that these figures are generalizations and multiple factors might influence your space’s actual cooling requirements. Large windows with direct sunlight may require additional cooling capacity while well-insulated rooms may need less.
Other considerations

Apart from BTUs, other key features are also important for an efficient and effective air conditioning system:

1. Energy Efficiency Ratio (EER): This represents the ratio of the cooling capacity (in BTUs) to the power input (in watts). A higher EER indicates a more energy-efficient air conditioner.

2. Programmability: Some air conditioners are equipped with programmable thermostats, allowing you to customize cooling schedules to save energy and maintain a comfortable temperature.

3. Air quality: Look for air conditioners with built-in filters capable of capturing dust, allergens, and even bacteria to improve indoor air quality.

4. Noise level: A quieter air conditioner can make all the difference in your comfort level, especially in bedrooms or shared living spaces.
By understanding how BTUs affect cooling capacity and taking additional factors into consideration, you can confidently choose the right air conditioner for your home. Remember that proper installation and regular maintenance are essential for ensuring your air conditioning system will keep you comfortable for years to come.

Ways to Stream Video Games from a PC to Your TV

Introduction:

Gone are the days when gaming was limited to a dedicated console or a computer screen; with the advancements in technology, it is now possible to stream video games from your PC to your television. This allows you to enjoy gaming on a larger screen with better audio quality and even play multiplayer games comfortably with friends and family. In this article, we will explore different ways to stream video games from a PC to your TV.

1. HDMI Connection:

The most common and straightforward method of connecting your PC to your TV involves using an HDMI cable. All modern TVs come equipped with HDMI ports, making this process quite simple. To get started, follow these steps:

a. Turn off your PC and TV.

b. Connect the HDMI cable to the HDMI port of your PC.

c. Connect the other end of the HDMI cable to your TV.

d. Turn on your TV and set it to the appropriate HDMI input channel

e. Turn on your PC, and you should see the display mirrored on your TV screen.

2. Wireless Display Adapter:

Another option for streaming games from your PC to your TV is by using a Wireless Display Adapter that supports Miracast technology, such as Microsoft’s Wireless Display Adapter or Google’s Chromecast. Once you have the adapter plugged into the HDMI port of your TV, follow these steps:

a. Open the ‘Settings’ app on your PC.

b. Click on ‘System’, then select ‘Display’.

c. In the Multiple Displays section, click on ‘Connect To A Wireless Display’.

d. Choose your wireless display adapter from the list of available devices.

e. Wait for the connection to be established; then you can start streaming.

3. Game Streaming Devices:

For more serious gaming enthusiasts, investing in a game streaming device like NVIDIA Shield or Steam Link could be the perfect solution. These devices are specifically created to stream PC games to your TV, providing excellent performance and minimal latency issues. Setup instructions may vary for each device, so follow the manufacturer’s guidelines.

4. Third-Party Applications:

There are also several third-party applications like Parsec or Moonlight, which allow you to stream games from your PC to other devices, including your TV. Most of these applications require installing the app on both your PC and a secondary device like a smartphone, tablet, or smart TV.

Conclusion:

There are multiple ways to stream video games from a PC to your TV, including HDMI connection, wireless display adapters, game streaming devices, and third-party applications. Regardless of the method you choose, these methods offer a more immersive gaming experience on a bigger screen with enhanced audio quality and improved multiplayer capabilities. Happy gaming!