EdTech & Innovation

20 Helpful Brainstorming Activities

Introduction

Brainstorming is an essential skill for individuals and teams looking to generate innovative ideas and solutions. It is a process where individuals come together to share and discuss ideas openly, sparking new connections and building on each other’s perspectives. To help you unleash your creativity and stimulate fresh thinking, here are 20 helpful brainstorming activities.

1. Mind Mapping – This visual technique encourages the free flow of ideas by organizing words, images, and phrases around a central concept or topic.

2. Brainwriting – Individuals write down ideas on cards or sticky notes anonymously and then share them with the group for discussion.

3. SCAMPER – This acronym stands for Substitute, Combine, Adapt, Modify, Put to Another Use, Eliminate, and Reverse. Use this method to challenge assumptions and come up with unique ways to improve a product or service.

4. Picture Association – Individuals draw or select pictures related to the topic at hand and let their imagination go wild in determining potential connections between the images.

5. Forced Connections – Select two unrelated items or topics and try to create a link between them with an innovative new idea.

6. Starbursting – Generate open-ended “what if” questions around the central topic to expand thinking possibilities further.

7. Rapid Ideation – Set a short time limit (from 60 seconds to 5 minutes) for your team to generate as many ideas as possible about a given subject.

8. Round-Robin Brainstorming – Group members take turns sharing their ideas verbally until every person has contributed at least once.

9. The Six Thinking Hats – Developed by Edward de Bono, this technique encourages you to view a problem from six different perspectives (facts, emotions, creativity, benefits, negatives, and control).

10. Rolestorming – Each team member adopts a persona or role during brainstorming (e.g., a customer, CEO, competitor, or historical figure) to encourage different viewpoints.

11. Morphological Matrix – Create a grid with categorized attributes or features and select one at random to focus on during brainstorming.

12. Idea Capsules – Divide your team into smaller groups and give each group 3-4 unrelated objects or ideas to generate potential concepts.

13. Triggered Brainwalking – Group participants walk around a room with multiple sheets of paper or sticky notes, adding their thoughts or building upon others’ ideas as they go along.

14. Speed Networking – Have individuals pair up for a brief discussion (like speed dating), then switch partners to maximize the exchange of ideas.

15. Worst Possible Idea – Encourage participants to brainstorm the worst possible solutions to trigger humorous discussions that lead to better ideas.

16. Challenge Assumptions – Analyze common assumptions around the problem and devise alternative approaches that break existing paradigms.

17. The Random Word Technique – Select a random word from a dictionary and use it as inspiration for generating new ideas related to the main topic.

18. Cross-Pollination – Combine different departments or areas of expertise within your organization for a comprehensive brainstorming session to come up with unique solutions.

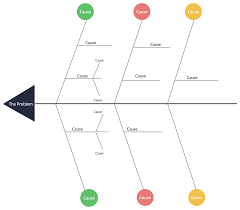
19. Fishbone Diagram – Also known as Ishikawa Diagram, this technique identifies root causes of problems to guide discussions more effectively.

20. The Five Whys – Encourage deep thinking by asking “why” multiple times to get to the root cause of a problem and find creative solutions.

Conclusion

Using these brainstorming activities can inspire creativity, enhance teamwork dynamics, and elevate innovative thinking within your organization or personal life. Implement these techniques in your next brainstorming session and watch your ideas flourish!

19 Wonderful Water Safety Activities for Little Learners

Introduction:

Water safety is an essential life skill for children. Encouraging kids to learn about water safety can be a fun and engaging activity that leaves them with lifelong knowledge on how to stay safe in and around water. Here are 19 wonderful water safety activities designed for little learners:

1. DIY Life Jackets:

Teach your little ones the importance of wearing life jackets by letting them create their own using recyclable materials like empty plastic bottles.

2. Water Safety Scavenger Hunt:

Hide items related to water safety, such as life jackets, pool noodles, and whistles, around your outdoor space for kids to find.

3. Safe Swim Races:

Organize races where children have to demonstrate safe swimming techniques like the back float or treading water.

4. Ring Toss Rescue:

In this game, kids will toss a ring, pool noodle, or any flotation device onto a designated spot in the water to mimic a water rescue.

5. Stoplight Game:

This idea involves teaching children the meaning of different colored flags often seen near beaches: red means “stop,” yellow means “proceed with caution,” and green means “go.”

6. Floating versus Sinking Objects:

Children can explore buoyancy by collecting various objects from around the house and testing whether they float or sink in a bucket of water.

7. DIY Pool Noodle Boats:

With an adult’s help, kids can make their own pool noodle boats and learn about flotation.

8. Role-Playing Lifeguards:

Encourage children to take turns being lifeguards while their friends pretend to play safely in the “water” (a blue blanket can represent the ocean or pool).

9. Beach Ball Safety Balance:

Have children balance a beach ball on various parts of their bodies while discussing how it feelswhen they’re in the water.

10. Water Safety Charades:

Play charades with water safety-themed prompts like lifeguard, life jacket, or safe diving.

11. Reach or Throw, Don’t Go:

Teach children the importance of reaching out with a pole or flotation device to help people indistress rather than entering the water themselves.

12. Music Freeze:

When the music stops during this fun game, kids have to practice one of many water safetytechniques they’ve learned.

13. Pool Rules Poster:

Let your little learners create a poster illustrating various pool rules and safety tips they’velearned.

14. Buddy System Activity:

Pair up children to teach them about always having a buddy while swimming.

15. CPR for Kids:

Introduce basic CPR concepts using age-appropriate methods and materials like a CPR doll oronline video tutorials.

16. Water Watcher Tags:

Create and decorate cardboard tags that serve as reminders for adults to actively supervise kidsaround water.

17. Treasure Hunt:

Organize a treasure hunt where kids have to safely navigate through a “water-filled” space usingtheir new skills.

18. Sink or Swim Storytime:

Share stories that emphasize water safety lessons or encourage discussion on the topic.

19. Craft Time: Safety Whistles:

Let children make and decorate their own safety whistles to use during water activities.

Wrap-up:

Incorporating these engaging water safety activities into your little learners’ playtime can be anenjoyable way to teach them significant life skills. The more knowledgeable and prepared theyare, the safer they will be when encountering any water-based activity for years to come.

6 Best Smartboards for Classroom to Improve Learning Experience

Introduction:

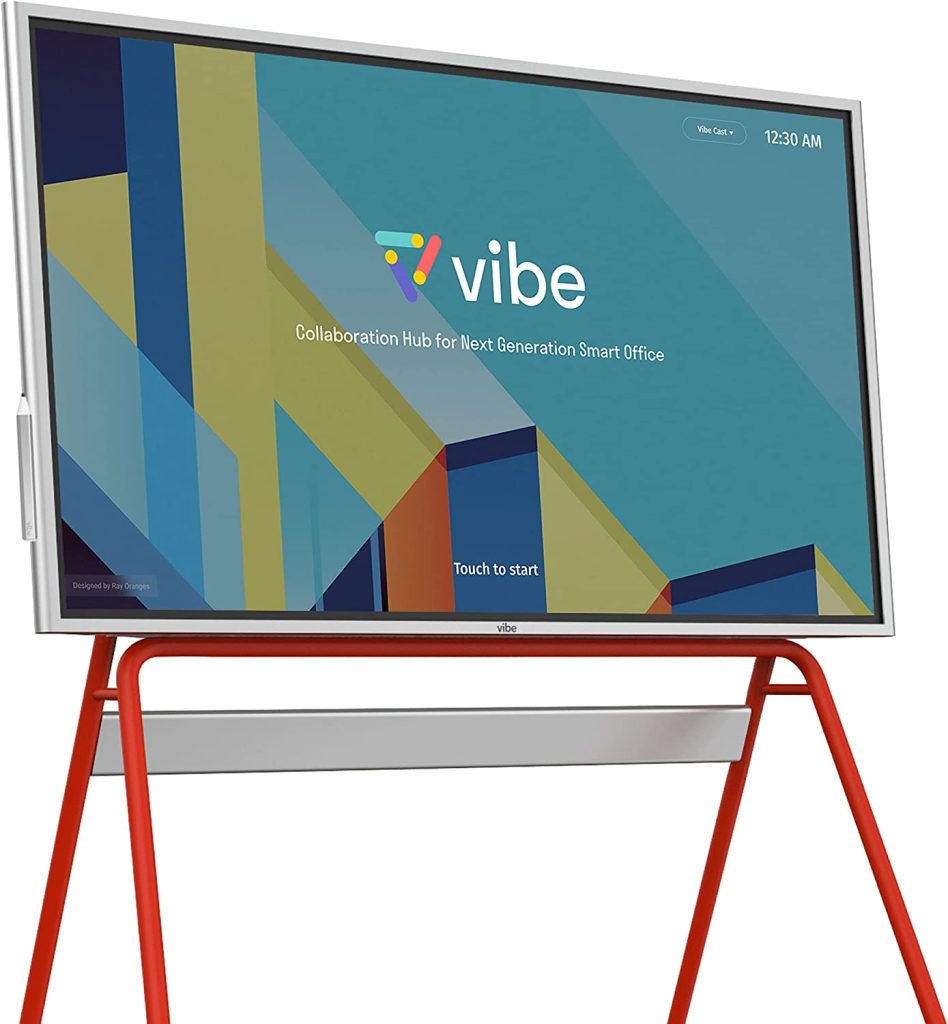
The integration of technology in education has transformed the learning landscape, leading to more interactive and engaging classroom experiences. One such innovation is the smartboard, which is becoming a staple in modern classrooms. In this article, we will explore six of the best smartboards for enhancing the learning experience in your classroom.

1. SMART Board 6000 Series

The SMART Board 6000 Series provides an intuitive touch experience with its multi-touch capabilities, making it easy for students and teachers to collaborate. This interactive whiteboard runs on the SMART Learning Suite software, which offers various educational tools and resources to support engaging lessons. Its smooth pen-on-paper writing experience, object recognition technology, and easy screen sharing options make it a top choice for many schools.

2. Promethean ActivPanel Titanium

The ActivPanel Titanium by Promethean is an exceptional interactive display that combines advanced technology with powerful teaching tools. With its 4K Ultra HD resolution, precise touch recognition, and digital pen support, this smartboard is perfect for creating captivating multimedia presentations. The ActivPanel Titanium runs on the Promethean ActivConnect platform, making it simple to connect with various devices and access educational apps.

3. ViewSonic IFP50-3 Interactive Display

The ViewSonic IFP50-3 series is an all-in-one interactive display that offers impressive performance for modern classrooms. Equipped with 4K Ultra HD resolution, multi-touch support, and smooth palm recognition for writing, this smartboard provides a premium interactive experience for students and educators alike. With its convenient wireless presentation and content sharing options, the ViewSonic IFP50-3 helps facilitate collaboration among students.

4. Newline Interactive TRUTOUCH X Series

Designed for collaboration-focused learning environments, the Newline Interactive TRUTOUCH X Series smartboards provide exceptional interactivity through infrared touch technology. These boards feature 4K UHD resolutions, multiple HDMI ports for easy connectivity, and built-in Android systems to access educational resources seamlessly. The TRUTOUCH X Series also supports cloud-based storage solutions, ensuring convenient file management for teachers.

5. Clear Touch Interactive 6000K+

The Clear Touch Interactive 6000K+ smartboard offers a versatile touch experience with its 20 points of touch, allowing multiple students to collaborate on the board simultaneously. This interactive display features Ultra HD resolution for crisp visuals, responsive touch capabilities, and an intuitive interface that simplifies navigation. The 6000K+ also integrates with various educational software, making it a comprehensive solution for classrooms.

6. BenQ RM7502K Interactive Flat Panel

The BenQ RM7502K Interactive Flat Panel is designed to enhance collaborative learning in the classroom with its advanced touch technology and powerful teaching tools. This smartboard boasts a 4K UHD resolution, duo pens for multi-user annotation, and an EZWrite digital whiteboard platform that supports handwriting recognition. Additionally, the RM7502K offers various connectivity options and cloud integration for easy content sharing.

Conclusion:

Selecting the right smartboard is crucial to improving the learning experience in your classroom. The SMART Board 6000 Series, Promethean ActivPanel Titanium, ViewSonic IFP50-3 Interactive Display, Newline Interactive TRUTOUCH X Series, Clear Touch Interactive 6000K+, and BenQ RM7502K Interactive Flat Panel each offer unique features and capabilities that can cater to different teaching styles and classroom needs. By choosing a smartboard tailored to your requirements, you can create more interactive and engaging lessons that foster collaboration and enhance learning outcomes.

8 Best Tablets for Teachers

In today’s fast-paced digital era, tablets have become an essential tool for teachers both in and out of the classroom. With a plethora of options on the market, finding the ideal tablet for a teacher’s needs might be overwhelming. To help with this quest, we’ve listed the 8 best tablets for educators to consider.

1. Apple iPad Air (4th Generation)

The Apple iPad Air is a versatile tablet with a sleek, lightweight design and a powerful performance. The A14 Bionic chip ensures smooth multitasking for teachers who need to juggle multiple apps at once. The crystal-clear 10.9-inch Retina display makes it perfect for presentations and media consumption, while the compatibility with Apple Pencil allows for easy note-taking and sketching.

2. Samsung Galaxy Tab S7

The Samsung Galaxy Tab S7 boasts a stunning 11-inch high-resolution display and comes with an S Pen for effortless writing, drawing, and editing. Its powerful Snapdragon processor offers impressive multitasking capabilities, making it an excellent choice for busy teachers. Additionally, you can enhance your productivity by connecting it to a keyboard cover.

3. Microsoft Surface Go 2

For teachers who rely heavily on Microsoft Office Suite or prefer Windows OS, Microsoft Surface Go 2 is an excellent option. It’s compact and portable but doesn’t compromise on performance thanks to the Intel Pentium Gold processor. The optional Surface Pen and Type Cover transform it into a full-fledged mini laptop for maximum productivity.

4. Lenovo Tab M10 Plus

The Lenovo Tab M10 Plus is an affordable option that doesn’t skimp on quality. Its bright 10.3-inch screen is easy on the eyes without sacrificing detail, while the MediaTek Helio P22T processor ensures reliable performance even with heavy usage. Its slim design coupled with great battery life makes this tablet highly portable.

5. Amazon Fire HD 10

For teachers on a tight budget, the Amazon Fire HD 10 is a smart choice. It features a 10.1-inch Full HD display and a solid battery life of up to 12 hours. While it doesn’t have access to Google Play Store, the Amazon App Store provides access to essential apps such as Microsoft Office, Zoom, and various educational resources.

6. Asus ZenPad 3S 10

The Asus ZenPad 3S 10 impresses with its sleek aluminum design and stunning visuals on its 9.7-inch QXGA display. The powerful MediaTek processor and ample storage for apps and documents make it a reliable choice for teachers who need efficient performance without breaking the bank.

7. Google Pixel Slate

The Google Pixel Slate is a thin and light tablet running Chrome OS that supports Google Play Store. This means that teachers can access Android apps while benefiting from a laptop-like experience with an optional attachable keyboard. The high-resolution screen offers vibrant colors and great readability, while the Intel Core i5 CPU ensures responsive performance.

8. Acer Chromebook Tab 10

Finally, the Acer Chromebook Tab 10 is perfect for educators who prefer using Chromebooks in class. It runs Chrome OS and supports Google Play Store, allowing seamless integration with Google’s suite of education tools. Its compact design and stylus support make it easy to use on-the-go, while the Rockchip processor provides sufficient power for everyday tasks.

In conclusion, these tablets offer versatility and performance to meet the diverse needs of modern teachers. Whether you prioritize portability, screen quality, or budget-friendly options, there is a tablet on this list that will help you elevate your teaching experience and manage your workload effectively.

Unleash Creativity in Your Classroom With This Wacom Giveaway!

Are you looking to spark creativity in your classroom and provide your students with a more engaging and interactive learning experience? Look no further! We are proud to announce a fantastic Wacom giveaway that will transform the way you teach and help you nurture the artistic talents of your students.

Wacom, a leading maker of digital pen tablets and displays, has teamed up with us to give educators the opportunity to win cutting-edge Wacom technology that can revolutionize their classroom environment. From fostering enhanced collaboration to allowing students to express themselves artistically, this giveaway promises to unleash unparalleled creativity within your students.

The Prize:

The lucky winner of this Wacom giveaway will receive three Wacom One pen displays, perfect for use in the classroom. The Wacom One is a 13.3″ pen display that allows you to draw, annotate, or write directly on the screen using the included stylus. With its natural pen-on-paper feel and accurate pressure sensitivity, the Wacom One creates an intuitive learning experience for both teachers and students.

How to Enter:

Entering the giveaway is easy! Just follow these simple steps:

1. Create a short video (1-2 minutes) showcasing how you plan to use the Wacom displays in your classroom.

2. Post your video on social media using the hashtag #WacomClassroomGiveaway along with a link to our website.

3. Fill out our online entry form (found on our website) including details about your school, subject taught, grade level(s), and a brief description of how you would utilize Wacom technology in your classroom.

The deadline for entries is MM/DD/YYYY. Please ensure that you submit your entry before this date so you don’t miss out on this exciting opportunity!

Boost Your Creative Teaching Methods:

Incorporating Wacom technology into your classroom not only fosters creativity but also offers numerous educational benefits:

1. Encourages active participation from students.

2. Improves spatial reasoning skills by working in a digital environment.

3. Enhances collaboration by allowing students to share their work quickly and easily.

4. Facilitates effective communication of ideas through visual representation.

Don’t miss out on this incredible chance to revolutionize your teaching style and inspire your students to think outside the box! Enter the Wacom giveaway today and get ready to unleash creativity like never before in your classroom.

Good luck, and we can’t wait to see how you plan to change the game with Wacom technology!

[Please note that this is a fictional giveaway and should not be taken as an actual contest or promotion.]

35 Place Value Games To Play In Your Classroom

Introduction:

Place value is a fundamental concept in the world of mathematics, one that is essential for students to grasp early on in their education. To make learning this vital skill both engaging and fun, here are 35 place value games that you can easily incorporate into your classroom.

1. Place Value Bingo

2. Place Value Battleship

3. Place Value Puzzle

4. Roll, Build, and Compare

5. Tens and Ones War

6. Scoop and Stack

7. Number Line Leap Frog

8. Decimal Dash

9. Strategy Swap Challenge

10. Popsicle Stick Match Up

11. Expanded Form Yahtzee

12. Flip Flop Card Game

13. Place Value Go Fish

14. Trading Tens

15. Digital Digits Race

16. Place Value Concentration

17. Number Detective Activity

18. Dice Duel – Greater or Smaller?

19 . Mini White Board Challenge

20 . Human Number Line

21 . Darts Splash Math

22 . Decimal Jenga

23 . Clothespin Clip Arrays

24 . Connect Four: Place Value Edition

25 . Shark Tank: Number Up!

26 . Round-O-Bot: Round ‘Em Up!

27 . Multi-Digit Multiplication Mega Mania

28 . Candy Counters Chaos!

29 . Snowball Fight: Even or Odd?

30 . Domino Doubles

31 . Tower of Hanoi Math Edition

32 . Strike It Rich: Base Ten Bowling

33 . Painting by Numbers: Colorful Place Values

34 . Crazy Catastrophe Challenge

35 . Bean Bag Number Bounce

Conclusion:

Learning place value can be an exciting experience for your students with these 35 interactive and enjoyable games. In addition to encouraging cooperation and friendly competition among classmates, these games allow you to provide a hands-on approach to teaching place value and reinforcing essential math skills. Explore these creative games and watch your students develop a solid understanding of place value in no time!

How To Do a Zoom Call with Your Partner Classroom

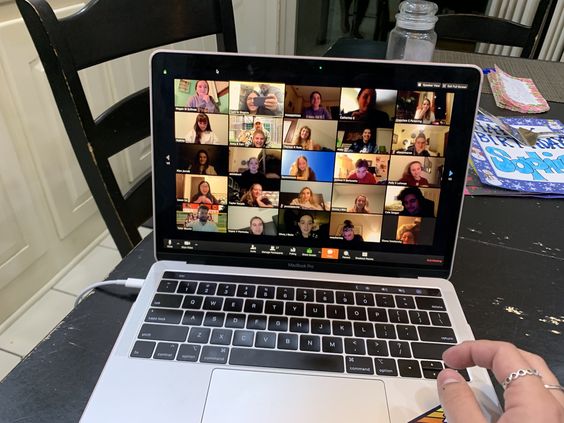
In today’s interconnected world, learning doesn’t have to be restricted to the four walls of a classroom. With the advancement of technology, teachers can now organize virtual sessions and collaborate with partner classrooms from anywhere in the world. One such platform that has made this possible is Zoom. In this article, we will explore how you can set up a successful Zoom call with your partner classroom.

1. Plan and Coordinate

Before setting up a Zoom call, communicate with the partner teacher to discuss mutual goals, agree upon a date and time for the session, and plan activities or discussions that suit both parties’ interests. Make sure you take into account the time difference if your partner classroom is located in a different time zone.

2. Prepare Your Students

Inform your students about the upcoming Zoom session and set expectations for behavior and engagement during the call. Provide some background information on the partner classroom and use this opportunity to foster cultural understanding among your students.

3. Technical Setup

Ensure a stable internet connection in your classroom, and test your audio and video equipment before the scheduled call. Familiarize yourself with Zoom’s basic features like screen sharing, raising hands, breakout rooms, and chat functionality.

4. Send an Invitation

Create a new Zoom meeting, making sure you have an active paid subscription to accommodate more participants for an extended duration. Send an invitation link to the partner teacher along with clear instructions on joining the meeting.

5. Ice-Breaker Activities

Start your Zoom call by introducing yourself, your students, and their background or culture. Encourage interactions between both classrooms through ice-breaker activities like asking questions about each other’s schools or sharing hobbies.

6. Engage in Collaborative Learning

Engage both sets of students in collaborative learning by conducting interactive quizzes or polls, discussing global issues or organizing cross-cultural presentations. This will help build empathy and understanding among students and promote global citizenship.

7. Breakout Rooms for Smaller Discussions

Divide students into smaller groups using Zoom’s “Breakout Rooms” feature, allowing them to work collaboratively on mini-projects or discuss assigned learning topics. This encourages peer-to-peer learning and creates more intimate conversations.

8. Debrief and Reflect

After the Zoom session, lead a debrief session encouraging your students to share their thoughts and experiences. Reflect on the benefits of the virtual exchange, potential improvements, and how this collaboration impacted your students’ perspective on the world.

9. Maintain Communication

Build rapport with your partner teacher and plan for future collaborations, such as follow-up Zoom calls, sharing teaching resources, or engaging in joint community service projects.

By following these steps, you can seamlessly organize a Zoom call with your partner classroom that fosters cross-cultural understanding, collaborative learning, and memorable experiences for your students. Happy Zooming!

What is Storyboard That and How Does It Work: Best Tips and Tricks

Introduction

Storyboard That is an innovative online platform that allows users to create visual storyboards for a wide range of purposes. This user-friendly tool enables storytelling in a visually engaging format, making it perfect for academic projects, business presentations, marketing strategies, and more. This article will introduce you to the world of Storyboard That and offer some valuable tips and tricks to make the most out of this creative platform.

Getting Started with Storyboard That

1. Create an account: To begin using Storyboard That, you’ll need a user account. Head over to https://www.storyboardthat.com and sign up for a free trial account or choose a paid subscription plan that suits your needs.

2. Familiarize yourself with the interface: Once you’re logged in, take some time to explore the workspace. You will find various options like selecting scene backgrounds, adding characters, objects, text, and more.

Best Tips and Tricks for Effective Storyboarding

1. Plan your content: Before jumping into designing your storyboard, draft an outline of the story or presentation you want to create. Make sure you have a clear idea of your storyboard’s purpose and overall structure.

2. Use appropriate backgrounds: Choose backgrounds that set the tone for each scene based on your content. Storyboard That offers a variety of options like classrooms, offices, landscapes, cities, and more.

3. Customize characters: Change your characters’ pose, expression, orientation, outfit or size to accurately represent emotions or actions relevant to your story’s context.

4. Size matters: Make important elements larger and less significant elements smaller. This visual hierarchy helps viewers understand the focus of each frame in your storyboard.

5. Utilize arrows or connectors: Use arrows or connectors between scenes when showing a change in time or location within the story.

6. Show rather than tell: Whenever possible, use visual elements to convey ideas or actions instead of relying solely on text.

7. Employ the rule of thirds: Divide your scene into a 3×3 grid to create a visually balanced layout. Place your key elements along the intersection points for maximum impact.

8. Use text sparingly: Only include text when necessary, and be concise.

9. Revise and refine: Don’t be afraid to make changes as you go. Review your storyboard after each addition and make adjustments for clarity, flow, or visual consistency.

10. Share and collaborate: Use the collaboration feature to obtain feedback from colleagues, classmates, or friends. They can provide valuable insights and suggestions that will help enhance your storyboard’s effectiveness.

Conclusion

Storyboard That is a powerful and accessible tool that enables users to create visually compelling representations of their ideas. By following these tips and tricks, you can maximize the platform’s potential and create storyboards that are both engaging and effective. Whether you’re using it for educational, business, or personal purposes, Storyboard That is a fantastic resource for bringing your stories to life.

Win Video Project Kits for Every Student in Your Class

In today’s technologically advanced world, it’s becoming more important than ever to integrate technology into education. A great way to achieve this is through video projects. They allow students to learn valuable skills, such as storytelling, collaboration, and video editing, all while having fun. Win Video Project Kits for every student in your class is a fantastic initiative that gives educators the resources they need to bring video creation into their classroom.

How Video Projects Benefit Students

Video projects offer a wealth of educational benefits for students:

1. Creativity Development: Students’ creativity can flourish when they’re given the freedom to express themselves through visual storytelling.

2. Collaboration: Working together on a video project lets students improve their communication and teamwork skills.

3. Technical Competence: Learning how to navigate and use various software applications effectively is an essential skill in today’s workforce.

4. Confidence Building: Successfully completing a video project and showcasing it to their peers can boost a student’s self-esteem.

What’s Included in a Win Video Project Kit?

A Win Video Project Kit provides all the necessary tools and resources that students need to create engaging, high-quality video content:

1. Camera Equipment: The kits include a digital camera fit for shooting high-resolution video footage.

2. Tripods: Tripods are essential for stabilizing cameras during shoots, ensuring steady and professional-looking footage.

3. Microphones: High-quality audio is vital in any production; therefore, each kit comes with a microphone designed for clear sound recording.

4. Lighting Equipment: Proper lighting enhances the overall quality of video content; the kits provide students with portable LED lights to ensure well-lit scenes.

5. Editing Software: To finalize and polish their projects, students will receive access to user-friendly video editing software.

6. Instructional Guides: Comprehensive guides are provided to help educators incorporate these kits into their lesson plans effectively.

How to Win Video Project Kits for Your Classroom

To be in the running for the Win Video Project Kits, there are several steps that educators must follow:

1. Proposal Submission: Educators interested in obtaining the kits should submit a proposal outlining their goals and how they plan to use video projects to engage and inspire students in their classroom.

2. Support and Networking: Share your initiative on social media, garner support from fellow educators, parents, and local businesses who can contribute to or sponsor the project.

3. Engage in Competitions: Keep an eye out for relevant contests, grants, or awards aimed at supporting innovative education initiatives – these can be excellent opportunities to win the kits for your classroom.

Conclusion

Winning video project kits for every student in your class is an excellent opportunity to help them build essential skills while equipping the classroom with modern technology. By integrating these resources into lesson plans, educators will nurture students’ creativity, improve collaboration skills, and ultimately prepare them for success beyond the classroom.

Win the Ultimate Camera Prize Pack for Your School Yearbook!

Are you looking to elevate your school’s yearbook quality to new heights? The Ultimate Camera Prize Pack could be the game-changer your yearbook committee needs. With state-of-the-art photography equipment and accessories, capturing those memorable moments of your school year has never been easier or more professional. Now is the perfect time for your school to enter this incredible competition and revolutionize your yearbook’s visual storytelling.

Entering the Competition

Joining the contest is quite simple. To participate, all you need to do is submit an original themed photo representing your school, along with a brief description stating why your school deserves to win the Ultimate Camera Prize Pack. Encourage your fellow students, faculty, and staff members to put their creative minds together and conceptualize a unique entry for your school.

What’s Included in the Prize Pack?

The Ultimate Camera Prize Pack contains everything you need to enhance the quality of your yearbook’s photography. The winning school will receive:

1. A high-quality DSLR camera: Capture stunning images with exceptional clarity and detail thanks to this professional-grade camera.

2. Premium lenses: Enhance your photographic potential with a versatile set of top-of-the-line lenses.

3. Advanced lighting kit: Illuminate your subjects using sophisticated lighting equipment designed for professional photography.

4. Sturdy tripod: Preserve the stability of your shots and avoid motion blur with a robust, reliable tripod.

5. Padded camera bag: Keep your valuable gear safe and organized with a spacious, well-cushioned camera bag.

6. Exclusive editing software: Refine and retouch your images like a pro by using cutting-edge photo editing software.

7. Photography workshop access: Learn from industry experts through comprehensive workshops designed to hone the skills of aspiring photographers.

Captivating images bring life to every page of a yearbook, preserving cherished memories for years to come. By participating in this competition, your school has the opportunity to upgrade its photography equipment and, in turn, inspire your yearbook committee to create a more visually stunning and memorable keepsake.

In Conclusion

Seize this opportunity to provide your school with an unbeatable edge in producing a remarkable yearbook. Encourage your yearbook team to explore their creativity and showcase their school spirit. Enter the contest for the Ultimate Camera Prize Pack and give your school a chance to win big! There has never been a better time to elevate your school’s photography game and create an extraordinary yearbook for students and faculty alike.